
Vibe FWD L4-2.4L (2009)
2. Ensure the caliper slide pins (3, 13) are lubricated with lithium soap base glycol grease or Silicone Brake Lubricant, or equivalent. Refer to
Adhesives, Fluids, Lubricants, and Sealers (See: Disc Brake System/Specifications/Fluid Type Specifications). If necessary, refer to Front Brake
Caliper Hardware Replacement (2.4L Engine) (See: Front Brake Caliper Hardware Replacement)Front Brake Caliper Hardware Replacement
(1.8L Engine) (See: Front Brake Caliper Hardware Replacement).
3. Install the caliper (2) to the caliper bracket (5).
Caution: Refer to Fastener Caution (See: Service Precautions/Vehicle Damage Warnings/Fastener Caution).
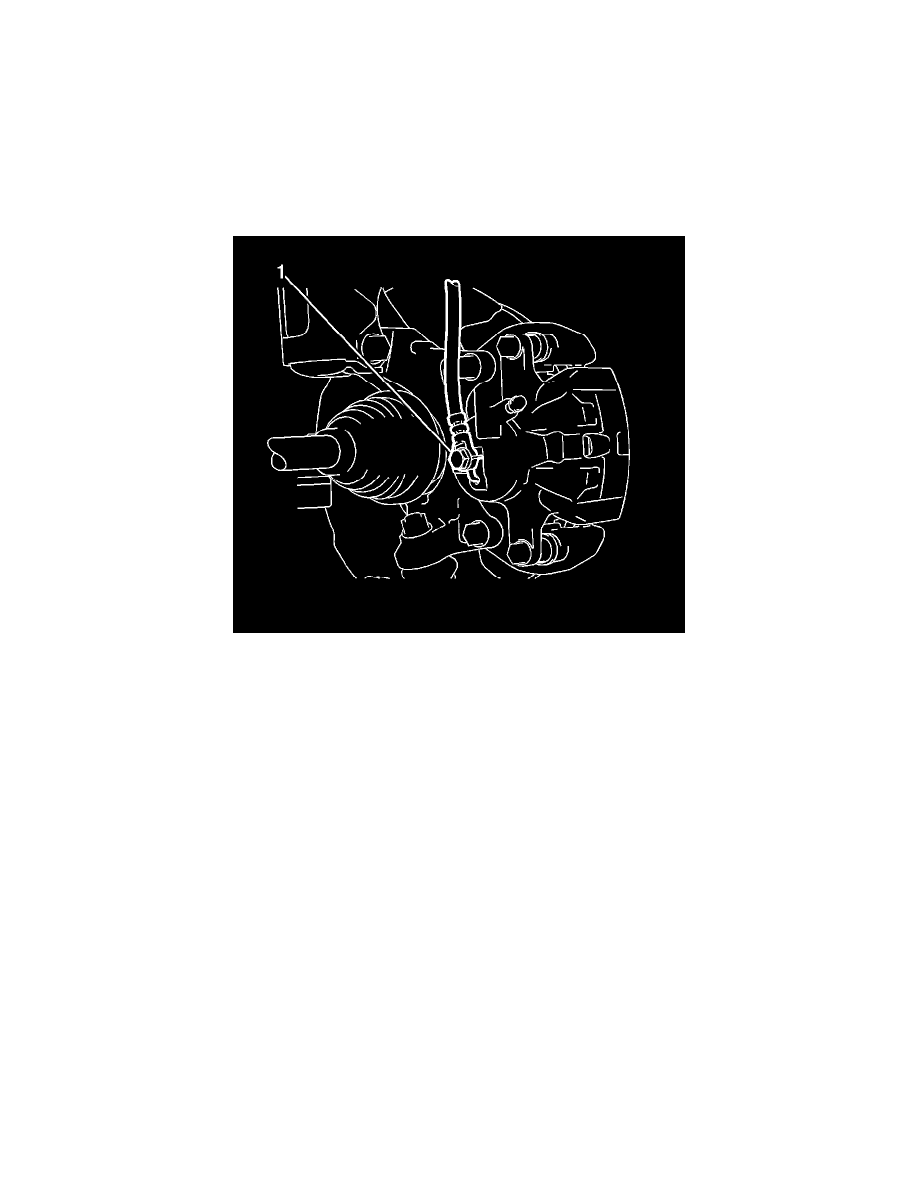
4. Use a wrench in order to hold the caliper slide pins. Install the caliper bolts (1, 14) and tighten to 34 Nm (25 lb ft).
5. Install a NEW washer to the flexible hose lock hole in the caliper.
6. Install the brake hose to the caliper. Install the hose lock securely into the lock hole in the caliper.
7. Install the brake hose fitting (1) and tighten to 29 Nm (21 lb ft).
8. Install the tire and wheel assembly. Refer to Tire and Wheel Removal and Installation (See: Maintenance/Wheels and Tires/Service and Repair).
9. Lower the vehicle.
Warning
Do not move the vehicle until a firm brake pedal is obtained. Failure to obtain a firm pedal before moving vehicle may result in personal injury.
10. With the engine OFF, gradually apply and release the brake pedal several times in order to position the caliper pistons and the brake pads.
11. Fill the master cylinder reservoir. Refer to Master Cylinder Reservoir Filling (See: Brake Master Cylinder/Service and Repair/Procedures/Master
Cylinder Reservoir Filling).
12. Bleed the brake system. Refer to Hydraulic Brake System Bleeding (See: Brake Bleeding/Service and Repair).
Rear Brake Caliper Replacement
Rear Brake Caliper Replacement (Except All Wheel Drive and GT)
Removal Procedure
1. Loosen the park brake system. Refer to Parking Brake Adjustment (All Wheel Drive and GT) (See: Parking Brake System/Adjustments)Parking
Brake Adjustment (Except All Wheel Drive and GT) (See: Parking Brake System/Adjustments).
Warning: Refer to Brake Dust Warning (See: Service Precautions/Technician Safety Information/Brake Dust Warning).
Warning: Refer to Brake Fluid Irritant Warning (See: Service Precautions/Technician Safety Information/Brake Fluid Irritant Warning).
Caution: Refer to Brake Fluid Effects on Paint and Electrical Components Caution (See: Service Precautions/Vehicle Damage Warnings).
2. Use a siphon in order to remove half of the brake fluid from the reservoir.
3. Raise and support the vehicle. Refer to Lifting and Jacking the Vehicle (See: Maintenance/Vehicle Lifting/Service and Repair).
4. Remove the rear tire and wheel assembly. Refer to Tire and Wheel Removal and Installation (See: Maintenance/Wheels and Tires/Service and