
Vibe FWD L4-2.4L (2009)
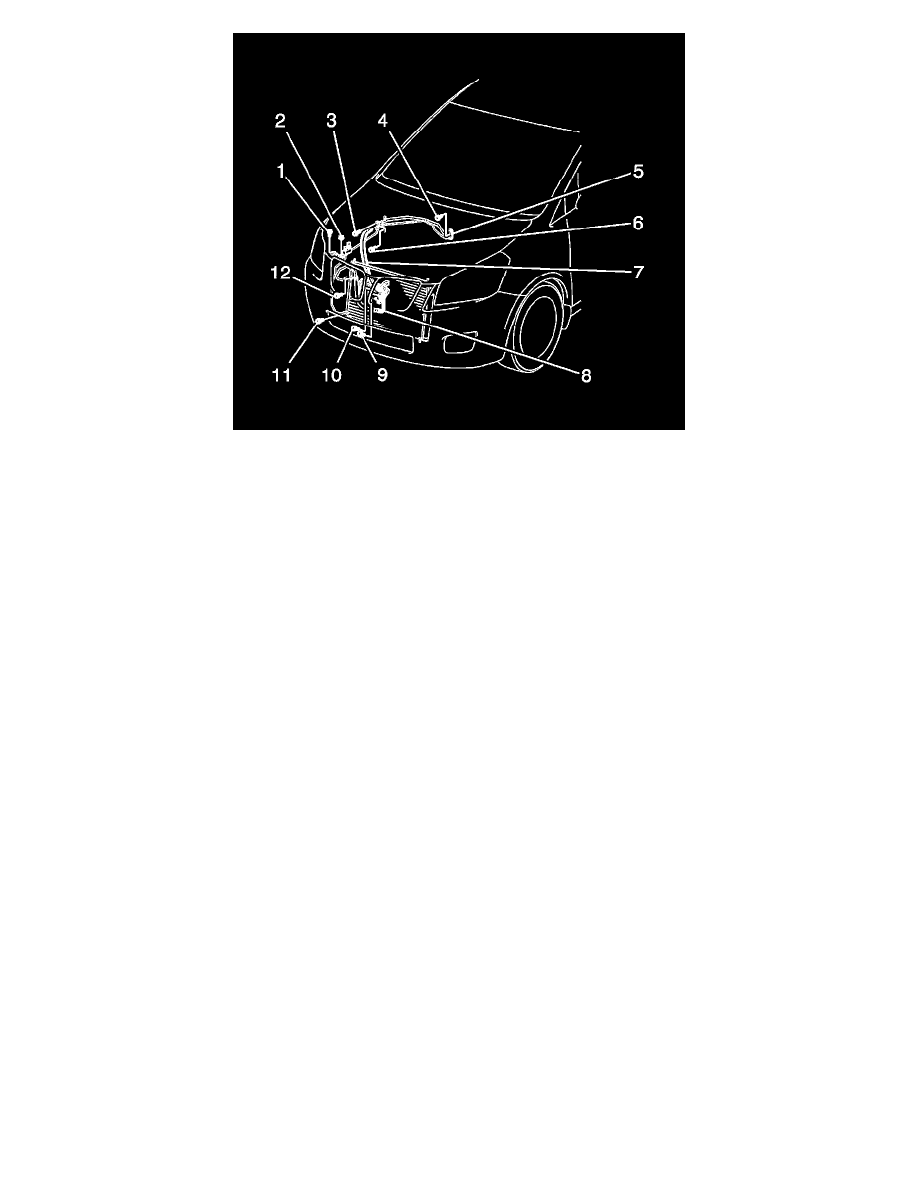
2. Position the evaporator tube assembly (5) into the vehicle.
3. Install the evaporator tube assembly (5) to the A/C condenser.
Caution: Refer to Fastener Caution (See: Service Precautions/Vehicle Damage Warnings/Fastener Caution).
4. Install the bolt (11) to the A/C condenser.
Tighten the bolt (11) to 5.4 Nm (48 lb in).
5. Install the right side radiator air side deflector.
6. Install the front engine splash shield (if equipped).
7. Lower the vehicle. Refer to Lifting and Jacking the Vehicle (See: Maintenance/Vehicle Lifting/Service and Repair).
8. Install the bolt (1) to the evaporator tube bracket.
Tighten the bolt (1) to 9.8 Nm (87 lb in).
9. Install the nut (2) to the evaporator tube bracket.
Tighten the nut (2) to 9.8 Nm (87 lb in).
10. Install the bolt (6) to the evaporator tube bracket.
Tighten the bolt (1) to 9.8 Nm (87 lb in).
11. Reposition the coolant overflow hose.
12. Install the bolt (3) and the suction hose (7) to the evaporator tube (5).
Tighten the bolt (3) to 9.8 Nm (87 lb in).
13. Install the bolt (4) and the evaporator tube (5) to the evaporator.
Tighten the bolt (4) to 9.8 Nm (87 lb in).
14. Install the engine cover. Refer to Engine Cover Replacement (See: Engine, Cooling and Exhaust/Engine/Service and Repair/Removal and
Replacement/Engine Cover Replacement).
15. Install the strut housing upper tie bar. Refer to Strut Housing Upper Tie Bar Replacement (See: Steering and Suspension/Suspension/Suspension
Strut / Shock Absorber/Service and Repair/Strut Housing Upper Tie Bar Replacement).
16. Evacuate and recharge the refrigerant system. Refer to Refrigerant Recovery and Recharging (See: Service and Repair/Refrigerant Recovery and
Recharging).
17. Operate the A/C system and test for refrigerant leaks. Refer to Leak Testing (See: Testing and Inspection/Component Tests and General
Diagnostics/Leak Testing).