
Vibe FWD L4-2.4L (2009)
Hose/Line HVAC: Service and Repair
Air Conditioning Evaporator Hose Assembly Replacement
Air Conditioning Evaporator Hose Assembly Replacement
Removal Procedure
Note: When installing a new hose assembly add 40 ml (1.4 fl oz) of refrigerant oil to the refrigeration system.
1. Discharge and recover the refrigerant. Refer to Refrigerant Recovery and Recharging (See: Heating and Air Conditioning/Service and
Repair/Refrigerant Recovery and Recharging).
2. Remove the strut housing upper tie bar. Refer to Strut Housing Upper Tie Bar Replacement (See: Steering and
Suspension/Suspension/Suspension Strut / Shock Absorber/Service and Repair/Strut Housing Upper Tie Bar Replacement).
3. Remove the engine cover. Refer to Engine Cover Replacement (See: Engine, Cooling and Exhaust/Engine/Service and Repair/Removal and
Replacement/Engine Cover Replacement).
Note: Cap the open fittings to prevent dirt and moisture from entering the refrigeration system.
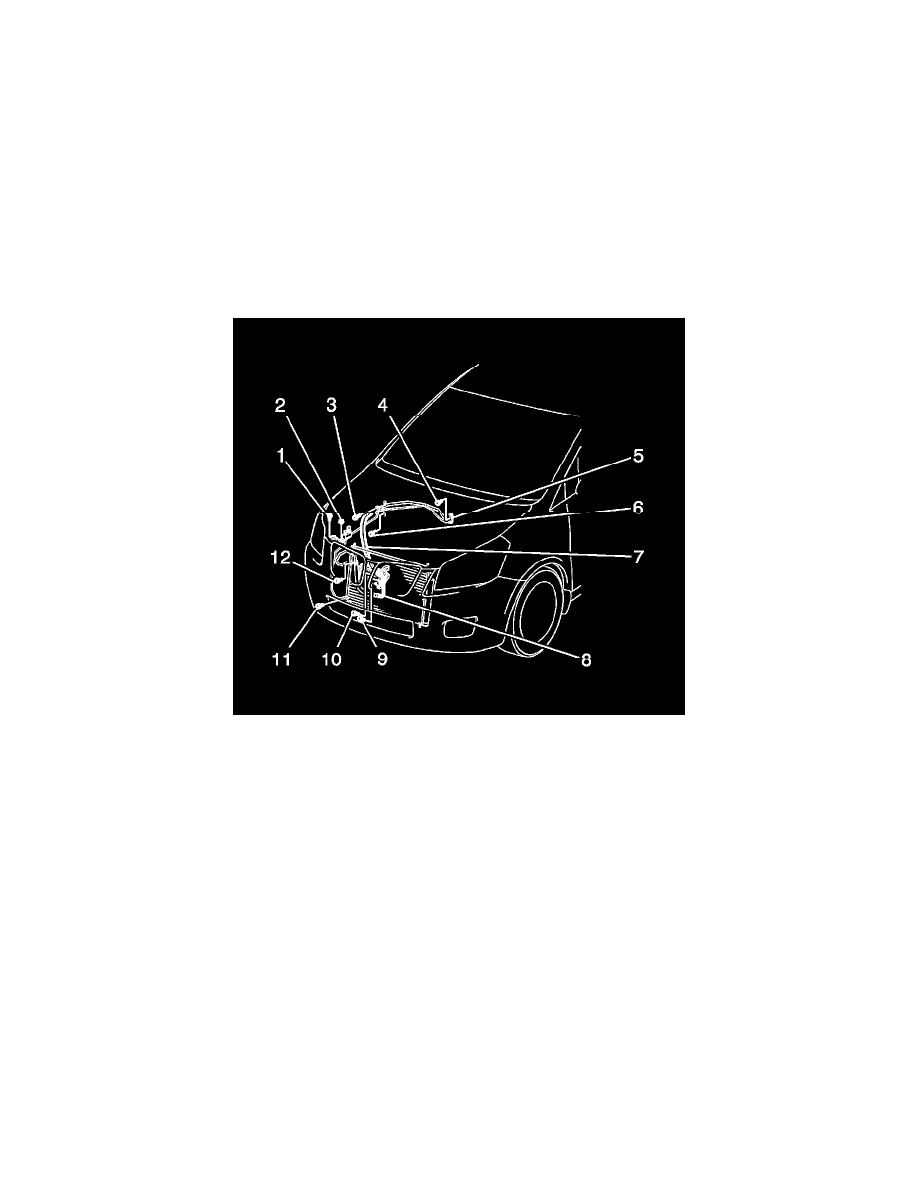
4. Remove the bolt (4) and the evaporator tube (5) from the evaporator.
5. Remove the bolt (3) and the suction hose (7) from the evaporator tube (5).
6. Reposition the coolant overflow hose.
7. Remove the bolt (6) from the evaporator tube bracket.
8. Remove the nut (2) from the evaporator tube bracket.
9. Remove the bolt (1) from the evaporator tube bracket.
10. Raise the vehicle on hoist. Refer to Lifting and Jacking the Vehicle (See: Vehicle Lifting/Service and Repair).
11. Remove the front engine splash shield (if equipped).
12. Remove the right side radiator air side deflector.
13. Remove the bolt (11) from the evaporator tube (5) to A/C condenser.
14. Remove the evaporator tube.
Installation Procedure
1. Install new O-rings lubricated with 525 viscosity mineral oil.