
Vibe FWD L4-2.4L (2009)
Control Arm: Service and Repair
Lower Control Arm Replacement
Removal Procedure
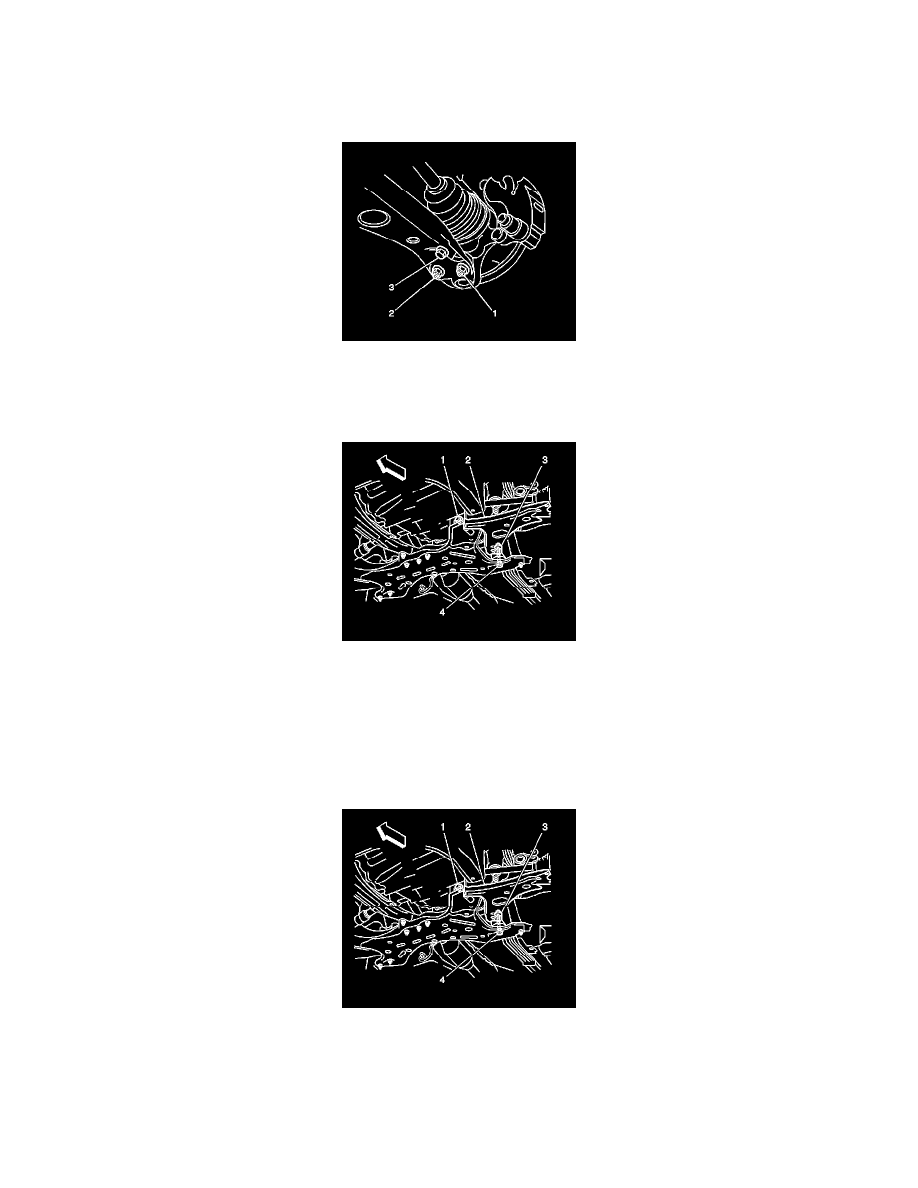
1. Remove the bolt (3) and the 2 nuts (1, 2) from the control arm.
2. Lower the front suspension crossmember as far as necessary to remove the control arm fasteners. Refer to Front Suspension Crossmember
Replacement (All Wheel Drive) (See: Cross-Member/Front Cross-Member/Service and Repair)Front Suspension Crossmember Replacement
(Two Wheel Drive) (See: Cross-Member/Front Cross-Member/Service and Repair).
3. Remove the bolt (1).
Note: DO NOT turn the nut.
4. Hold the nut (3) and remove the bolt (4).
5. Remove the control arm (2) from the crossmember.
Installation Procedure
Note: DO NOT tighten the nut (3) and bolts (1, 4) completely. The weight of the vehicle must be on the tire and wheel assemblies before
tightening the nut and the bolts.
1. Install the lower control arm (2) and the bolt (1) to the crossmember.
2. Hold the nut (3) and install the bolt (4).
3. Raise and install the lower control arms and the crossmember to the vehicle. Refer to Front Suspension Crossmember Replacement (All Wheel
Drive) (See: Cross-Member/Front Cross-Member/Service and Repair)Front Suspension Crossmember Replacement (Two Wheel Drive) (See: