
Vibe FWD L4-2.4L (2009)
Assembly Procedure
1. Position the beveled side of tripod axial spline toward the outboard joint.
2. Align the reference marks and install the tripod to the outboard joint shaft.
3. Install a new snap ring.
4. Pack the inboard joint and boot with grease.
145 g (5.1 oz)
5. Align the reference marks on the inboard joint shaft and outboard joint shaft.
6. Temporarily install the boot to the inboard joint.
7. Install the boots into the grooves on the drive shaft.
Caution: Refer to Fastener Caution (See: Service Precautions/Vehicle Damage Warnings/Fastener Caution).
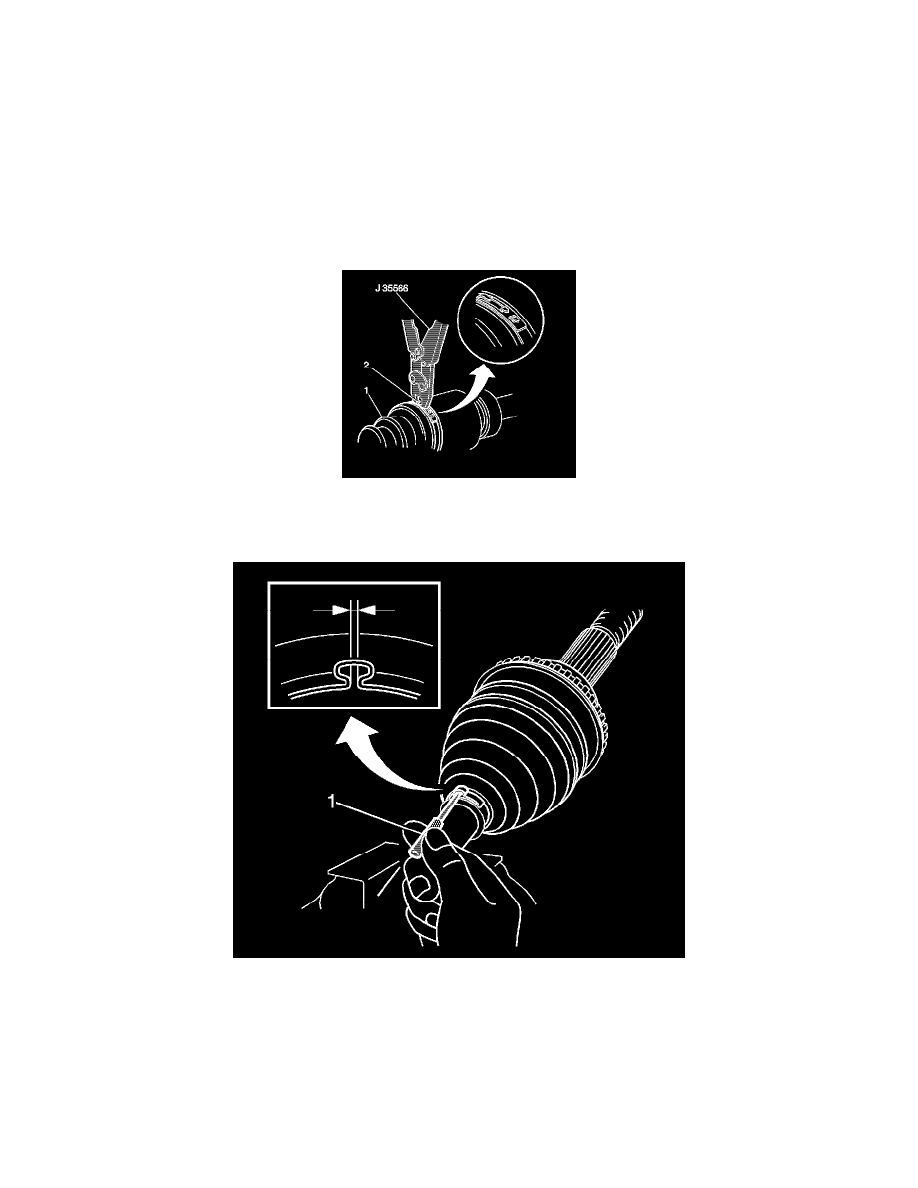
8. Using J 35566 - Clamp Pliers , crimp the small boot (1) retaining clamp (2).
9. Using a suitable tool (1), measure the clearance of the boot clamp
Note: If the measured value exceeds the specified value, retighten the clamp
10. Inspect the clearance of the drive shaft joint boot clamp.
Clearance: 1.0 mm (0.0394 in)
11. Align the reference mark on the tripod spider and the wheel drive shaft bar.
12. Install the tripod spider to the wheel drive shaft bar, while compressing the barrel retaining ring with a flat-bladed tool.