
Vibe FWD L4-2.4L (2009)
13. Verify positive engagement of the tripod spider to the wheel drive shaft bar by grasping the tripod spider and attempting to pull free from the
wheel drive shaft bar.
Note: Ensure the tripod bushing is flush with the face of the housing.
14. Place approximately half of the grease from the service kit in the wheel drive shaft outboard boot. Use the remainder of the grease to repack the
housing.
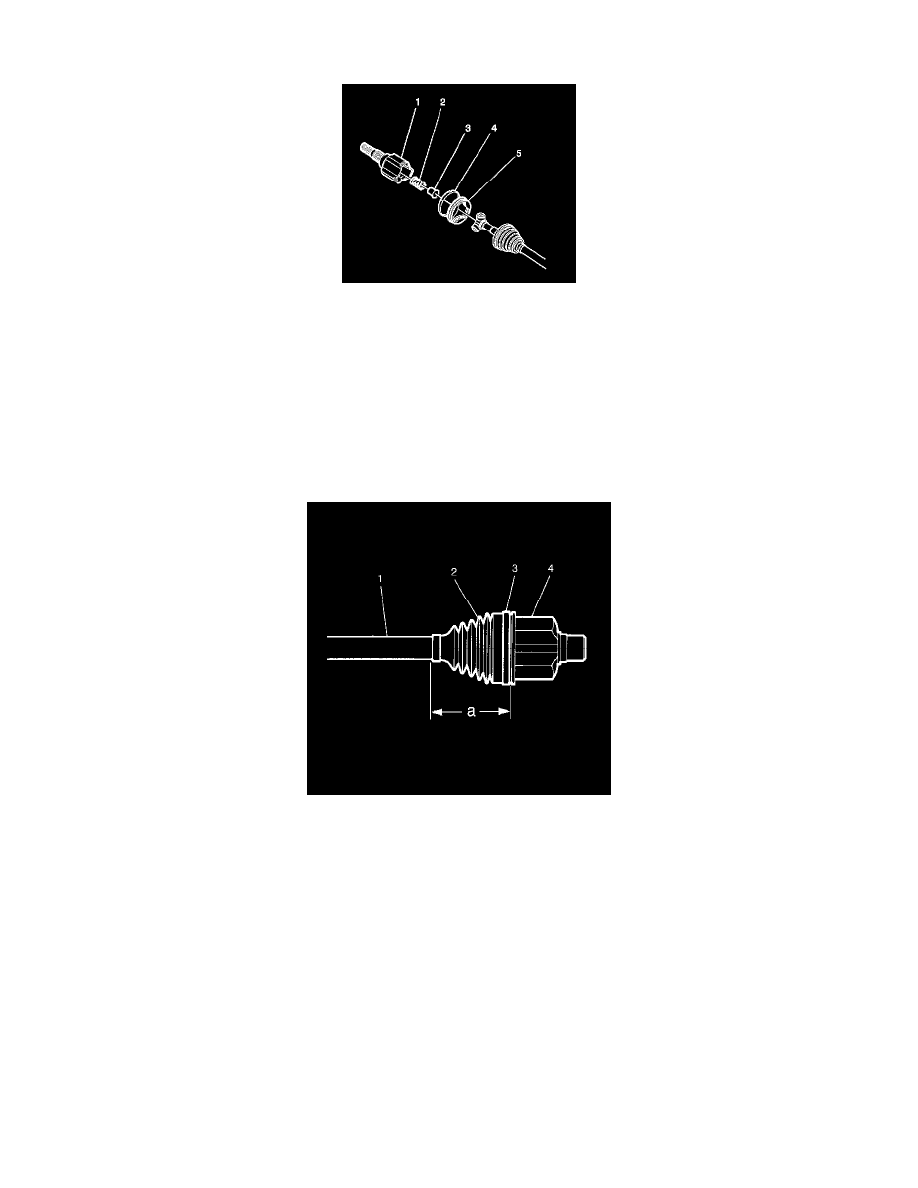
15. Install the tripod bushing (5) to the housing (1).
16. Install the spring (2) to the tripod housing.
Use grease from the housing in order to retain the spring.
17. Install the guide (3) to the spring.
Use grease from the housing in order to retain the guide.
18. Position the larger new boot retaining clamp (4) on the wheel drive shaft outboard boot.
19. Slide the housing over the tripod joint spider assembly on the wheel drive shaft bar.
20. Slide the large diameter of the wheel drive shaft outboard boot (2), with the larger clamp (3) in place, over the outside of the tripod bushing and
locate the lip of the seal in the groove.
Note: The wheel drive shaft outboard boot must not be dimpled, stretched out or out of shape in any way. If the wheel drive shaft outboard boot is
not shaped correctly, carefully insert a thin, flat, blunt tool (no sharp edges) between the large seal opening and the tripod bushing in order to
equalize the pressure. Shape the wheel drive shaft outboard boot properly by hand. Remove the tool.
21. Position the joint assembly at the proper vehicle dimension.