
911 Carrera Targa F6-3600cc 3.6L SOHC (1996)
Models Affected:
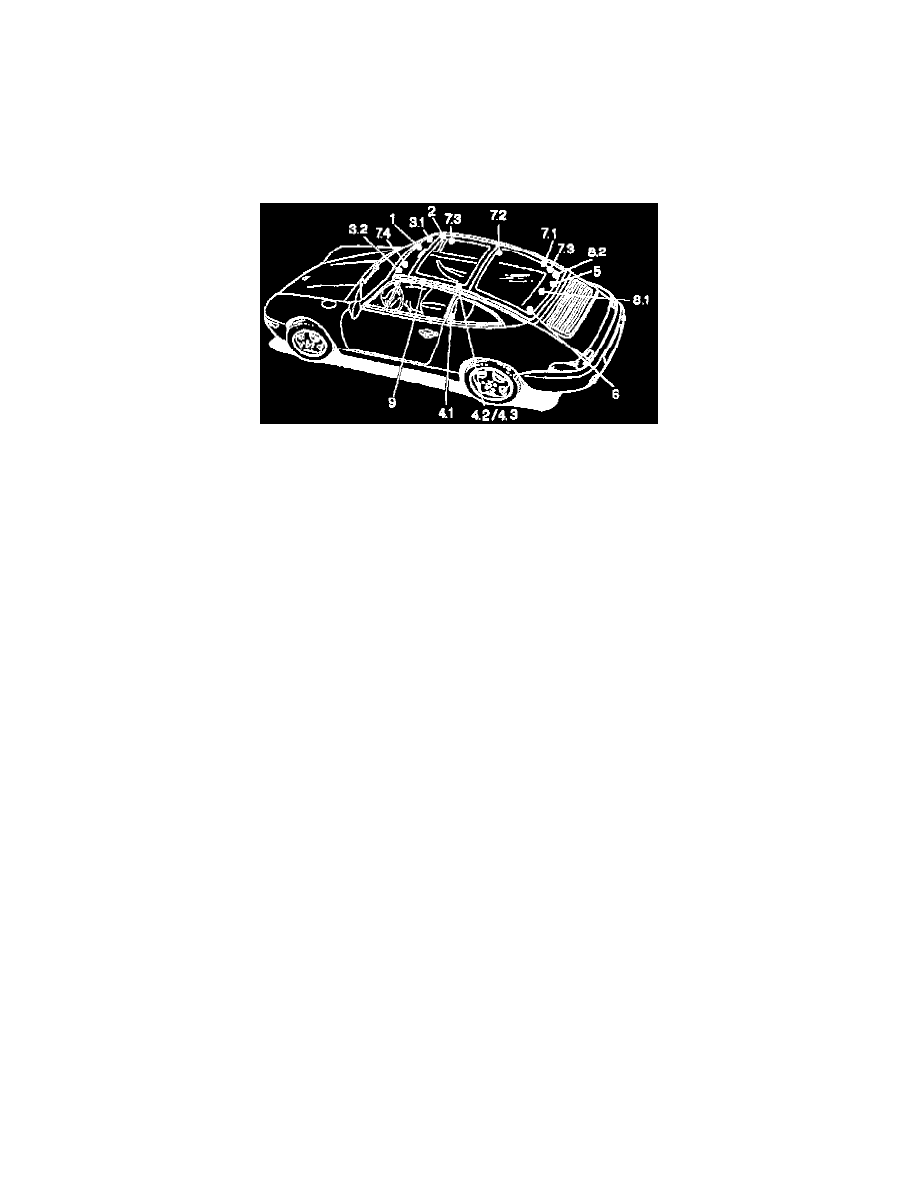
911 Targa, Model Year 1996
General Information:
Since the start of production of the Targa model, the production line conducts several procedures to eliminate the possibility of noises from the Targa
roof. In case of complaints of noises on the Targa roof, these procedures can be used for repairs.
Possible areas where noises can occur include:
1
-
Creaking in the area of the wind deflector.
2
-
Creaking at the left and right sides of the sliding glass roof panel.
3
-
Strong rattle noises in the area of the windshield frame (3.1 - 3.2).
4
-
Rattle or creaking noises in the area of the "B" pillar, left and/or right sides (4.1, 4.2, 4.3).
5
-
Creaking noises in the area around the rear window.
6
-
Creaking noises in the area where the inside rear cover panel and rear window meet.
7
-
Crackling or rattle noises from the area of the inner roof trim panels, left and right and the windshield frame cover (7.1, 7.2, 7.3, 7.4).
8
-
Crackling or rattling noises from the rear inside wall trim panel (8.1, 8.2).
9
-
Creaking noises in the area of the roof rail trim strips, left and right sides.
Testing Procedures:
Contained within the following information are repair procedures to be used when customer complaints of noises in the roof of Targa models are
received. It is possible that noises in the Targa roof may have other causes than those mentioned in this information. Therefore, it is essential to correctly
identify the type of noise and the area from which the noise originates. If possible, before repairs begin, take a test drive with the customer so that an
accurate description of the noise and its location can be made. In any case, a test drive will be necessary. To aid in diagnosis of noise location, remove
interior trim panels in the suspect areas before the test drive.
Procedure for removing interior trim panels:
-
Removal of the Cowl panel trim: Remove the dome light assembly and disconnect the wires. Remove the sun visors and pull the cowl panel trim to
the rear.
-
Removal of the rear wall trim panel:
Remove the four screws and pull the panel out toward the front.
-
Removal of the lower rear side wall trim panel:
Remove the panel mounting screws and pull the panel off.
-
Removal of the upper rear side wall trim panels:
Remove the plastic cap from the screw on the "B" pillar Remove this screw and the screw on the wheel well. Pull off panel.