
968 Cabriolet L4-2990cc 3.0L DOHC (1993)
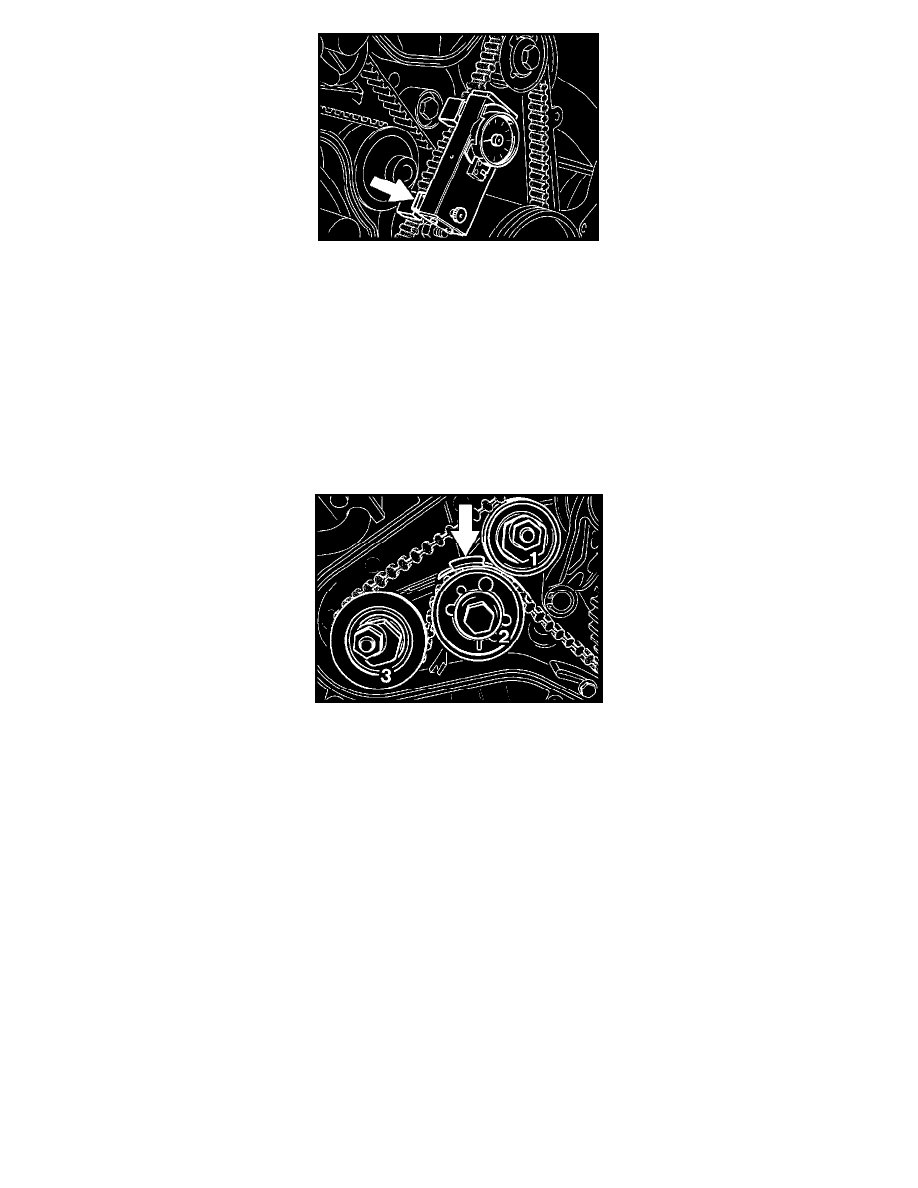
8. Push Special Tool onto toothed belt. Push measuring button (arrows) slowly in until engagement of the lock pin is felt and read off displayed value
on dial gauge.
NOTE: To avoid reading errors, the non-return pointer must always be aligned to the measuring pointer after the lock pin has engaged (turn
counterclockwise).
Adjusting value: (new and used belts) 2.7 ± 0.3 dial values If required, correct toothed belt tension.
ADJUSTING
9. The sliding blocks must rest on the belt along their entire surface. During the measuring process, the Special Tool must neither be twisted nor
moved on the belt.
10. When tensioning, rotate tensioning pulley clockwise. When slackening, rotate tensioning pulley counterclockwise. Tighten hexagon nut to 45 Nm
(33 ft lb), using a second wrench to lock.
1 - Idler pulley
2 - Balance shaft
3 - Tensioning pulley
11. After the toothed belt has been adjusted, follow by adjusting the idler. Using Special Tool 9207 or a feeler gauge (0.5 mm) (0,020 in), set idler
pulley to a clearance of 0.5 mm (0.020 in) to the toothed belt in bottom balance shaft area and preload upper toothed belt train by 0 to 1 mm (0 -
0.040 in)at same time. Tighten idler pulley in this position. If the adjustment travel is not sufficient, turn idler pulley by 180 and repeat adjustment.
Tighten hexagon head nut to 45 Nm (33 ft lbs), using a second wrench to lock.