
Alliance/Encore L4-1397cc 1.4L (1984)
3.
Reinstall the stop lamp switch trim cover.
4.
Reinstall the steering wheel trim cover.
5.
Reposition the console to its proper location and install the attaching screws.
6.
Reinstall the shift indicator mylar strip and plastic shift lever trim (or shift boot for manual transmissions).
7.
Seal the two pop rivets used to hold the air conditioning wide open throttle bracket in position. Use silicone sealer and work from the engine
compartment side.
8.
With the ignition switch in the "OFF" position, reattach the battery negative cable.
9.
Remove the coolant pressure cap. Start the engine and ensure that there is a constant flow of coolant from the bleeder tee into the remote filler
neck (1983 and 1984 models) or into the coolant bottle (1985 through 1987 models). Note: If no flow occurs, a potential for air lock exists. See
Service Procedure Section IV. Add coolant as necessary and replace the pressure cap.
10.
Check the heater operation and allow the engine to run until the thermostat opens.
11.
Shut off the engine and slowly remove the remote fill or coolant bottle pressure cap and add coolant as necessary.
12.
Check the function of electrical components which were previously disconnected.
13.
Reset the clock, if equipped.
CAUTION:
IF ORIGINAL COOLANT WAS LOST FROM SYSTEM COMPONENTS OTHER THAN THE HEATER CORE, THEN THE ENTIRE
SYSTEM MUST BE BLED TO ENSURE THAT ALL AIR IS EXPELLED. SEE SECTION IV OF THIS SERVICE PROCEDURE FOR SYSTEM
BLEED PROCEDURES.
FAILURE TO PURGE AIR FROM THE COOLING SYSTEM WILL RESULT IN OVERHEATING AND POSSIBLE ENGINE DAMAGE.
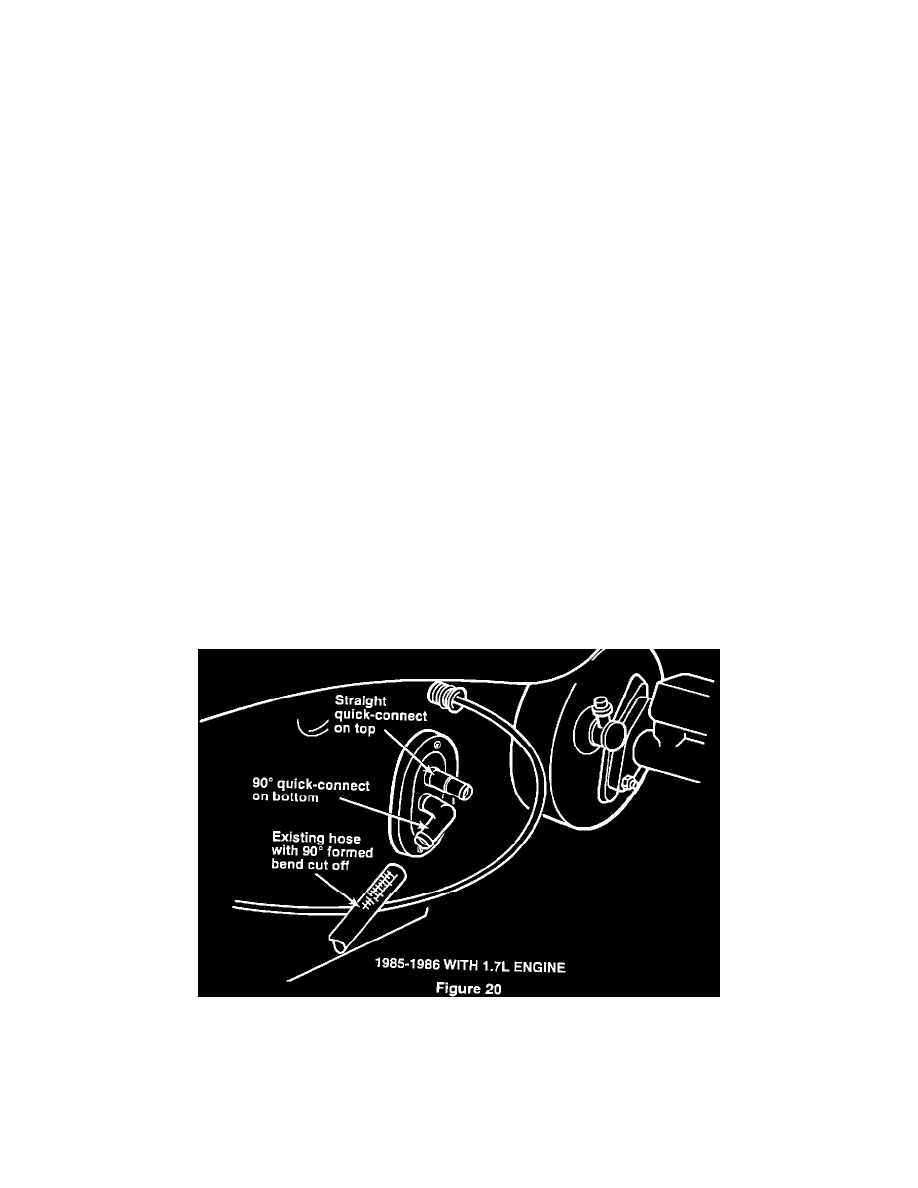
II. Special Replacement Instructions For 1985-86 1.7L Engine
Installation of Heater Core Quick-Connects and Hoses
1.
Install the supplied 90 degrees quick-connect on the bottom (inlet) heater core nipple and the straight quick-connect on the top (outlet) heater core
nipple (Fig. 20).
2.
Install the supplied rubber bulkhead seal and retainer plate over the quick-connects with the supplied screws.
3.
Cut off the formed end of the existing lower heater hose.