
Alliance/Encore L4-1397cc 1.4L (1984)
Note:
Be sure that the quick-connects are fully (click) locked on. Pull on each quick-connect after it is attached to ensure proper engagement.
Note:
Install the quick-connects to face the right hand (passenger) side of the vehicle in the engine compartment (Fig. 16).
5.
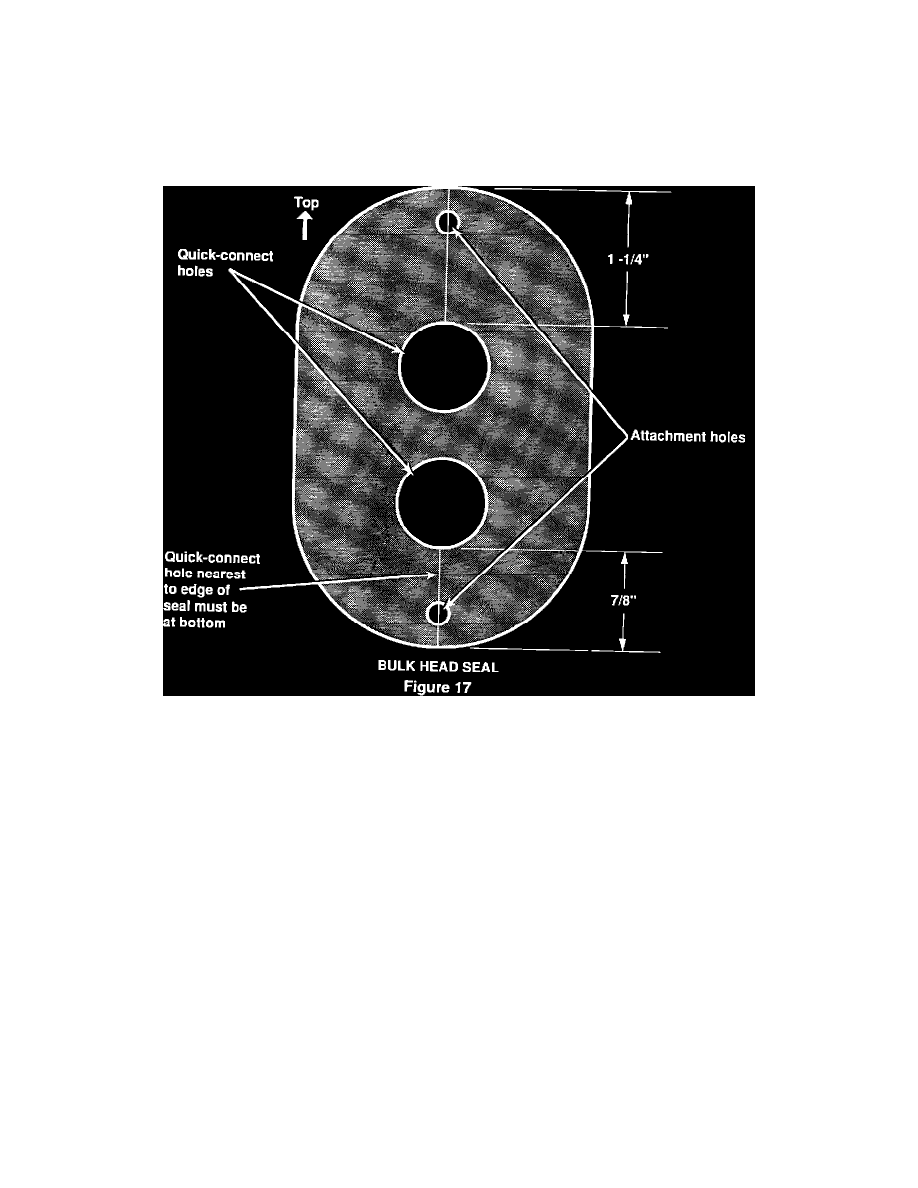
Install the supplied rubber bulkhead seal by working it over and around the bend in the quick-connects. Silicone lubricant will ease installation.
Note:
The seal will fit only one way. Refer to Fig. 17 for proper seal location on the quick-connects.
6.
Reinstall the metal retainer plate over the rubber seal and attach to the bulkhead using the screws provided.
7.
Cut off the end of both heater hoses.
Note:
Remove only the formed bend section from each hose. Otherwise the hoses will be too short.
8.
Fill the new heater core with coolant and connect hoses as follows.
Note:
Using this method will assure proper air bleed in minimum time.
a. Rotate both heater core quick-connects until the nipples point upward. In the case of repairs with a straight quick-connect (Service Procedure
Sections II & III), rotate only the bottom, 90 degrees quick-connect upward.
b. Add coolant to the upper nipple, using a long funnel, until the core is full of coolant. (In the case of straight quick-connects, add coolant
through the bottom, 90 degree nipple.)
c. When the core is full, use one of the protective caps supplied on the new heater core to cap the upper quick connect to prevent coolant from
running out.
d. Rotate the lower quick-connect back facing the right side of vehicle, install the lower hose and supplied clamp onto the quick-connect and