
Alliance/Encore L4-1397cc 1.4L (1984)
Constant Velocity Joint: Service and Repair
Right Side Inner Boot & CV Joint
1.
Remove retaining spring and cut boot from end to end to remove it.
2.
Remove as much grease as possible from shaft CV joint components. Remove grease with rags only. Do not use solvents.
3.
Lift each end of retaining plate and disassemble yoke. Do not remove rollers from spider trunnions. The rollers and needle bearings are
matched sets and must not be intermixed. Hold bearing rollers in place on spider with adhesive tape.
4.
Remove snap rings and, using tool T.Ar. 65, or equivalent, and suitable press, remove spider.
5.
Lubricate driveshaft and install replacement boot on shaft, securing with small clamp.
6.
Install spider on shaft, then install snap ring.
7.
Spread grease supplied in boot kit evenly inside boot and on yoke.
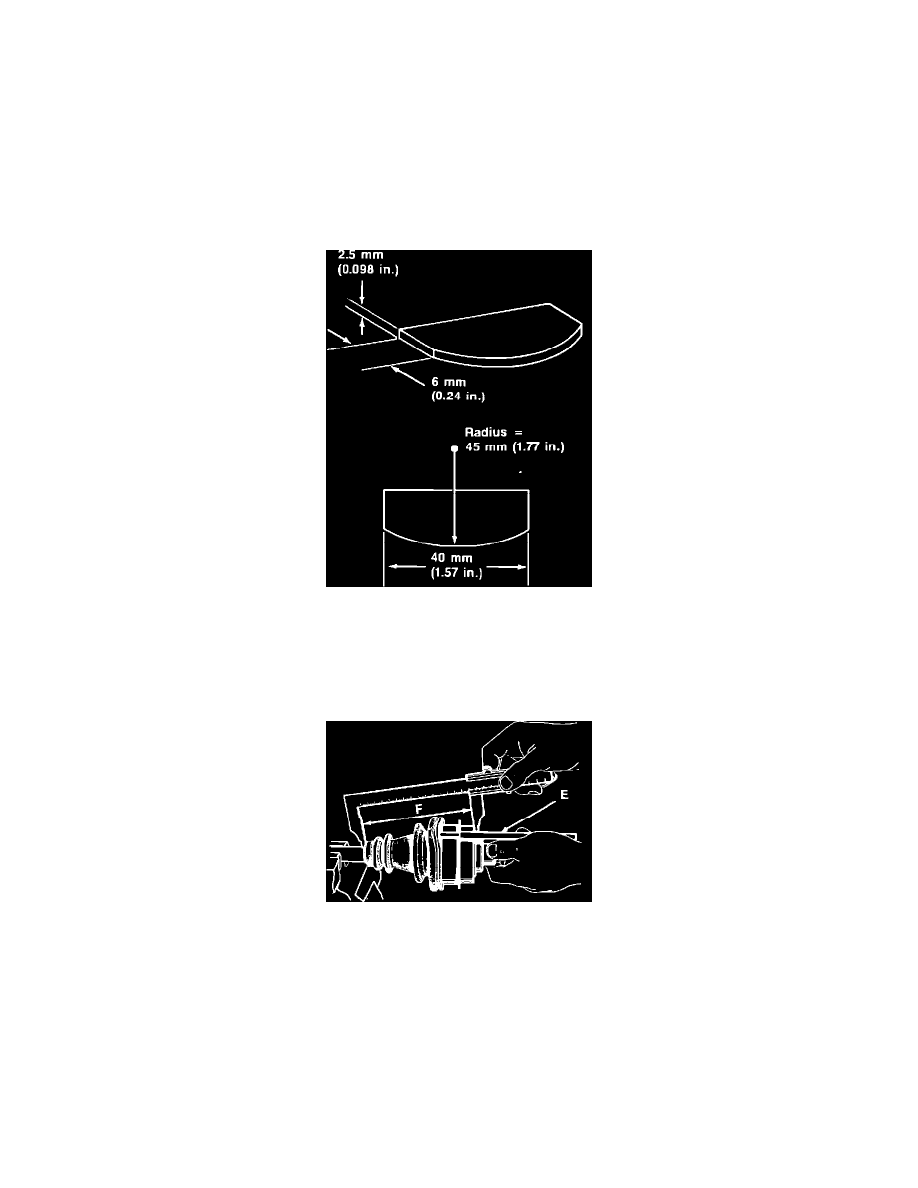
Fig. 12 Fabricating shim.
8.
Fabricate shim as shown, Fig. 12, and insert between anti-separation plate and yoke to hold plate in position.
9.
Install anti-separation plate and remove shim.
10.
Locate boot lips in their respective grooves in shaft and metal cover, then purge air from boot by inserting length of smooth rod between boot and
yoke to release air trapped in boot. Do not damage boot when purging air.
Fig. 13 Adjusting joint, right side inner CV joint
11.
Lengthen or shorten shaft so that dimension F, Fig. 13, is 6.04 ± .04 inches (153.3 ± 1 mm) between small end of boot and the largest machined
diameter on yoke, then remove rod.
12.
Install retaining spring, ensuring spring is not stretched and coils are touching after assembly.