
Alliance/Encore L4-1721cc 105 CID (1985)
Timing Belt: Service and Repair
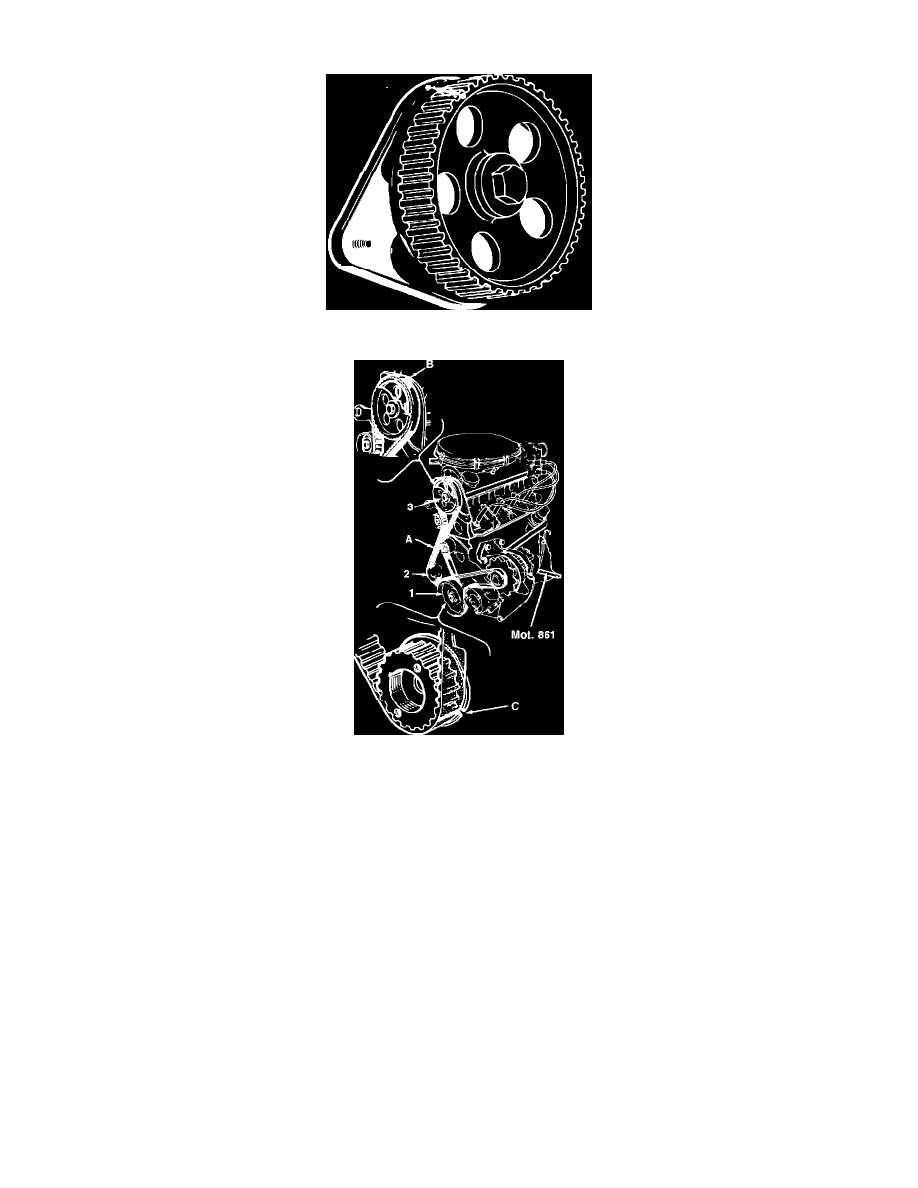
Fig. 22 Camshaft sprocket alignment.
Fig. 23 Timing belt installation.
Removal
1.
Remove accessory drive belts and timing belt cover.
2.
Rotate crankshaft until No. 1 cylinder is at TDC of compression stroke, ensure camshaft is positioned as shown in Fig. 22, then insert TDC lock
pin Mot. 861 or equivalent through opening in side of block, Fig. 23, and ensure tool engages slot in crankshaft. If there is no reference mark on
camshaft sprocket rear cover plate, scribe a matching mark in line with timing mark on sprocket.
3.
Loosen timing belt tensioner, then remove timing belt. Do not rotate crankshaft or camshaft with timing belt removed.
Installation
1.
Ensure TDC tool Mot. 861 is properly seated in and align camshaft sprocket timing mark with mark on rear cover plate, Fig. 22.
2.
Position timing belt over crankshaft sprocket (1) first, then intermediate shaft sprocket (2), and then camshaft sprocket (3), Fig. 23.
3.
Position timing belt arrow (A), indicating direction of rotation between intermediate shaft sprocket and idler pulley, Fig. 23.
4.
Align timing belt marks with timing mark on camshaft sprocket (B) and crankshaft sprocket (B), Fig. 23. Intermediate shaft sprocket does not
have a timing mark.
5.
Adjust initial belt tension as follows:
a. On 4-105/1721cc engines, loosen tensioner pulley locknut, then turn tensioner pulley nut counterclockwise until timing belt is taut. Hold
tensioner pulley nut from turning and tighten the locknut.
b. On 4-120/1965cc engines, pry tensioner inward toward belt until belt is taut, then tighten tensioner pulley locknut.
6.
Remove TDC tool Mot. 861 from crankcase, then rotate crankshaft clockwise, 2 complete revolutions, then reinstall TDC tool Mot. 861 through