
9-2X F4-2.0L Turbo (2005)
Lateral Stabilizer Rod: Service and Repair
Lateral Link
REMOVAL
Loosen the wheel nuts. Lift-up the vehicle and remove wheel.
Remove the stabilizers.
Remove the ABS wheel speed sensor harness from trailing link.
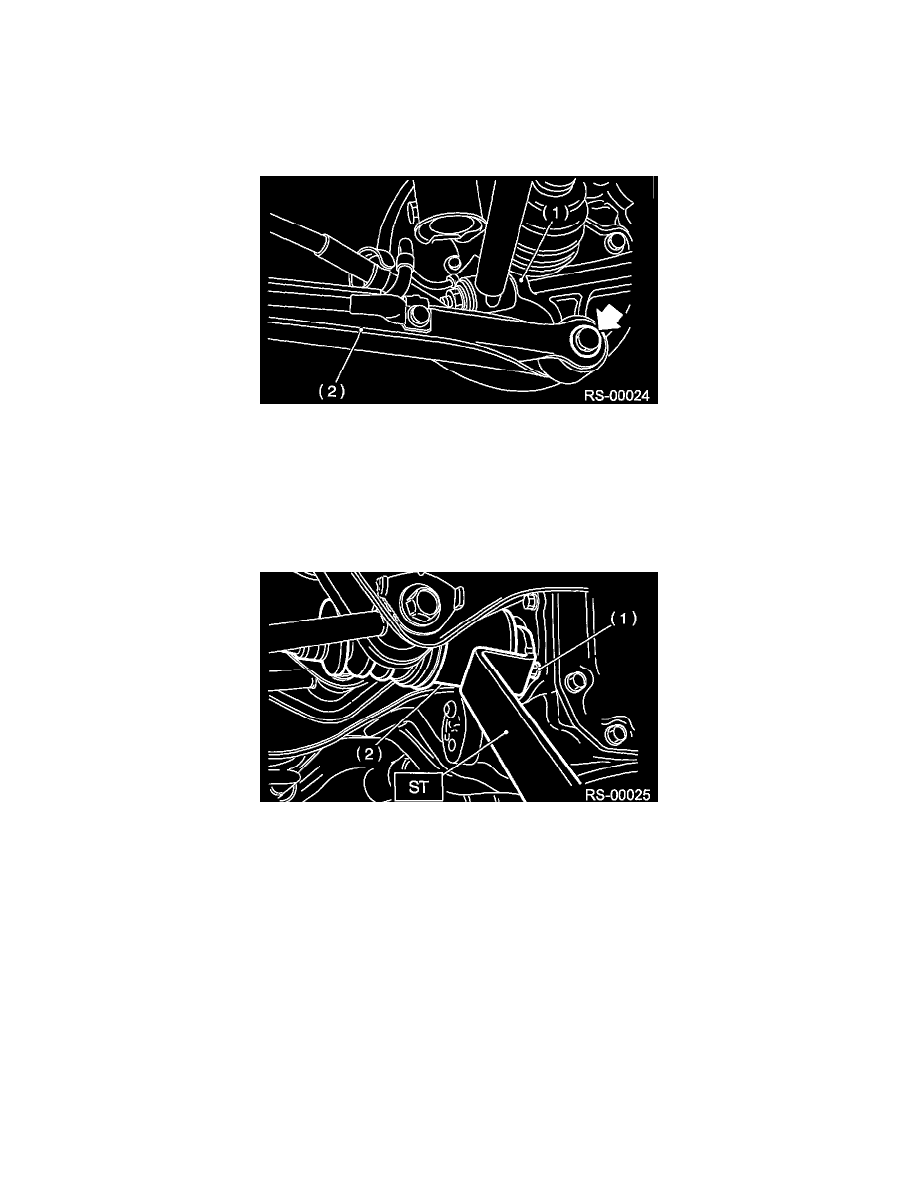
Remove the bolt securing trailing link to rear housing.
(1) Rear housing
(2) Trailing link
Remove the bolts which secure the lateral link assembly to rear housing.
Remove the DOJ from rear differential using ST.
ST 32005038 DRIVE SHAFT REMOVER
Note: The side spline shaft snap ring comes out together with the shaft.
(1) Bolt
(2) DOJ
Important: Be careful not to damage the side bearing retainer. Always use bolt shown in the figure, as supporting point for ST during removal.
Scribe an alignment mark on the rear lateral link adjusting bolt and crossmember.
Remove the bolts securing front and rear lateral links to crossmember, detach lateral links.
Important: To loosen the adjusting bolt, always loosen the nut while holding head of adjusting bolt.
INSTALLATION
Install in the reverse order of removal. Observe the following instructions.
^
Installation of DOJ to differential:
Important:
^
Replace the self-locking nut and DOJ snap ring with new ones.
^
Always use the special tool not to allow the DOJ splines to damage the side oil seal.
ST 32005037 OIL SEAL PROTECTOR
^
Always tighten the bushing location when tires are in full contact with the ground and vehicle is curb weight.