
9-7X V8-5.3L (2005)
Front Door Window Regulator: Service and Repair
Front Side Door Window Regulator Replacement
Removal Procedure
1. Remove the door trim panel. Refer to Front Side Door Trim Panel Replacement (See: Body and Frame/Doors, Hood and Trunk/Doors/Front
Door/Front Door Panel/Service and Repair/Front Side Door Trim Panel Replacement).
2. Remove the speaker. Refer to Radio Front Side Door Speaker Replacement (See: Accessories and Optional Equipment/Radio, Stereo, and
Compact Disc/Speaker/Service and Repair/Radio Front Side Door Speaker Replacement).
3. Remove the water deflector. Refer to Front Side Door Water Deflector Replacement (See: Body and Frame/Doors, Hood and Trunk/Doors/Front
Door/Front Door Panel/Service and Repair/Front Side Door Water Deflector Replacement).
4. Loosen the regulator window carrier bolts.
5. Raise and support the window.
6. Disconnect the electrical connector from the regulator motor.
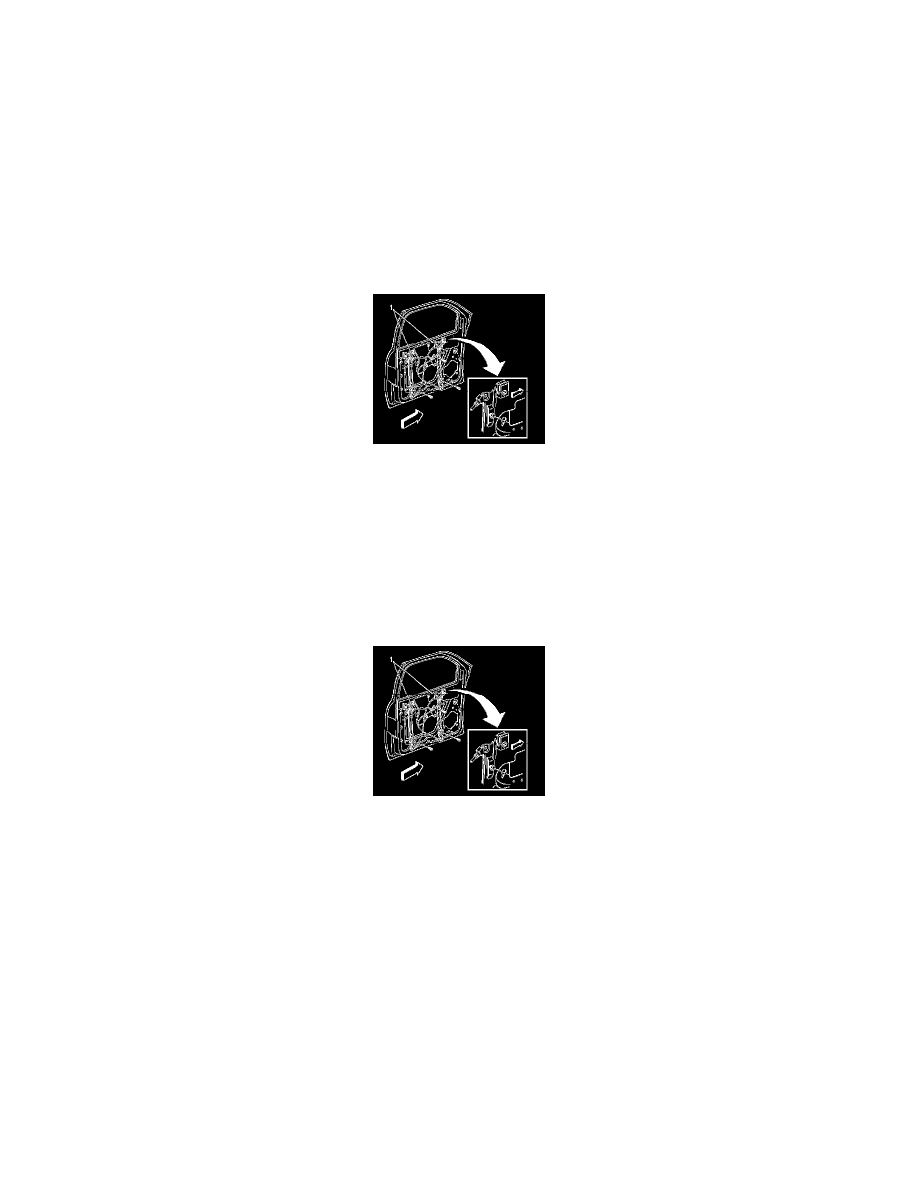
7. Loosen the upper 2 bolts (1) that retain the regulator assembly to the door.
8. Remove the remaining 3 bolts that retain the window regulator assembly and the motor to the door.
9. Lift the regulator assembly upward in order to release the upper 2 bolts.
10. Rotate the upper portion of the regulator assembly forward.
11. Beginning with the lower portion, remove the regulator assembly through the door opening.
12. Place the regulator assembly on a prepared surface.
13. Remove the upper 2 bolts from the regulator assembly.
Installation Procedure
1. Partially install the upper 2 bolts (1) to the regulator assembly.
2. Beginning with the upper portion, install the regulator assembly through the door opening in a semi-horizontal position.
3. Position the regulator assembly fully forward into the door cavity.
4. Rotate the regulator assembly to a vertical position.
5. Lower and hang the regulator assembly onto the door sheet metal using the upper 2 bolts that were previously installed.
Notice: Refer to Fastener Notice (See: Service Precautions/Vehicle Damage Warnings/Fastener Notice).
6. Install the bolt that retains the motor to the door.
Tighten bolts to 9 Nm (80 in. lbs.).
7. Install the remaining bolts that retain the regulator assembly to the door.
Tighten bolts to 10 Nm (88 in. lbs.).
8. Connect the electrical connector to the regulator motor.
9. Remove the window support and lower the window onto the regulator window carrier.
10. Loosely tighten the regulator window carrier bolts.
11. Operate the window upward to the full up position, ensuring the window remains in the run channels.