
900 L4-1985cc 2.0L (1982)
5.
Thoroughly clean the sealing surfaces of any remaining gasket material.
6.
Check the sealing surfaces for flatness using a straightedge. If necessary, remove any high spots by lightly filing the surface. Thoroughly clean the
field area to remove any metal particles.
7.
Degrease the sealing surfaces using a suitable solvent. Also clean the new pans to remove any production oils.
NOTE
The transmission sealing surfaces must be clean and dry before installing the new pans and gaskets.
NOTE
Do not presoak the gasket. Do not supplement the gasket with any type of sealing compound or adhesive.
8.
Install the new gasket, pan, and frames and secure using the longer screws provided in the kit.
NOTE
Do not overtorque the screws.
9.
Torque the screws to 11 N-m (8 lb. ft.).
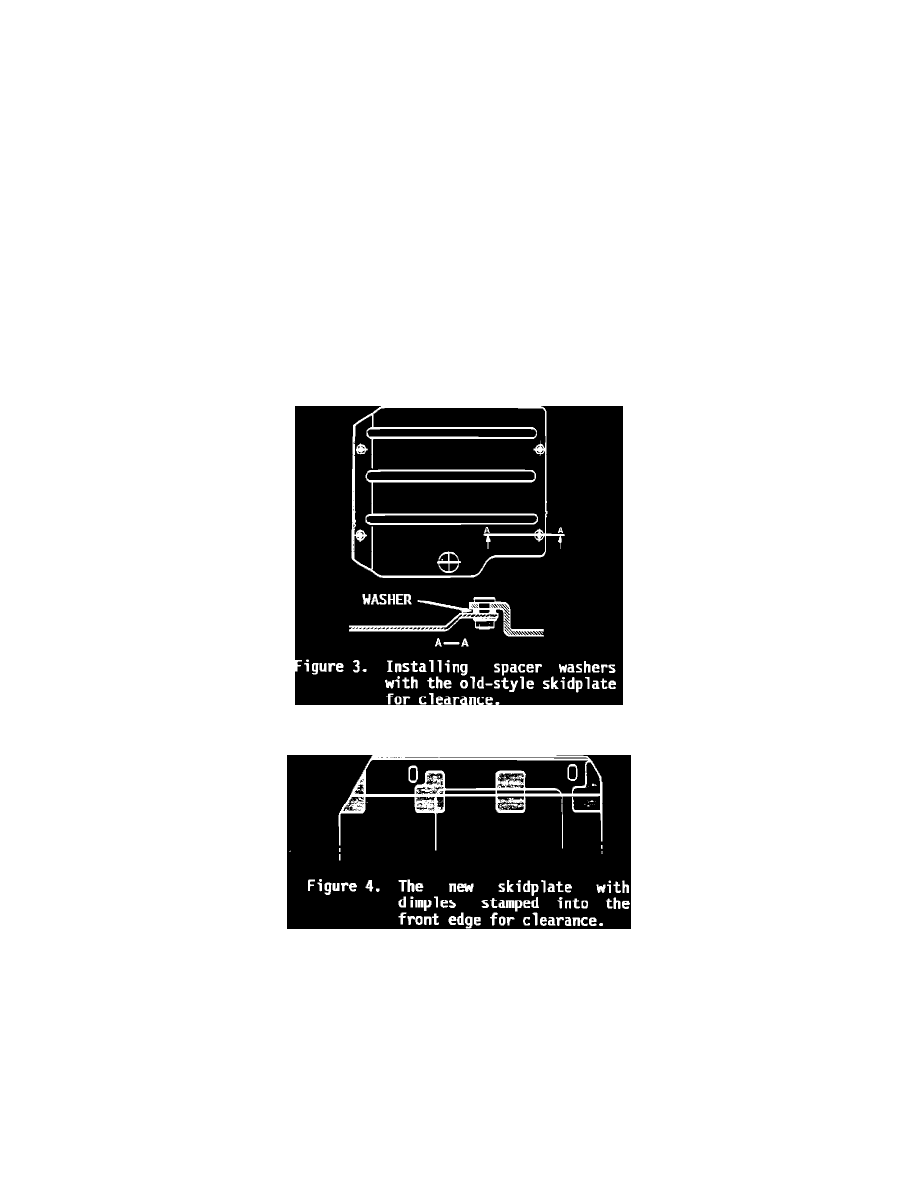
Figure 3
Figure 4
10.
Reinstall the drain lug using a new sealing washer P/N 87 08 398).
11.
Reinstall the protective bars or skidplate:
a.
To install the old-style skidplate without dimples on transmissions with the new oil pans, four spacer washers (P/N 80 73 249) must be
installed to provide the additional clearance needed (Figure 3).
b.
If a damaged old-style skidplate needs to be replaced (not a warranty item), use the new skidplate, P/N 40 07 449 (Figure 4).
12.
Fill the transmission with the required amount of Type F ATF.