
900 L4-1985cc 2.0L DOHC Turbo EFI (1985)
Trunk / Liftgate Latch: All Technical Service Bulletins
Rear Hatch - Correcting A Latching Complaint
FILE IN S.I. Man
VOL. I
SEC. A-8
PG. 110
ISSUE:
01/89-1105
SUBJECT:
CORRECTING A LATCHING COMPLAINT
APPLICATION: ALL 900 3-DOOR MODELS
Proper operation of the rear hatch latch on 900 models depends upon correct adjustment of the latch and striker plate. The procedure detailed in this
Service Information bulletin uses shim washers to improve the operation of the rear hatch latch.
Parts Required:
Washer (2 req.) P/N 94 93 743
Hex nut, 4 mm
P/N 80 74 098
Rear Hatch Adjustment Procedure
1.
Inspect the fit of the rear hatch to the body. If necessary, adjust the hatch position at the hinges per S.I. 05/88-1055 (A-8, p.107).
2.
Remove the parcel shelf.
3.
Remove the rear hatch trim panel to gain access to the latch mechanism. If applicable, remove the cover over the latch.
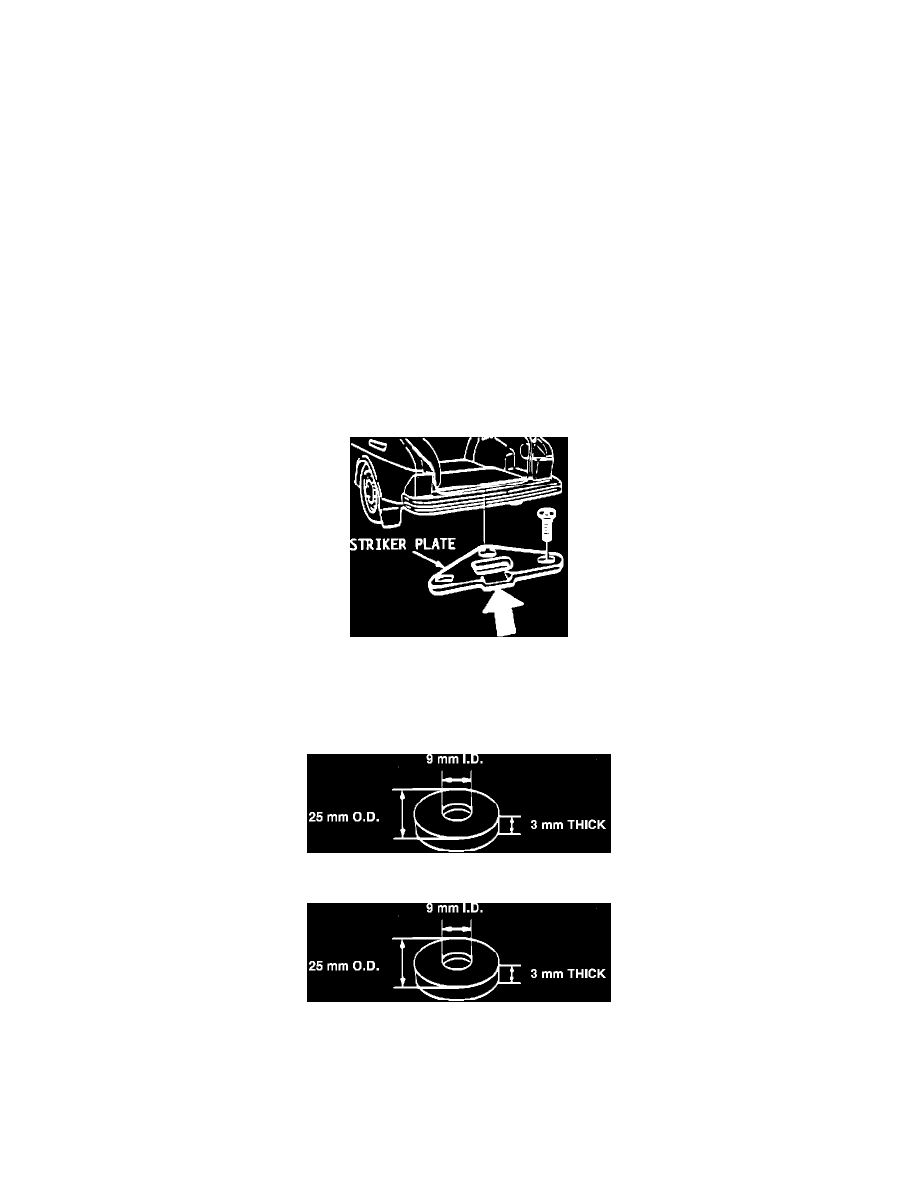
FIGURE 1 - INSPECT THE STRIKER PLATE EDGE.
4.
Mark the position of the striker plate and remove it (Figure 1.)
5.
Inspect the edge of the striker plate as shown in Figure 1. If the edge has a chamfer or has been damaged, install a new striker plate.
FIGURE 2 - THE DIMENSIONS OF WASHER P/N 94 93 743.
FIGURE 2 - THE DIMENSIONS OF WASHER P/N 94 93 743.