
900 L4-1985cc 2.0L DOHC Turbo EFI (1985)
7. Check that there are no impurities or other foreign matter in the oil pan and make sure that its flange is scrupulously clean.
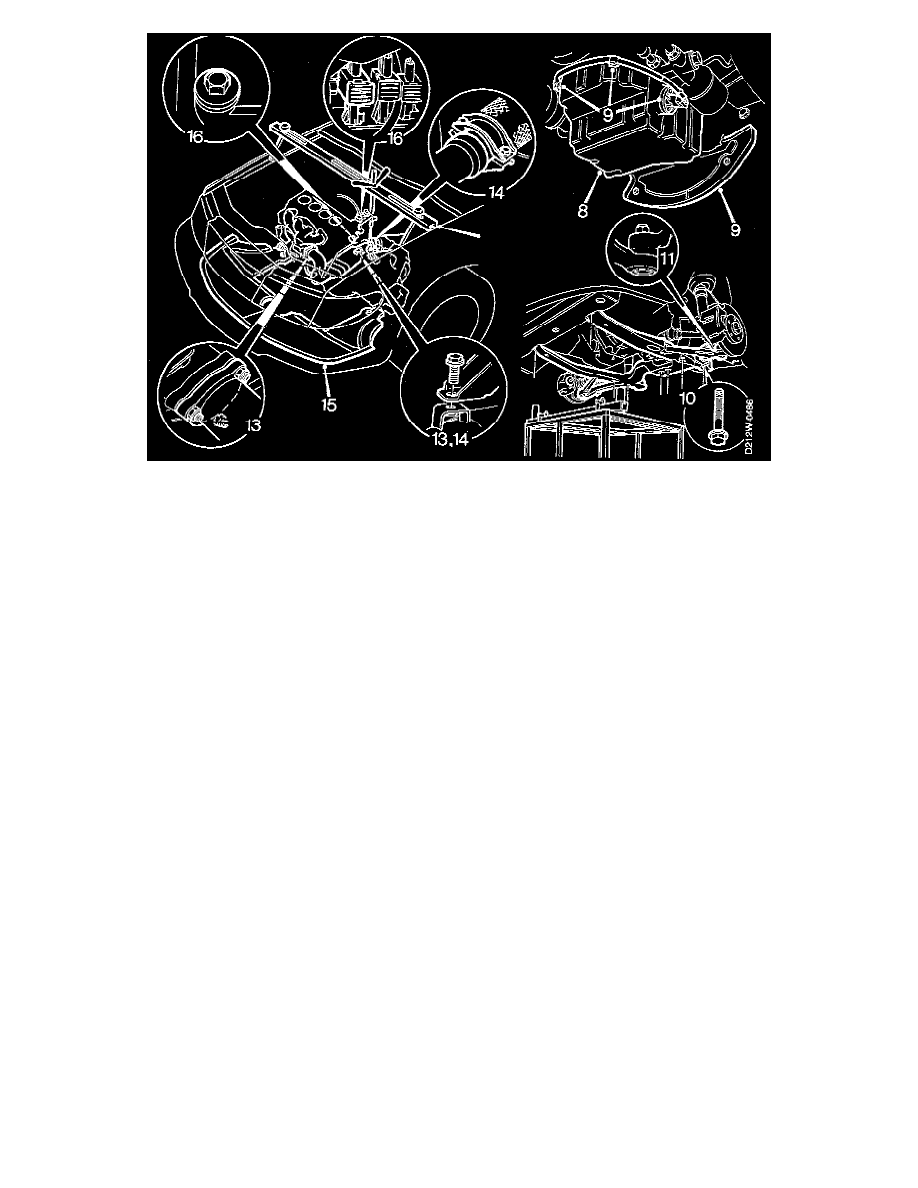
8. Apply an even layer of Loctite 518, or equivalent, along the flange and fit the oil pan, tighten bolts to: 22 Nm (16 ft. lbs.)
9. Install the protective plate, plug in the oil level sensor connector and press the cable back into its clamps.
10. Position the sub-frame and fit it in position, then tighten as follows:
-
Front: 115 Nm (85 ft. lbs.).
-
Middle: 190 Nm (140.6 ft. lbs.).
-
Rear: 110 Nm plus an additional 75° (81.4 ft. lbs. plus an additional 75°).
11. Install the nuts for the end pieces and tighten to: 75 Nm (55.5 ft. lbs.).
12. Clean the exhaust pipe joints.
13. Install the bolt securing the catalytic converter to the bracket on the engine, but do not tighten it.
-
Screw the front exhaust pipe to the exhaust manifold or turbocharger.
-
Before assembly, apply Molykote 1000, or equivalent, to the threads of the studs on the turbocharger.
14. Tighten the bolt securing the catalytic converter to the bracket on the engine and screw together the joint under the car.
15. Install the spoiler sections and the road wheels.
-
Tighten wheel bolts to: 120 Nm (89 ft. lbs.).
16. Check that the oil drain plug is tight, lower the car to the floor and fill up with oil.
-
Put back the dipstick, connect the oxygen (Lambda) sensor leads and remove the lifting beam.