900 L4-1985cc 2.0L DOHC Turbo EFI (1985)

Alignment: Technical Service Bulletins
Alignment - Toe-In Information
FILE IN. S.I. Man. VOL. I
SEC. 6
PG. 22
Service Information
SUBJECT:
MEASURING TOE-IN USING MECHANICAL, ISSUE: 10/85-792 OPTICAL, AND ELECTRONIC EQUIPMENT
APPLICATION: All Saab 900 Models
A mechanical toe-in gauge such as the one shown at the right is a mechanical device which measures front or rear wheel toe-in at the rims. When
measuring toe-in, technicians must note that the specification given in the Saab Service Manual (Sections 0, 6, 7) are given for use with such a tool.
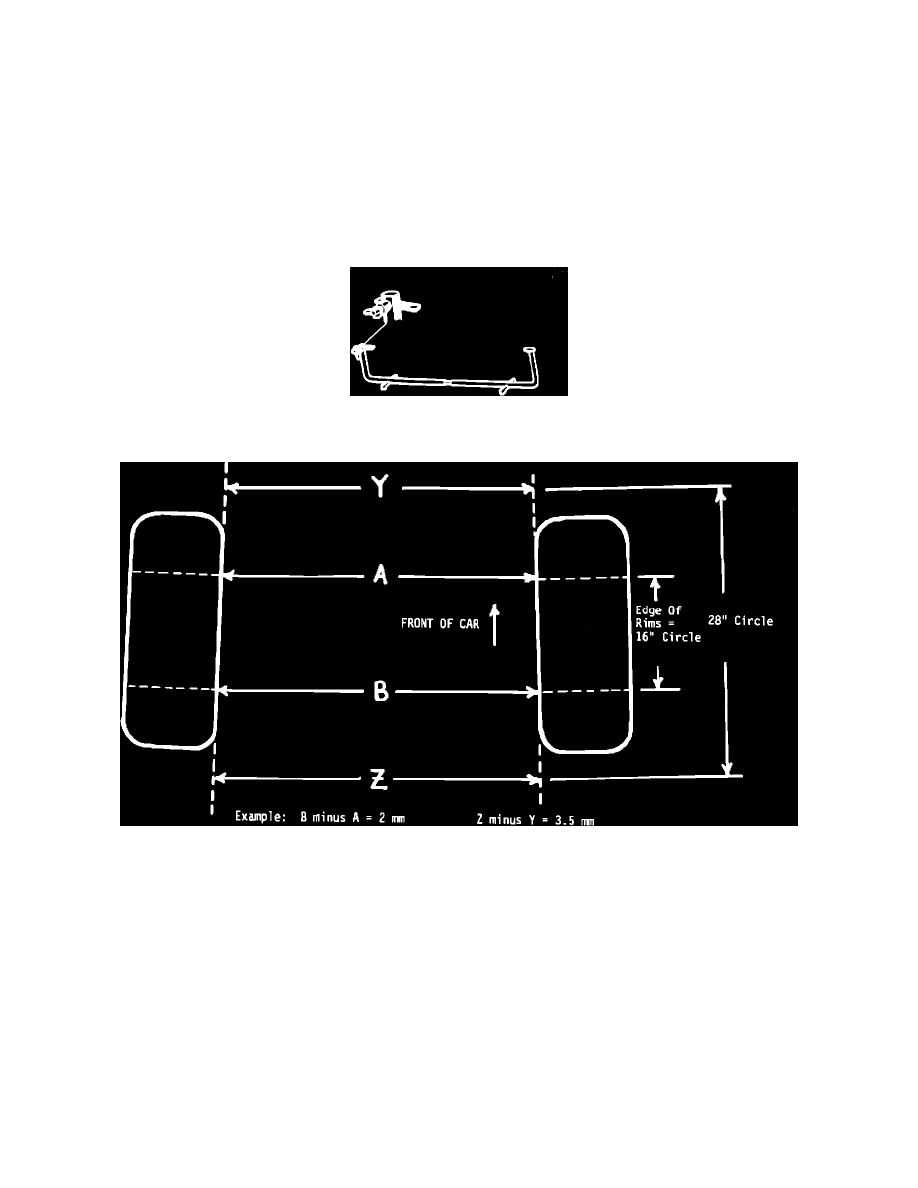
When using an optical toe-in gauge or an electronic alignment machine the technician must remember that these machines are not measuring toe-in at the
rims. Electronic and optical gauges take an angular reading and convert it to a linear measurement (millimeters or inches).
For this reason the equipment manufacturers have standardized all toe-in measurements by using a universal circle of approximately 28 inches. A toe-in
reading of 2 mm at the rims becomes 3.5 mm when measured at the 28 inch universal circle.
When using an electronic machine or an optical toe-in gauge (almost all alignment machines fall into this category), your technicians or sublet shops
must use the following specifications.
Mechanic
Optical/Electronic Machine
(measured at rims)
(measured @ 28" universal circle)
Front Toe-In
1-3 mm total
1.7-5.2 mm total
Rear Toe-In (M79-85)
1-3 mm per side
1.7-5.2 mm per side
(M79-84)
2-6 mm total
3.5-10.5 mm total
(M85-)
3-5 mm total
5.2-8.7 mm total
