
900 L4-1985cc 2.0L SOHC (1988)
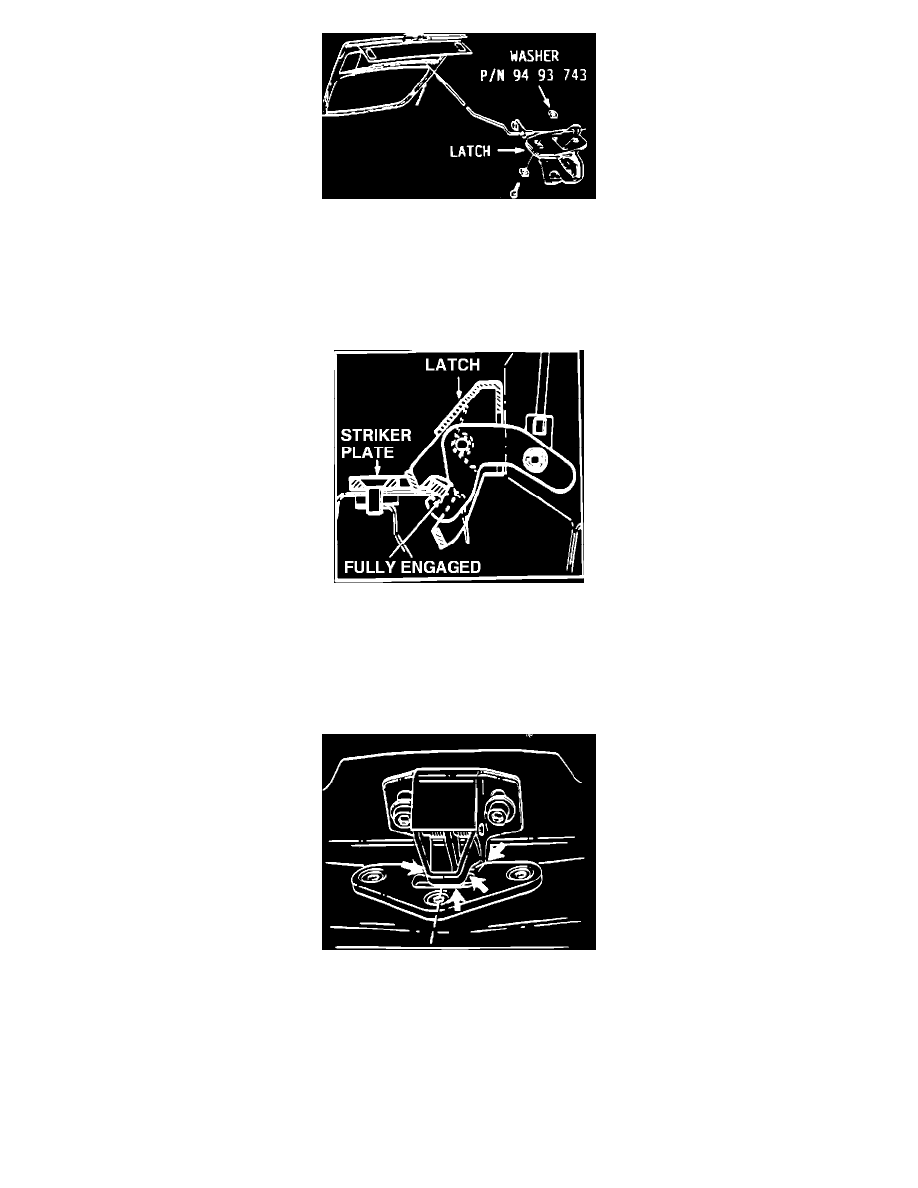
FIGURE 3 - THE NEW WASHER LOCATION.
6.
Reinstall the striker plate.
7.
Mark the position of the latch mechanism.
8.
Remove the latch screws. Install a washer (P/N 94 93 743) on each screw between the hatch and the latch (Figure 3).
FIGURE 4 - THE LATCH IN THE LOCKED POSITION.
9.
Reinstall the latch.
10.
Close the rear hatch. From inside the trunk check the following:
^
The latch is fully engaged against the striker plate (Figure 4).
FIGURE 5 - CENTER THE STRIKER PLATE LATCH (SHOWN FROM INSIDE TRUNK).
^
The latch is centered relative to the striker plate (Figure 5).
^
Be sure there is clearance at the locations indicated in Figure 5.
11.
If necessary, adjust the rear hatch as shown in S.I. 05/88-1055 (A-8, p. 107).