
900 L4-2118cc 2.1L DOHC (1992)
6.
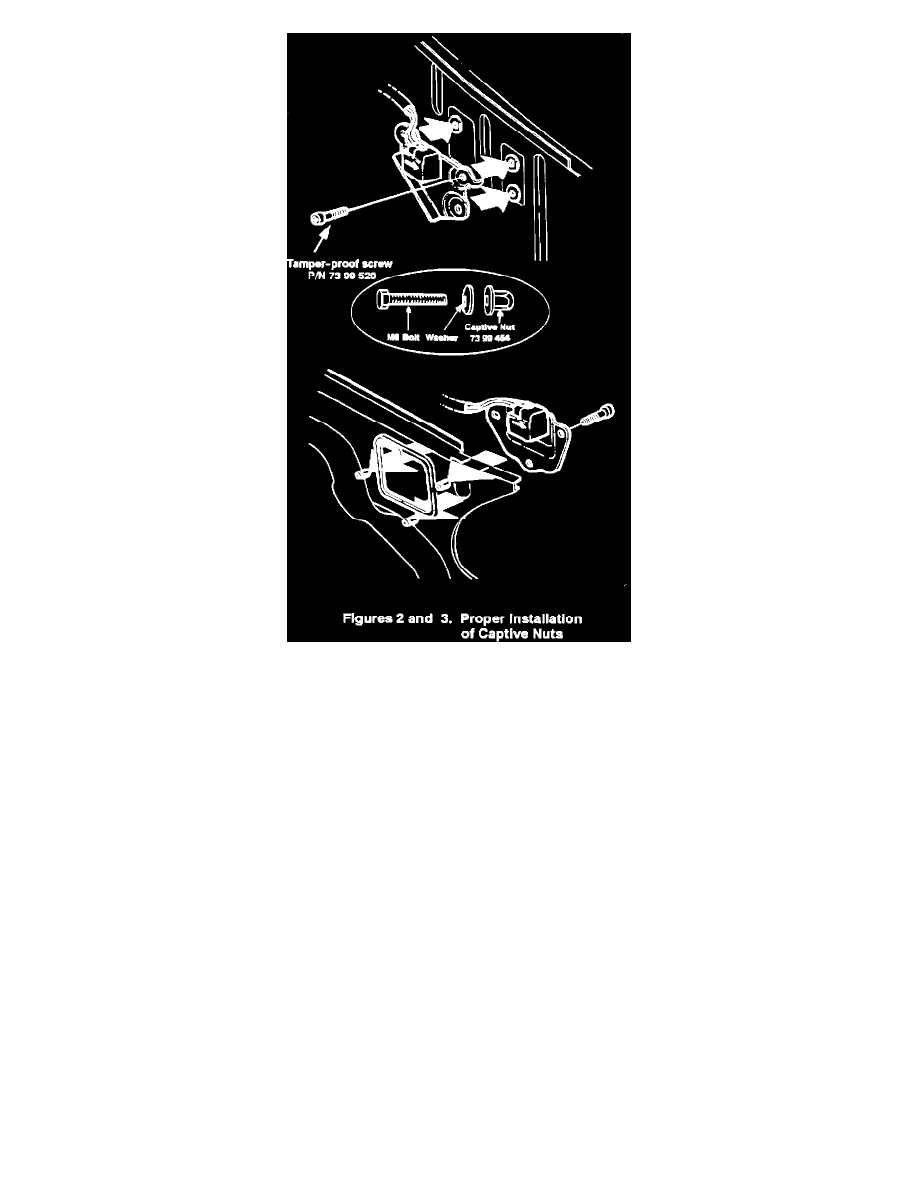
Using a torque wrench, tighten the M6 bolt down against the washer to a torque of 13-15 N-m (9.6 - 11. 1 ft.lbs.). This will draw the captive nut up
tight against the body. See Figures 2 and 3.
7.
With the bolt and washer still installed, use touchup paint to cover the small area of bare metal around the captive nut.
Remove the bolt and washer.
NOTE:
Do not get any paint on the top flange surface of the captive nut.
8.
When mounting a new sensor make certain to use a light coating of dielectric grease and install the sensor using the tamper-proof screws, P/N 73
99 520.
NOTE:
New tamper-proof mounting screws, P/N 73 99 520 are required if surface corrosion that cannot be easily cleaned by wire brushing is present on existing
screws.