
9000 L4-1985cc 2.0L DOHC (1986)
2.
Remove the flap from the vent assembly. See Figure 1, # 2.
3.
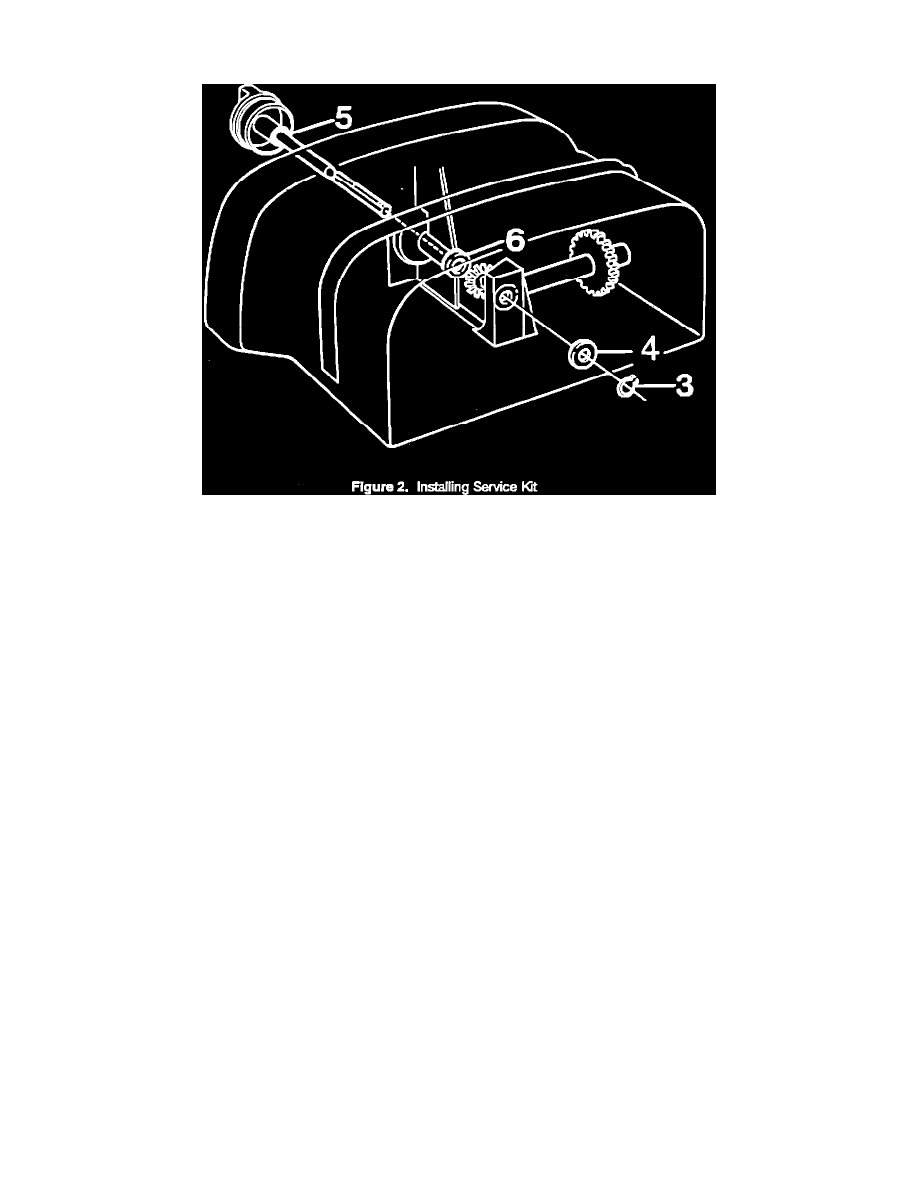
As indicated in Figure 2, remove the circlip (# 3) and washer (# 4) from the adjusting shaft.
4.
Press the adjusting shaft out of the air vent assembly. Using slip-joint pliers if necessary, remove and discard the wavy spring washers installed at
the gear.
5.
Place the O-ring from the service kit behind the knob on the adjusting shaft. See Figure 2, # 5.
6.
Insert the adjusting shaft part way into the air vent assembly. Place the flat washer from the service kit and the gear onto the shaft. See Figure 2, #
6.
7.
Verify that the intermediate shaft for the flap is correctly positioned. Make certain that the knob is within its adjustment range. Press the adjusting
shaft into position.
8.
Place the washer (removed in step 3 above) and circlip from the service kit onto the adjusting shaft.
9.
Refit the flap. Verify that its position coincides with the indication on the front of the air vent.
Warranty Information:
For warranty repairs, use Failure Coding 85443-61-0-01-05. Time allowance is Labor Operation No. 85443 (0.8 hour) plus 0.1 hour straight time.