
9000 L4-1985cc 2.0L DOHC Turbo EFI (1987)
DISASSEMBLY.
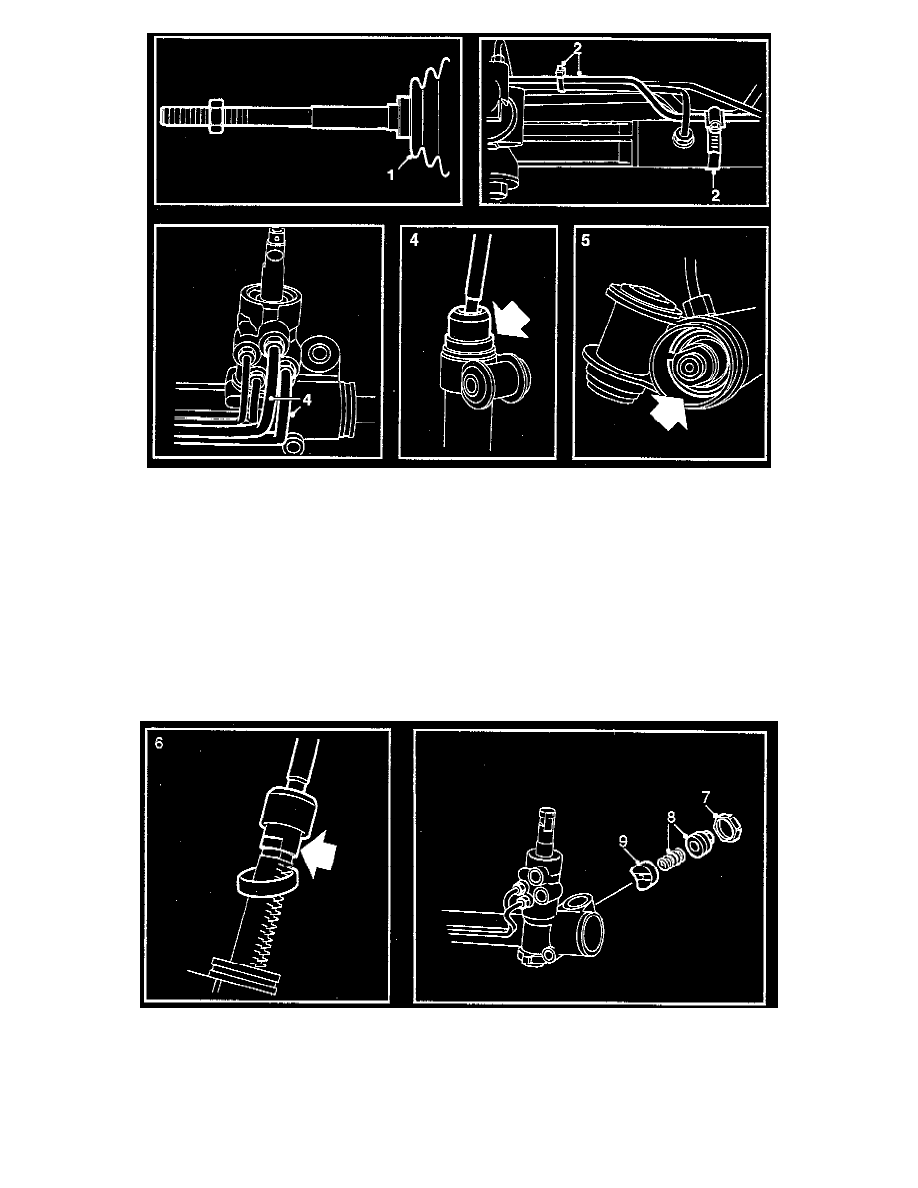
1. Remove the rubber gaiters.
2. Remove the cable tie, clip and capillary tube.
3. Remove the delivery and return pipes and plug the openings in the control valve casing.
4. Remove the inner ball joint furthest from the pinion as follows:
^
Clamp the rack in a soft jaw vice.
^
Tap down the thrust washer.
^
Using the special tool 89 96 480, unscrew the inner ball joint and remove the thrust washer.
IMPORTANT The pinion should absolutely not be used as a counter grip when tightening or slackening the ball joint.
5. Using a small drift, press down on the end of the circlip inside the rack housing and withdraw the clip by means of a pair of pliers or a hook made
of piano wire.
6. Remove the inner ball joint (nearest to pinion) according to the following:
^
Clamp the rack in a soft jaw vice.
^
Tap down the thrust washer.
^
Using tool 89 96 480, unscrew the inner ball joint.
7. Undo the adjusting screw locknut.
8. Remove the adjusting screw, locknut and feather.
9. Lift out the damper yoke. If it proves obstinate, tap the housing gently on the workbench.