
9000 L4-1985cc 2.0L DOHC Turbo EFI (1987)
IMPORTANT To enable the circlip to be removed again in the future, one end must be directly in line with the hole in the rack housing.
22. Screw the inner ball joint complete with end stop on the other end of the rack housing. When refitting the ball joint, special spacer washer, part no.
89 46 360, is fitted so the old peening marks are offset by 90°.
23. Clamp the rack in a soft jaw vice and tighten the inner ball joint using tool 89 96 480, or equivalent.
Tightening torques: 90 Nm (67 ft. lbs.)
IMPORTANT The pinion should absolutely not be used as a counter grip when tightening or slackening the ball joint.
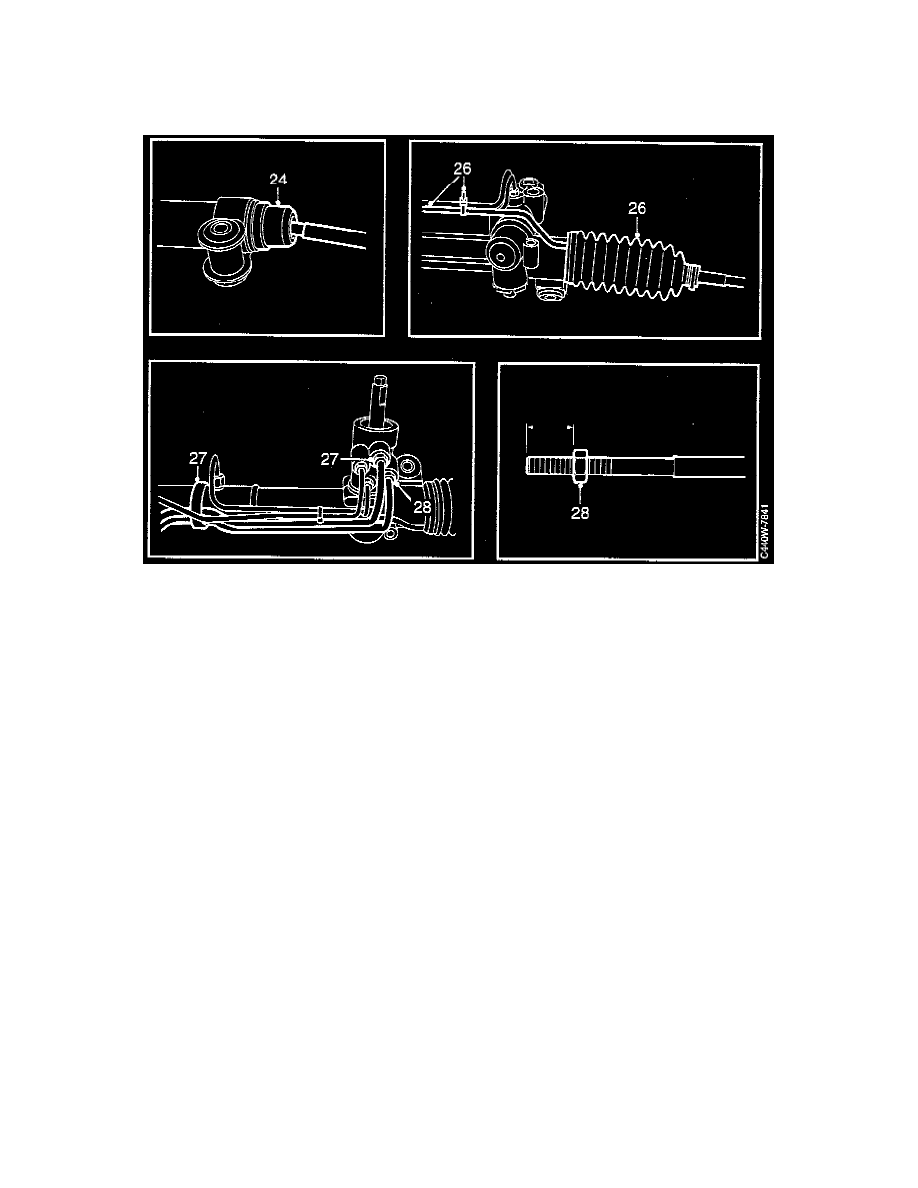
24. Lock the inner ball joint by tapping down the tabs onto the two flats of the rack. Push the end stop into position.
25. Refit the rubber gaiters and secure the capillary tubes with a cable tie.
26. Reconnect the flow and return pipes and fit the clamp.
27. Screw on the locknuts to the same distance as that measured before their removal.
Tightening torques: 90 Nm (67 ft. lbs.)
IMPORTANT: The pinion should absolutely not be used as a counter grip when tightening or slackening the ball joint.
24. Lock the inner ball joint by tapping down the tabs onto the two flats of the rack. Push the end stop into position.
25. Refit the rubber gaiters and secure the capillary tubes with a cable tie.
26. Reconnect the flow and return pipes and fit the clamp.
27. Screw on the locknuts to the same distance as that measured before their removal.