
9000 Aero L4-2290cc 2.3L DOHC Turbo EFI (1996)
INSTALLATION
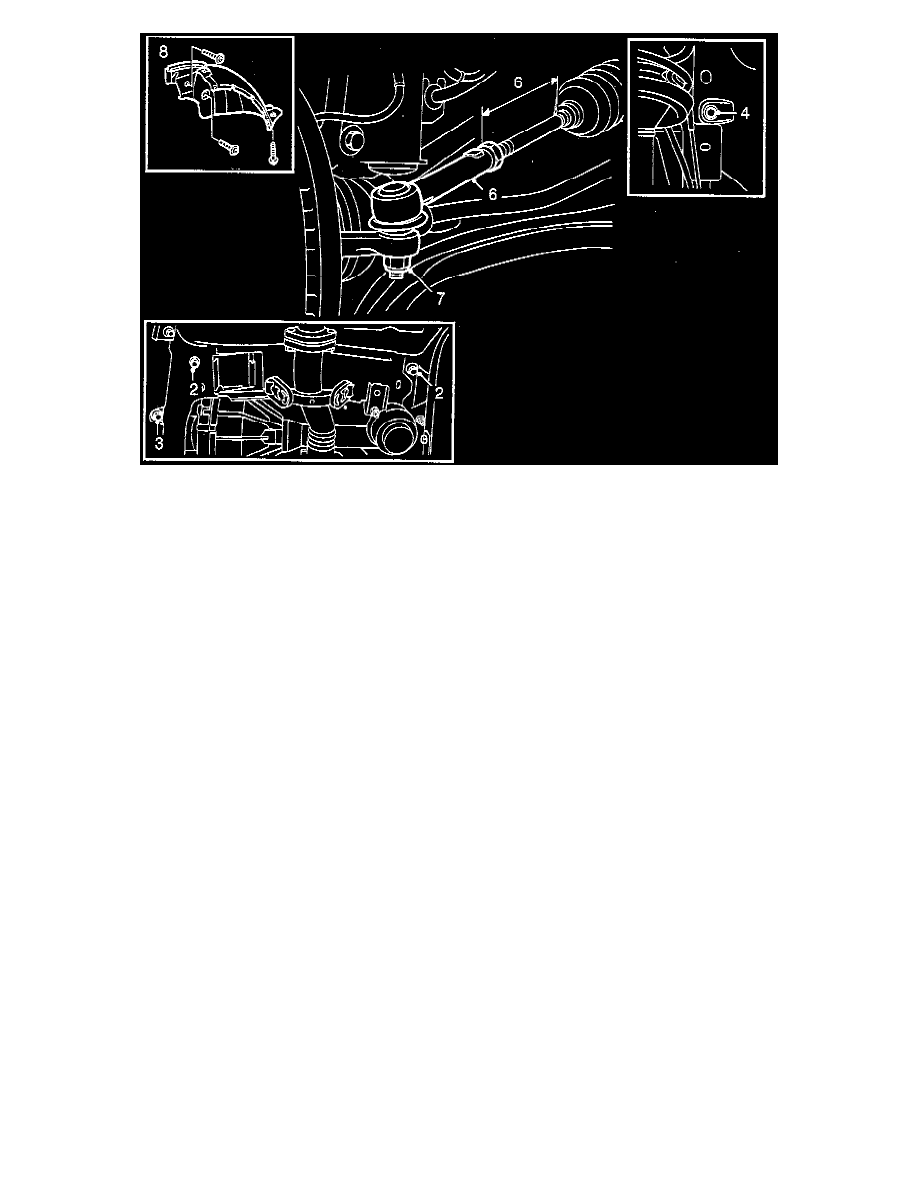
1. Lift the rack and pinion assembly through the lefthand wheel arch. Take care not to damage the rubber gaiters on the rack and ensure that the
control valve does not snag on hoses or electrical leads inside the engine compartment.
2. Tighten the two bolts securing the steering gear (1).
Tightening torques: 70 Nm (52 ft. lbs.)
IMPORTANT On cars to chassis No. H 1003410, from 1987, a 2 mm thick washer sits between the left bracket of the assembly and the body.
3. Position the stanchion between the subframe and the wheel arch on the righthand side and fit the lower retaining bolts (2).
4. Tighten the top fixing bolt.
5. Tighten the lower fixing bolts
6. Screw the track rod end onto the track rod following the measurement noted previously, but do not tighten the lock nuts.
7. Tighten the nuts securing the track rod ends to the steering swivel members.
Tightening torques: 55 Nm (41 ft. lbs.)
8. Refit the rear part of the wing liner on the righthand side.
9. Refit the road wheels.
Tightening torques: 120 Nm (89 ft. lbs.)