9000 Aero L4-2290cc 2.3L DOHC Turbo EFI HO (1997)

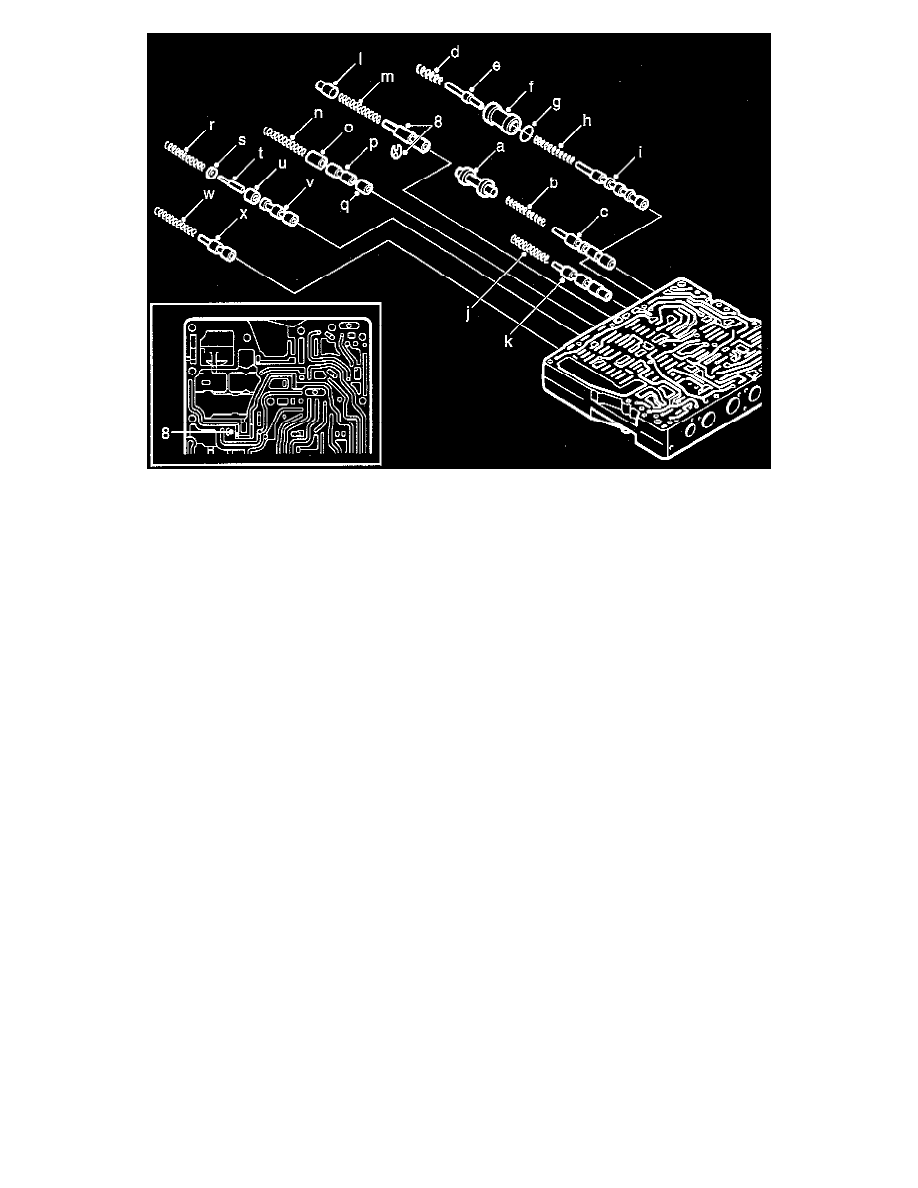
7. On all models, lift out the valves and place them on the bench in the same order as they are installed in the valve body so that they can be
correctly reinstalled.
-
On models with turbocharger, the shift sequencing valve has an O-ring, if this is not OK, upshift does not work.
-
On all models, the following parts are removed:
CAUTION: Do not mix up the parts.
a. Spacer, shift valve 3-4
b. Spring, shift valve 3-4
c. Shift valve 3-4
d. Spring, shift sequencing valve 1-2-3
e. Spacer, shift sequencing valve 1-2-3
f.
Cylinder, shift sequencing valve 1-2-3
g. O-ring, shift sequencing valve body valve 1-2-3
h. Spring, shift sequencing valve 1-2-3
i.
Shift sequencing valve 1-2-3
j.
Spring, lock-up valve 1+R
k. Lock-up valve 1+R
l.
Spacer, modulator valve
m. Spring, modulator valve
n. Spring, downshift valve 4-3
o. Spacer, downshift valve 4-3
p. Downshift valve 4-3
q. Spacer, downshift valve 4-3
r.
Spring, traction valve 3-4
s. Spring cup, traction valve 3-4
t.
Pin, traction valve 3-4
u. Spacer, traction valve 3
v. Traction valve 3-4
w. Spring, traction valve 4-3
x. Traction valve 4-3
8. Remove the clip from the modulator valve.
-
Then remove the valve.
Upper Section
NOTE: Component identifier numbers used in the following illustrations relate to specific steps in the procedures below.
