
9000 CS L4-2290cc 2.3L DOHC Turbo EFI (1996)
6. Heat using a hot air gun and remove the bearing race.
7. Lift out the governor together with the governor housing.
NOTE:
^
When cleaning the governor, only undo the retaining screws so that the governor can be removed.
^
Check that the governor valve moves freely.
^
If the valve is stuck, dismantle the governor and thoroughly clean the parts.
^
Lubricate the parts using automatic transmission fluid before assembly.
^
Install the governor in its housing.
^
se a TORX TX27 wrench.
^
Tighten to 10 Nm (7.3 ft. lbs.).
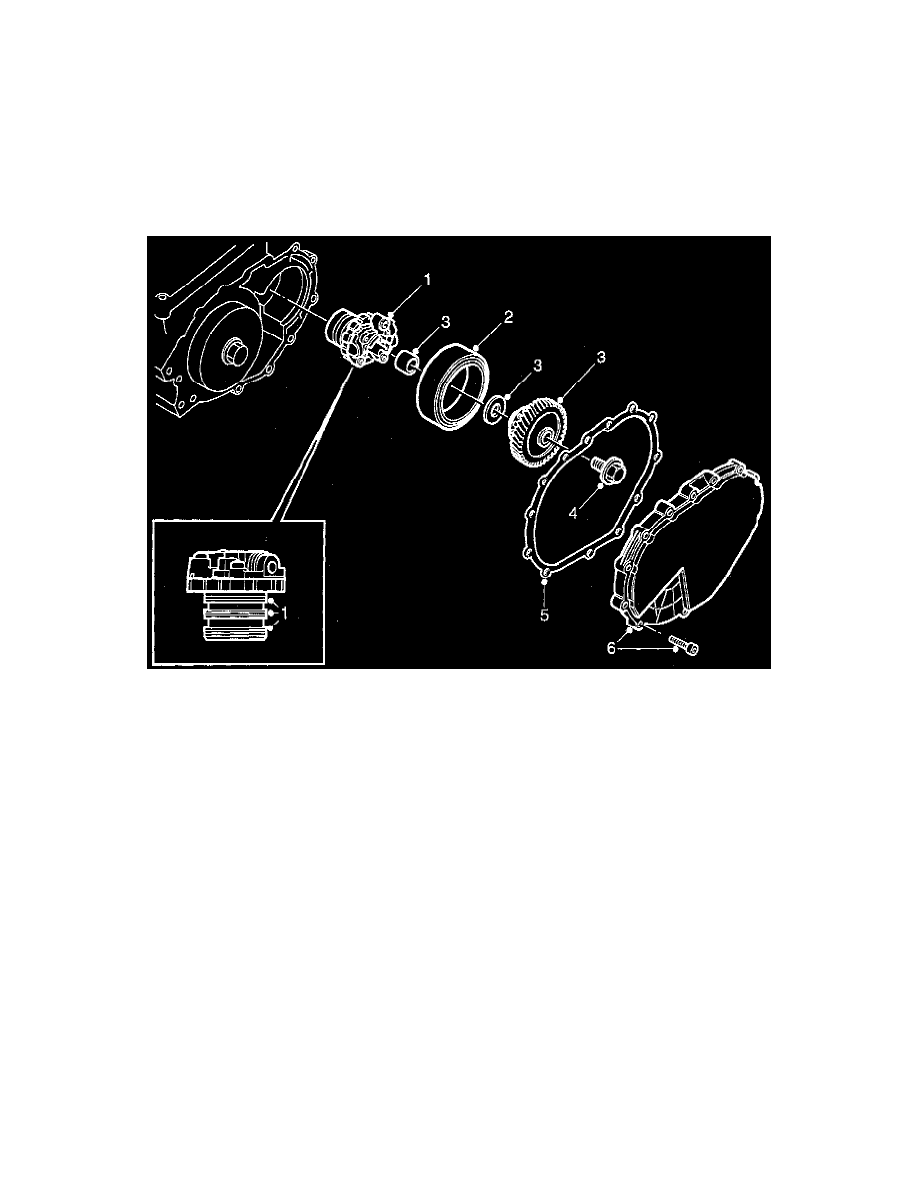
Installation
1. Apply Vaseline to the seals and carefully install the complete governor.
NOTE: When the governor is correctly installed, the governor hub should be level with the splines on the pinion shaft.
2. Heat the housing with a suitable hot air gun for 3-5 min., to about 70° C, and install the bearing race.
3. Install the spacer sleeve and washer to the pinion shaft and install the gear.
4. Insert the parking pawl and tighten screw.
-
A flange screw has been introduced.
-
When installing, any screw without a flange should be replaced with the newer flange screw.
-
There is a long and a short version of this screw.
-
Tightening torque, 24 mm long screw: 150 Nm (110 ft. lbs.).
-
Tightening torque, 70 mm long screw: 170 Nm (124.7 ft. lbs.).
5. Apply a thin coat of Vaseline to the gasket and install it.
6. Install the intermediate gear cover with the 13 screws (screw size = TORX TX27).
Tightening torque: 10 Nm (7.3 ft. lbs.)
7. Install fender liner and wheel.