
9000 CSE L4-2290cc 2.3L DOHC Turbo EFI (1995)
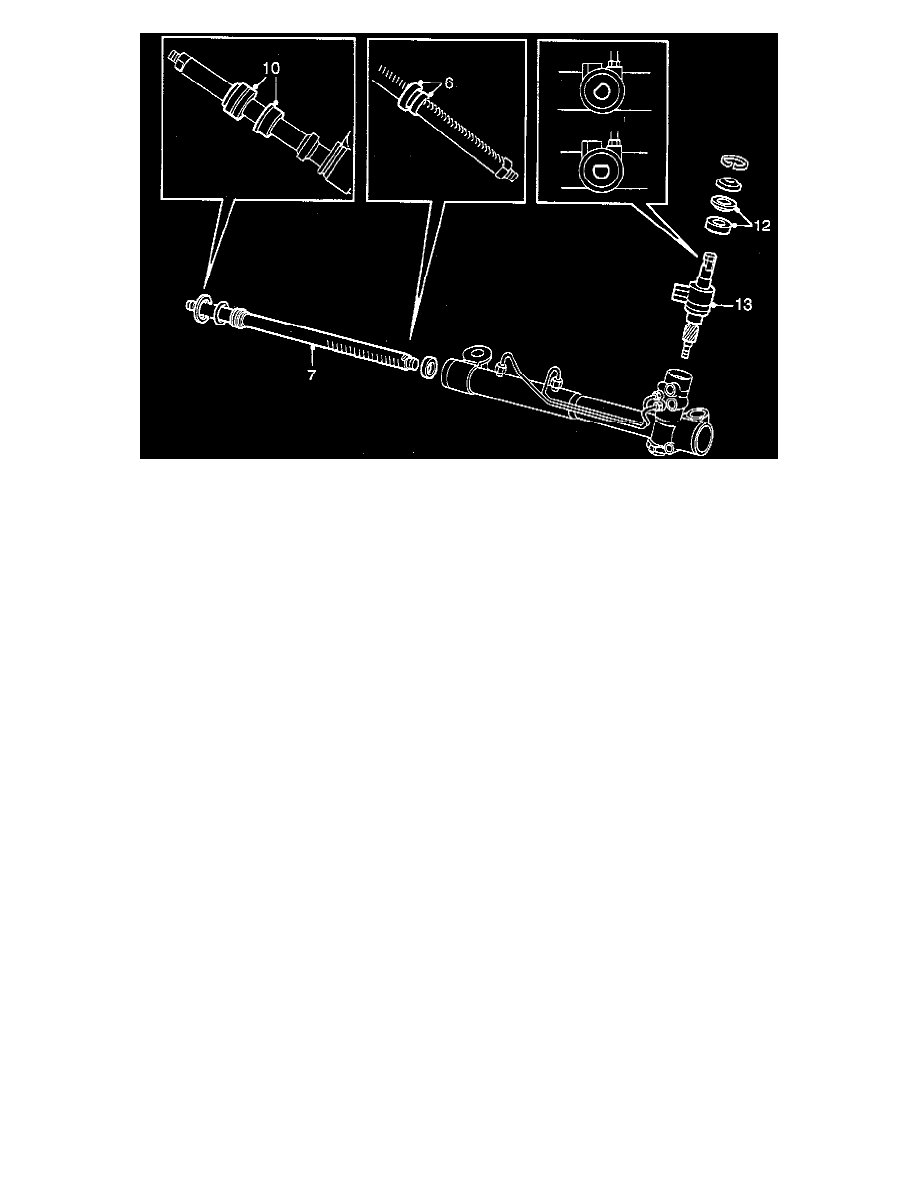
6. Slide the inner hydraulic seal onto the rack. First the rubber seal, then the plastic ring. Use tool 89 95 946 to prevent the rubber seal being
damaged by the teeth on the rack.
7. Insert the rack into the housing.
8. Press the rack into the housing, using a 7 mm socket and a short extension piece. Use tool No. 83 90148 (special tool) as a support.
Maximum pressure force: 2200 N (506 lbs.)
9. Fit a new O-ring on the outer seal retainer.
NOTE: Inspect the seal. New seal are fitted with tool 89 96 407.
10. Slide the bush (1) and the outer seal retainer (2) onto the rack.
11. Center the rack and rotate it to bring its teeth into mesh with those on the pinion.
12. Fit the needle bearing and seal onto the valve. Press the control valve as follows:
^
Hold the valve body with the slot in the end of the shaft pointing diagonally up to the left (1 o'clock) as the teeth mesh with each other.
^
Slide in the valve as far as it will go and then tap it home using sleeve 78 41 067 (special tool). The pinion should now be rotated to bring the
slot in the end of the shaft to the "12 o'clock" position when the rack is centered.
^
centered circlip.