
9000 Hatchback L4-2290cc 2.3L DOHC Turbo EFI (1994)
20
Remove acoustic insulation panels from under the facia. Remove panels from center console.
21
From year model 1988
Remove left-hand and right-hand floor ducts.
22
Remove screws securing left-hand and right- hand side defroster ducts.
23
Cut the cable tie securing the wiring harness to the left-hand air duct (right-hand drive cars in right-hand air duct).
24
Unplug loudspeaker connections.
25
Remove screws securing the instrument panel and lift it out.
26
Detach cable tie from heater housing so that the electrical distribution box can be lifted down to the floor of the car.
27
Lift down the combined instrument.
Important : Protect the glass so that it is not scratched.
28
Remove the air duct and the left-hand and right-hand defroster vents.
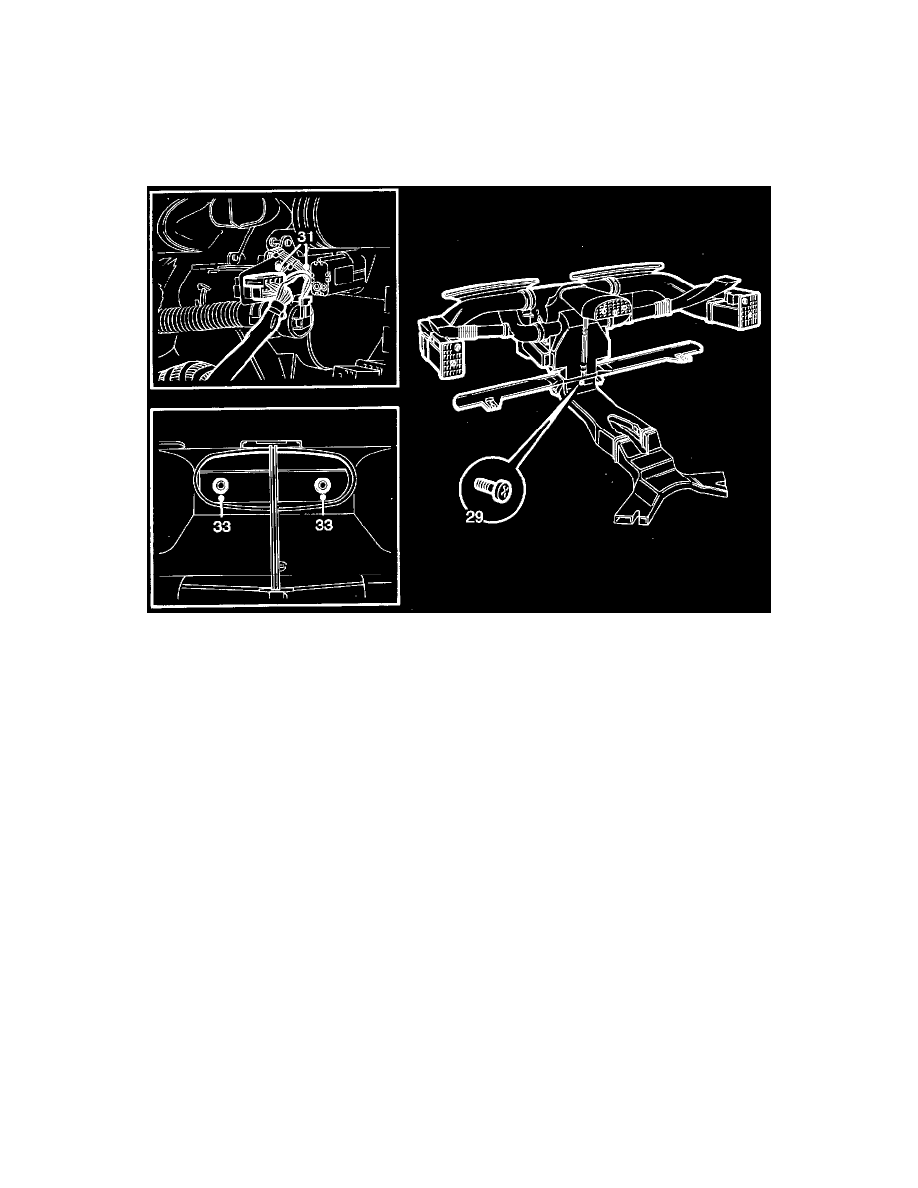
29
Undo the screws and lift away the air duct which goes to the rear floor.
30
Unscrew the plastic holder securing the wiring loom under the heater housing.
31
Unplug connectors for servomotor fan motor and blended air sensor (cars with ACC only).
32
Remove the floor vents.
33
Remove screws in heater housing.
34
Detach clips from engine compartment and move cable entry to one side.
35
Lift the housing diagonally up. The underpart is located in a groove between the bulkhead and the facia subframe.
Picture shows year model 1985 - 1986