
9000 Hatchback L4-2290cc 2.3L DOHC Turbo EFI (1994)
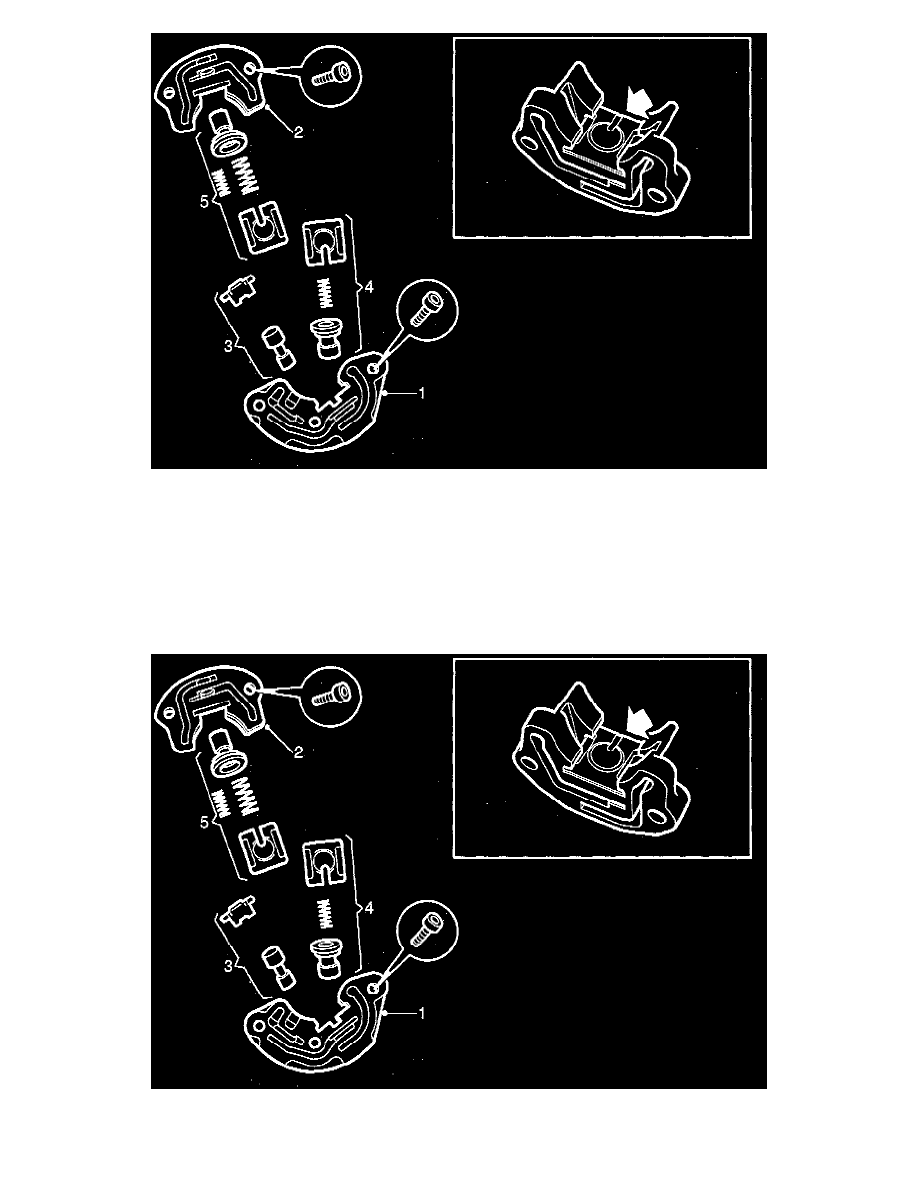
Disassembly
1. Remove stages 1 and 2, black screws.
2. Remove stage 3, shiny screws.
3. Stage 1 is held in place with a clip which is located at the waist of plunger and which also limits travel.
4. Stage 2 has a spring loaded washer which holds the plunger in position.
5. Stage 3 has a spring loaded washer which holds the plunger in position.
6. Check if the steel seal and both the rubber seals are damaged. Change them if necessary.
Check that all moving parts move freely. If there are scratches which cause moving parts to seize, these scratches must be removed or the
scratched part be.changed. Alternatively, the entire governor may be changed.
Assembly
1. Install stages 3, 2 and 1. Parts can only be installed one way.