
9000 Hatchback L4-2290cc 2.3L DOHC Turbo EFI (1994)
-
Remove the lefthand front wheel and the front part of the wing liner.
-
Detach the lower ball joint on the suspension arm.
-
Detach the rubber gaiter.
-
Split the joint and attach a protective cover to the universal joint and driver.
2. Remove the lefthand driver by first undoing the five bearing cover screws.
-
Wrench size = 13 mm
3. Withdraw the inner driver using slide hammer tool No. 83 90 270 and puller tool No. 87 90 354, or equivalent.
4. Remove the shims.
5. Remove the circlip using circlip pliers.
6. Press the inner driver out of its bearing seat using a press.
7. Pry out the shaft seal using a screwdriver.
8. Tap out the ball bearing.
9. Pull off the O-ring.
Installation
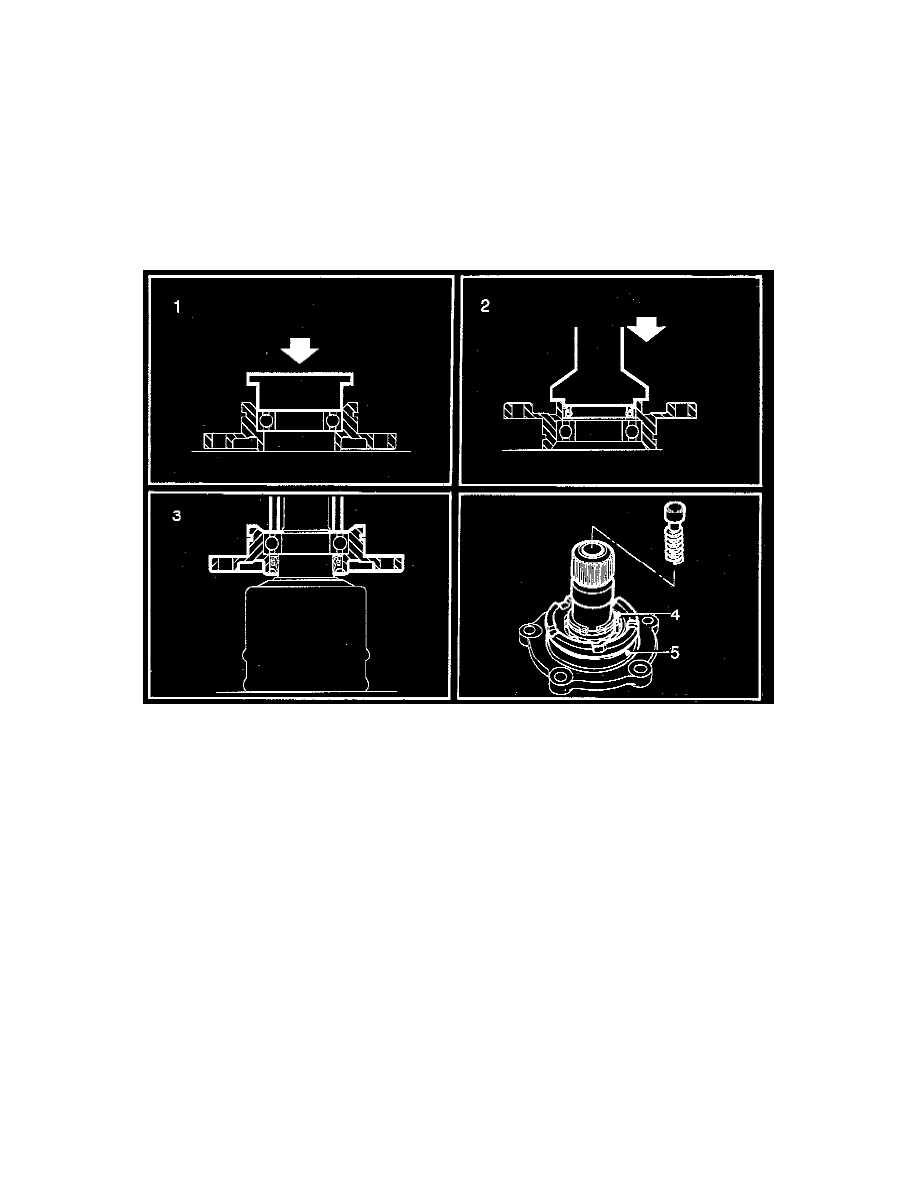
1. Press the ball bearing into the bearing seat using driver tool No. 78 41 141, or equivalent, in a press.
2. Press in the shaft seal, from the opposite side, into the bearing seat using driver tool No. 87 90 800, or equivalent, in a press.
3. Using driver tool No. 78 41 067, or equivalent, press the inner driver into the bearing seat.
4. Secure using the circlip.
5. Install the O-ring in the bearing seat.
6. Install the shims.
7. Install the complete driver and tighten the screws.
CAUTION:
^
Keep area clean when working with universal joints.
^
Sand or dirt, even in small quantities, considerably reduces the service life of universal joints.
8. Remove the protective covers and fill the driver with about 80 grams of suitable grease.
-
Then install the drive shaft.
9. Install the universal joint gaiter.
-
If the clamp was disposable, use a new clamp.
10. Install the three screws securing the ball joint to the suspension arm.
-
Use new locknuts.
Tightening torque: 26-34 Nm (19-25 ft. lbs.).
11. Install the wing liner and front wheel.