
900 S Hatchback L4-2290cc 2.3L DOHC EFI (1997)
Valve Spring: Service and Repair
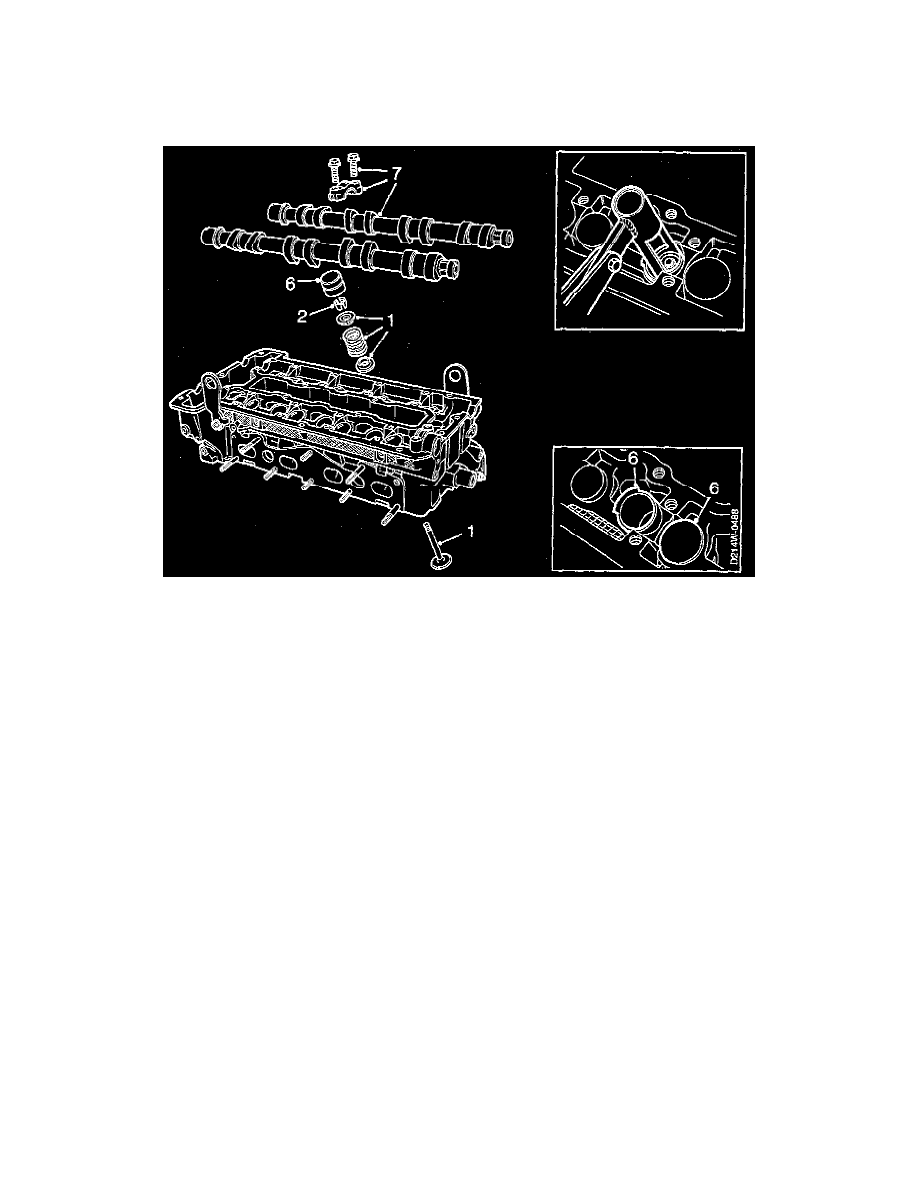
Installation
Cylinder Head Removed
NOTE:
^
Step numbers below refer to numbers used in the illustrations.
^
Before assembly, lubricate all the parts and replace any defective valve guide seals.
CAUTION: Make sure that the cylinder head is supported on blocks to prevent damage to the valves when the camshafts are tightened down.
1. Install the valves and springs.
2. Use valve spring compressor tools No. 83 93 761 and anvil 83 93 779, or equivalent, and refit the collets.
3. Place measuring head tool No. 83 93 753, or equivalent, across two of the camshaft bearing seats with the depth gauge against the end of the valve
stem.
4. Check that the maximum gauge depth of 20.5 mm actually reaches down to the end of the valve stem (noticed by the measuring head not
bottoming against the bearing seat closest to the depth gauge).
5. Then check that the minimum gauge depth of 19.5 mm does not reach down to the end of the valve stem.
-
The correct valve clearance is between the minimum and maximum gauge depths.
-
If the clearance is less than the minimum, the valve stem must be shortened and if it is greater than the maximum the valve seat must be
reground.
6. Remove the protective sleeves and install the valve
7. Install the camshafts, bearing caps and bolts, beginning where the cams lobes point downwards and press on the tappets.
-
Bearing caps marked 1-5 for the inlet side, 6-10 for the exhaust side.
-
Tighten camshaft bearing cap bolts to: 15 Nm (11 ft. lbs.).
NOTE: The black bolts have an oilway and should be fitted on the spark plug side.
8. Line up the marks on the camshafts with their timing marks.
Cylinder Head Installed