
900 S Sedan V6-2498cc 2.5L DOHC (1995)
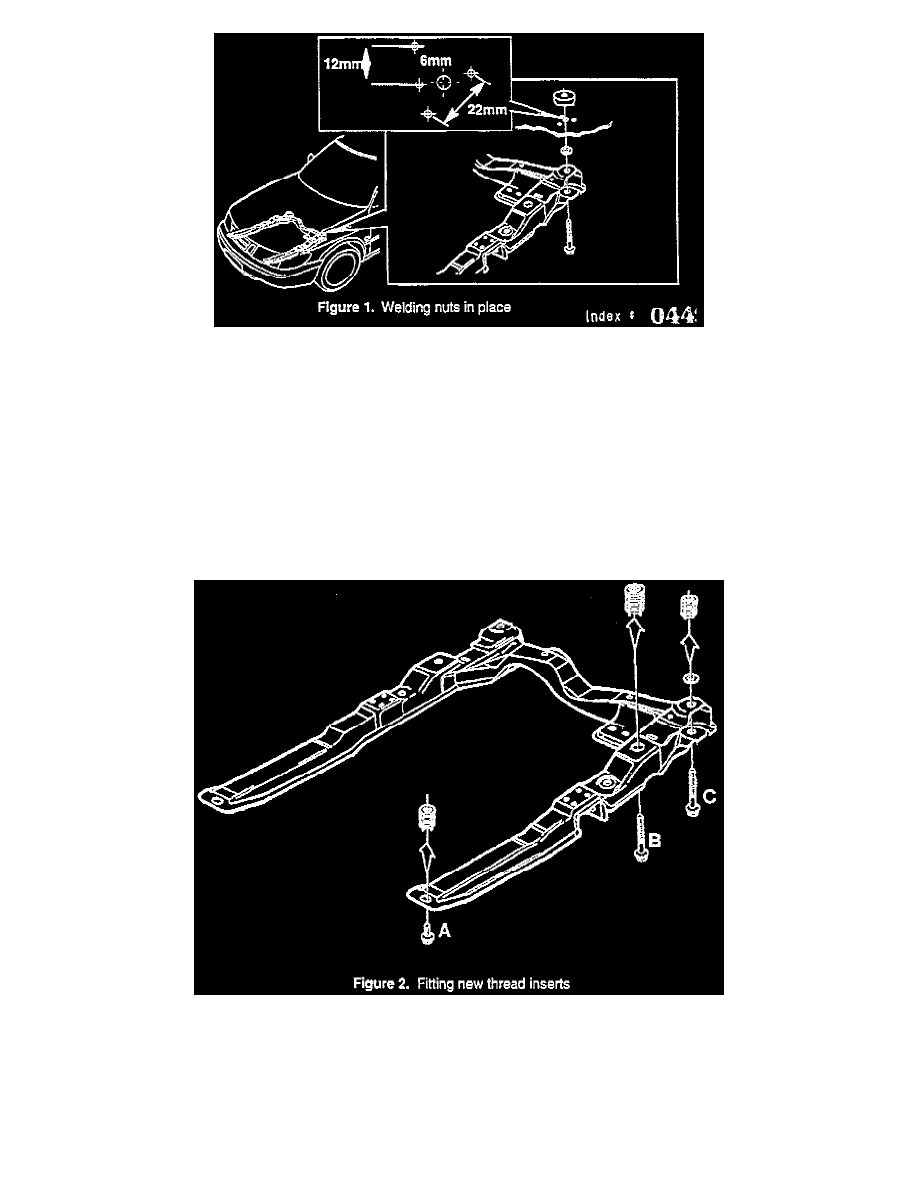
2.
Drill three holes in accordance with the measurements shown in the diagram, Figure 1.
3.
Center the weld nut.
4.
Plug weld the nut through the three holes in the body. Remove the bolt if it is still in the weld nut.
5.
Go over the welds with a grinder and paint them, using appropriate primer.
6.
Apply rust inhibitor around the welds and inside the subframe member.
7.
Fit a new thread insert. See below.
Fitting new thread Insert:
1.
Drill out the old thread. Use a drill with 16.5 mm on the front (Figure 2.A) and rear (Figure 2.0) attachments and a drill with 18.5 mm on the
middle (Figure 2.8) attachment.
2.
Tap the holes. Use tap with dimension 18 x 1.5 mm on the front (Figure 2.A) and rear (Figure 2.0) attachments and the 20 x 1.5 mm tap for the
middle attachment.
3.
Apply Loctite 242 to the thread insert and fit it in place.