900 S Sedan V6-2498cc 2.5L DOHC (1995)

Radiator: Service and Repair
Installation
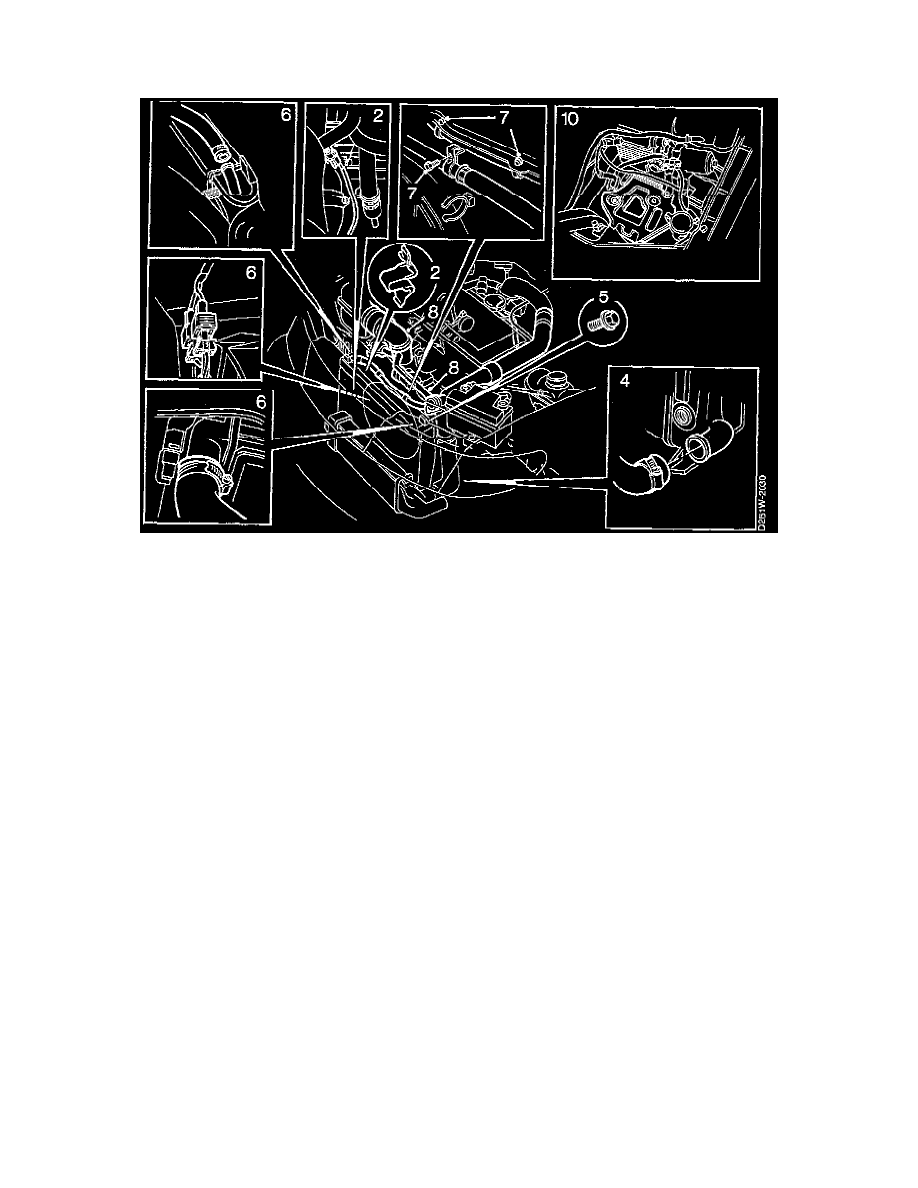
NOTE: Step numbers below refer to numbers used in the illustrations.
REMOVAL
1. Spread some Vaseline on the radiator's rubber bushings.
2. Push down the radiator and refit the clamps.
-
Install the clips for the A/C compressor.
3. On models with automatic transmission, install the gearbox's oil pipes to the oil cooler, then tighten to: 25 Nm (18.5 ft. lbs.).
-
Do not forget the screw which secures the pipes to the radiator.
4. Check that the radiator's drain plug is tightened to: 4 Nm (3 ft. lbs.).
-
Install the lower radiator hose to the radiator.
5. Install in the radiator fan cover over the radiator and tighten the two screws.
6. Connect the radiator fan and install the upper radiator hoses.
7. Install the clips for the radiator's breather hose to the radiator crossmember and install in and tighten the screw to the servo pump's oil pipe.
8. Install the bypass hose together with the intake hose and the pressure pipe between the charge air cooler and the throttle body.
9. Fill up with coolant and check that the system does not leak.
10. Install the battery shelf.
-
Install and reconnect the battery.
11. On models with automatic transmission, check the oil level in the gearbox and top it up if necessary.
12. On all models, install the condenser (A/C).
13. Install the engine oil cooler (as equipped).
14. Install the grille.
15. Install the charge air cooler.
16. Bleed the system as follows:
-
Fill the system to the MAX level, refit the pressure lid, start the engine and run it warm, preferably at varying speeds, until the radiator fan
starts.
-
Remove the pressure lid and fill up to MAX again.
-
Install the pressure lid and let the engine run at varying speeds until the radiator fan has started a further three times.
-
Switch off the engine and fill up to MAX again if necessary.
