
900 S Sedan V6-2498cc 2.5L DOHC (1995)
5.
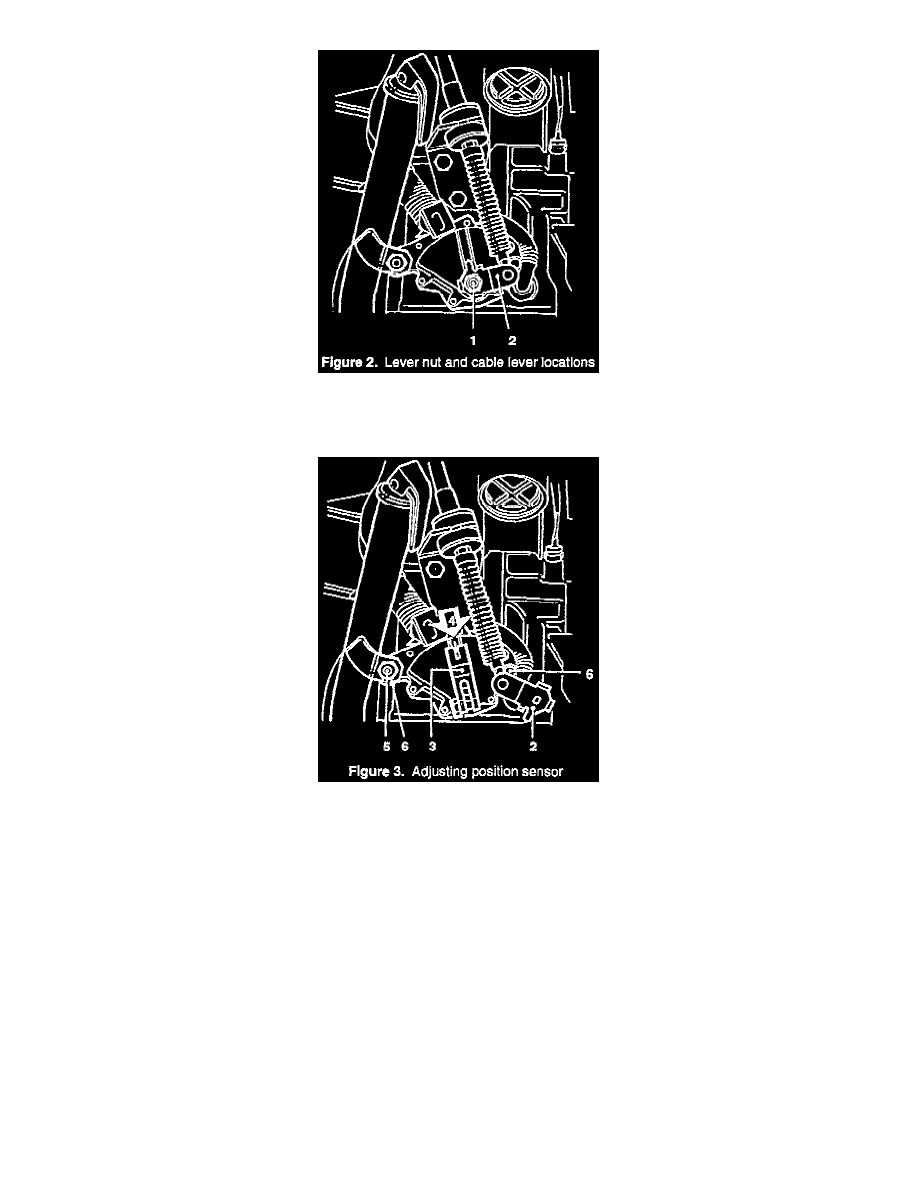
Move the gear selector lever to position 1 and undo the lever nut (item 1, Figure 2) from the cable lever (item 2, Figure 2).
6.
Move the gear selector lever to N. Remove the cable lever (item 2, Figure 2) from the stud.
7.
Install the adjusting tool (item 3, Figure 3).
8.
Check to see if the line on the gear position switch is visible in the center of the tool groove (item 4, Figure 3).
9.
If the sensor line does not align with the center of the tool groove, remove the dipstick tube retaining nut (item 5, Figure 3). Otherwise, go to step
13.
10.
Turn the tube aside and loosen the switch lock nuts (item 6, Figure 3, two places).
11.
Turn the switch so that the line (item 4, Figure 3) is visible in the center of the tool. Tighten the lock nuts.
Tightening torque 25 Nm (18.5 ft. lbs.).
12.
Lubricate the dipstick tube 0-ring using acid-free petroleum jelly.
13.
Remove the adjusting tool and refit the cable lever.
14.
Retit the dipstick tube and retaining nut (it removed in step 9). Tighten the nut.
Tightening torque 25 Nm (18.5 ft. lbs.).