
900 SE Convertible V6-2489cc 2.5L DOHC EFI (1997)
Radius Arm: Service and Repair
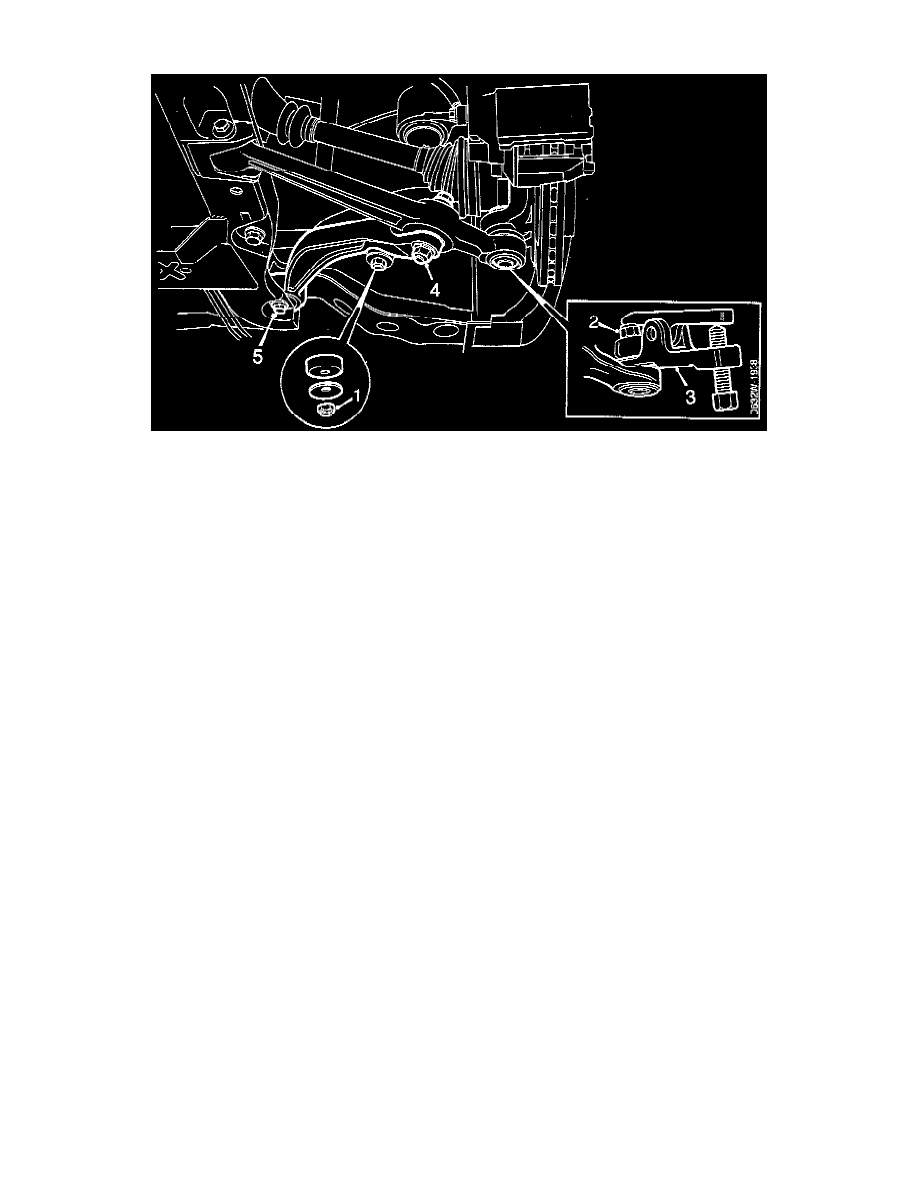
NOTE: The numbers found below in parenthesis ( ), refer to that number (and that part/component) found in the illustration.
REMOVAL
1. Raise the car and remove the wheel.
2. Undo the anti-roll bar nut (1).
3. Undo the ball joint nut (2). Press out the ball joint (3), using special tool 89 96 696.
4. Undo the bolt securing the support arm to the suspension arm (4).
5. Unscrew the bolt securing the support arm to the subframe (5).
6. Remove the support arm, using an iron bar as a lever.
INSTALLATION
1. Install the new support arm and tighten the bolt securing it to the subframe, using a torque wrench.
Tightening torque: 100 Nm (73.8 ft. lbs.) + 75-90°.
2. Install the bolt securing the support arm to the suspension arm and tighten it, using a torque wrench.
Tightening torque: 92 Nm (67.9 ft. lbs.).
3. Press the ball joint into the right position and install the nut securing it. Tighten the nut, using a torque wrench.
Tightening torque: 75 Nm (55.4 ft. lbs.).
4. Tighten the anti-roll bar nut, using a torque wrench.
Tightening torque: 10 Nm (7.4 ft. lbs.).
5. Install the wheel and tighten the wheel bolts, using a torque wrench.
Tighten torque: 105-130 Nm (77.5-95.9 ft. lbs.).
6. Lower the car to the floor.