
900 SE Convertible V6-2498cc 2.5L DOHC (1995)
6.
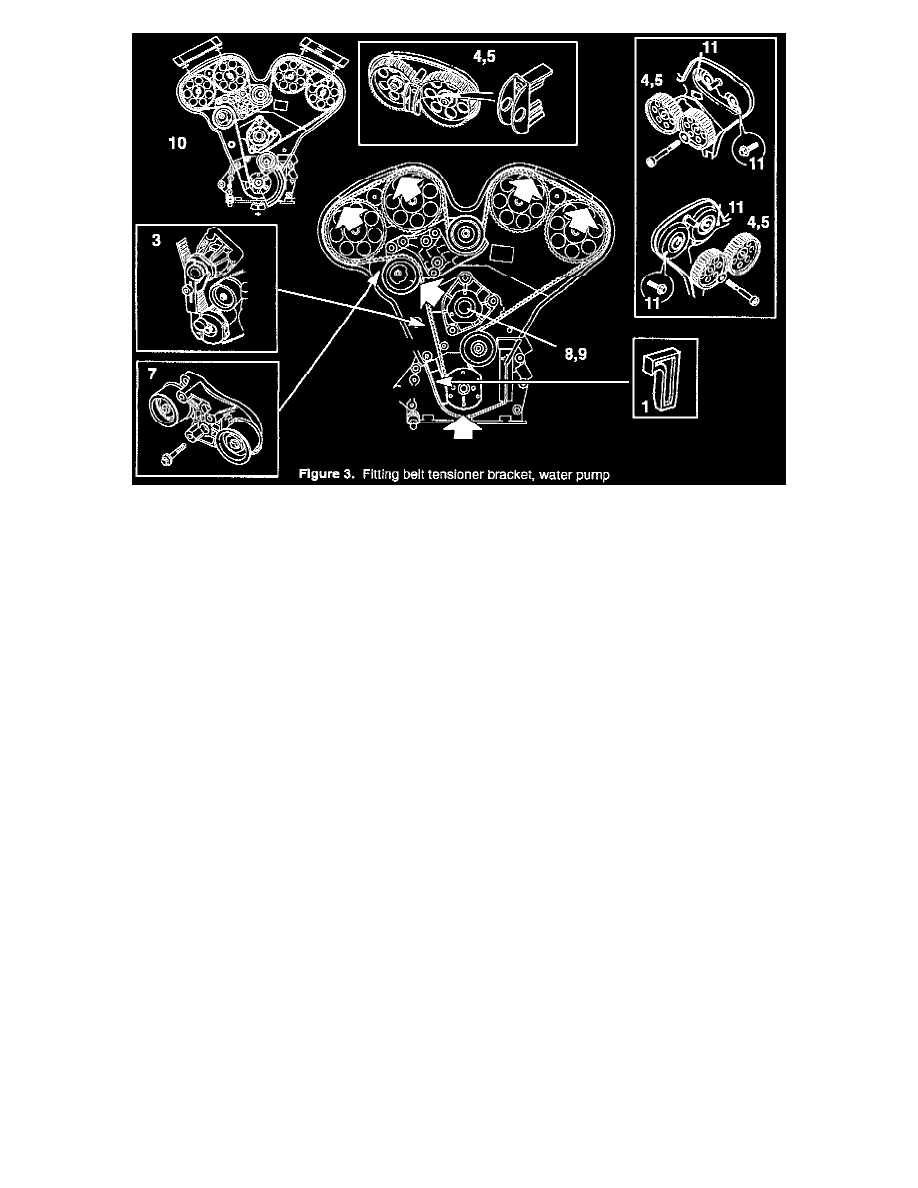
With green locking tool (included in P/N 83 94 926 cam locking kit) still in place between camshaft sprockets 3 and 4, undo the bolts and remove
the tool and camshaft sprockets. See Figure 3, item 4.
7.
Remove the rear timing cover retaining bolts one at a time and apply threadlocking compound, Loctite 242 to the bolts. Reinstall and tighten the
bolts. See Figure 3, item 11.
8.
Fit the new thicker camshaft sprockets with new bolts. Check the position against the markings on the rear timing cover. Secure camshaft sprockets
3 and 4 with the green locking tool (included in P/N 83 94 926 cam locking kit) and tighten the bolts. See Figure 3, item 5 above.
Tightening torque: 37 ft.lbs. (50 Nm) + 60°.
** 9.
Fit the belt tensioner bracket. See Figure 3, item 7 above. Remove upper guide roller B to make it easier to install the timing belt.**
Tightening torque: 30 ft.lbs. (40 Nm).
10.
Remove the water pump. See Figure 3, item 8 above.
11.
Clean the sealing surfaces and fit a new 0-ring. Smear acid-free Vaseline on the sealing surfaces and 0-ring and fit a new water pump. See Figure
3, item 9 above.
Tightening torque: 18.5 ft.lbs. (25 Nm).
12.
Turn the crankshaft forward to just before 0° and fit crankshaft locking tool KM800-10 (included in P/N 83 94 926 cam locking kit) on the
crankshaft. Carefully turn the crankshaft in the same direction of rotation as the engine until the arm rests against the flange of the water pump and
then tighten it.
** 13.
Temporarily remove the locking tool from the crank to make it easier to install the timing belt.**