
900 SE Hatchback L4-1985cc 2.0L DOHC Turbo EFI (1997)
Constant Velocity Joint: Service and Repair
Cleaning
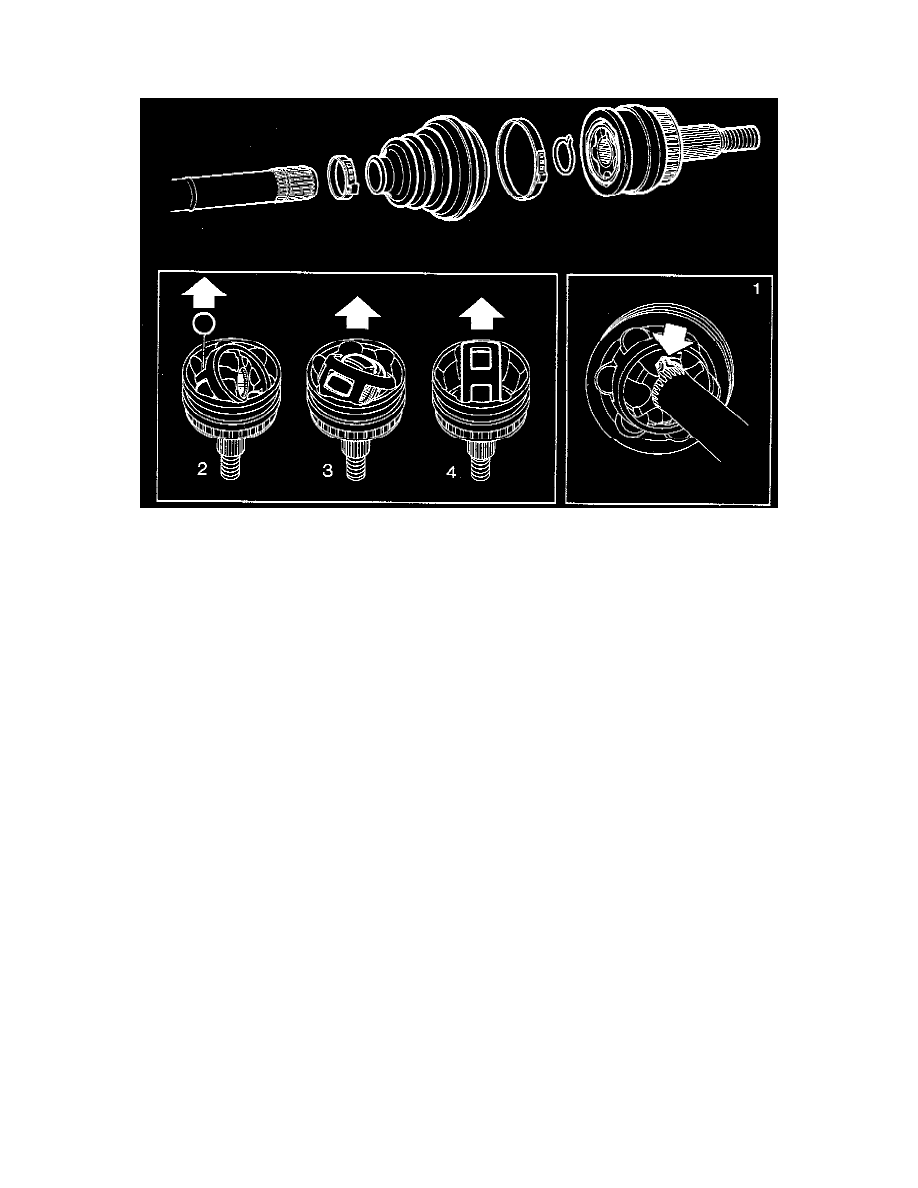
NOTE: The numbers found below in parenthesis ( ), refer to that number (and that part/component) found in the illustration.
DISASSEMBLY
1. Make sure that the shaft and gaiter are clean. Clamp the drive shaft in a vice.
2. Undo the gaiter clips on the constant velocity joint and slide the rubber gaiter along the shaft.
NOTE: Remove all grease from the constant velocity joint.
3. Open the circlip (1) and tap the constant velocity joint off the shaft, using a hammer and brass drift.
4. Rotate the bearing to allow removal of the steel balls (2).
5. Rotate the inner cage for the steel balls to permit its removal from the outer raced (5).
6. Lift out the outer race (4).
7. Wipe the balls and other parts clean.
ASSEMBLY
1. Install a new rubber gaiter on the shaft.
2. Position the outer race in the joint.
3. Install the inner cage in the outer race and rotate it so that the steel balls can be inserted.
4. Press each ball into place.
5. Pack the constant velocity joint with 80 grams of fresh Molycote Rapid G VN24612C grease, or the equivalent.
6. Press the drive shaft into the constant velocity joint.
7. Position the new rubber gaiter correctly and secure it with new retaining clips.