
Astra L4-1.8L (2009)
13. For vehicles equipped with A/C, install the TXV.
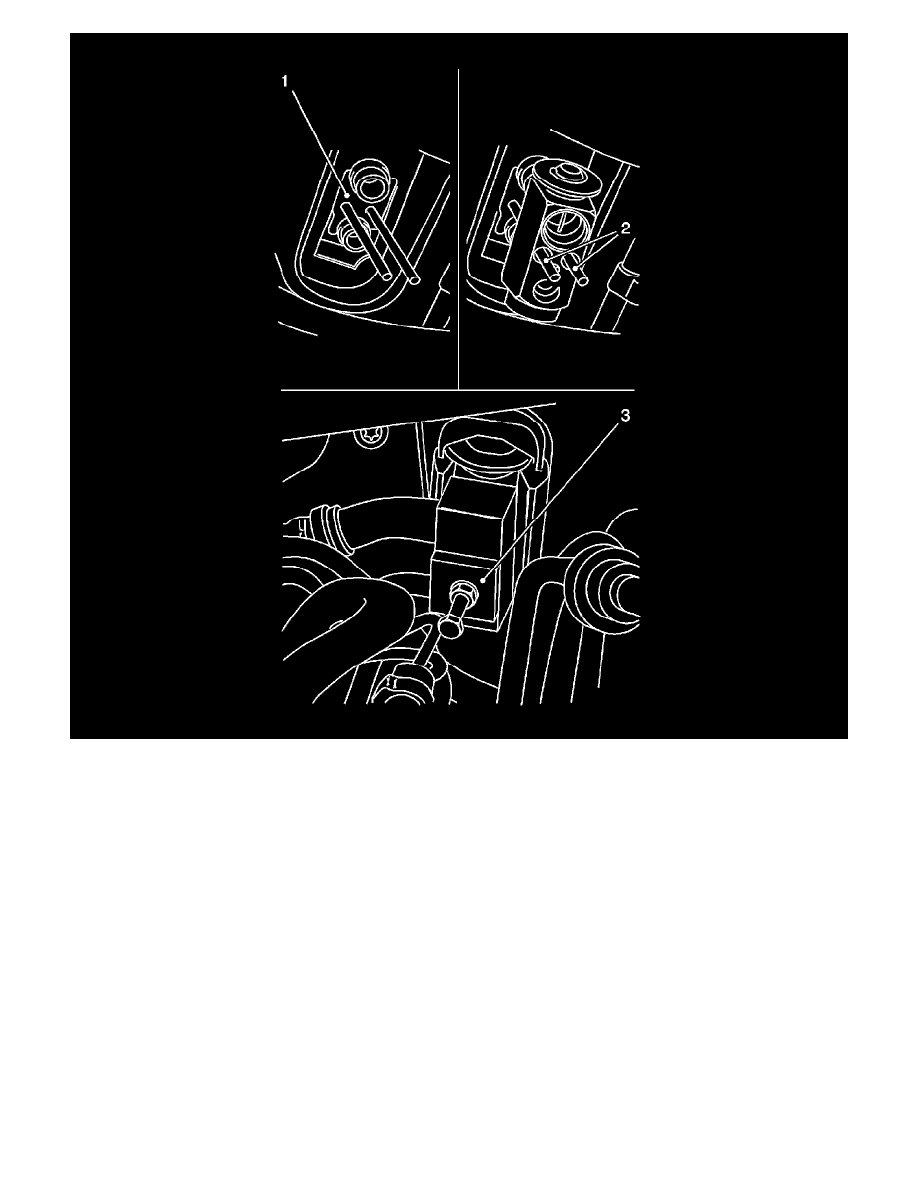
1. Use new sealing rings, before installation moisten only green colored sealing rings with mineral oil and insert.
2. Install the service threaded rods (2) into the retaining clip (1) to guide expansion valve.
3. Push the expansion valve onto service threaded rods until the refrigerant lines lie in the expansion valve.
4. Replace the threaded rods in succession with fixing bolts.
Tighten the expansion valve bolts to 6 Nm (19 lb ft).
14. Attach the block connector.
Use new sealing rings, before installation moisten only green colored sealing rings with mineral oil and insert.
Tighten the block connector bolt to 7 Nm (62 lb in).
15. For vehicles equipped with A/C, recharge and top up the A/C system. Refer to Refrigerant Recovery and Recharging (See: Service and
Repair/Refrigerant Recovery and Recharging).
16. Fill and bleed the cooling system. Refer to Cooling System Draining and Filling (See: Engine, Cooling and Exhaust/Cooling System/Service and
Repair).
Note: Perform inspection for leaks with utmost care as hot coolant will escape into the driver footwell if there are leaks in coolant connections at
the heater core.
17. Inspect the coolant system for leaks. Refer to Cooling System Leak Testing (See: Engine, Cooling and Exhaust/Cooling System/Testing and