
Astra L4-1.8L (2009)
Note: No sealant may reach the camshafts.
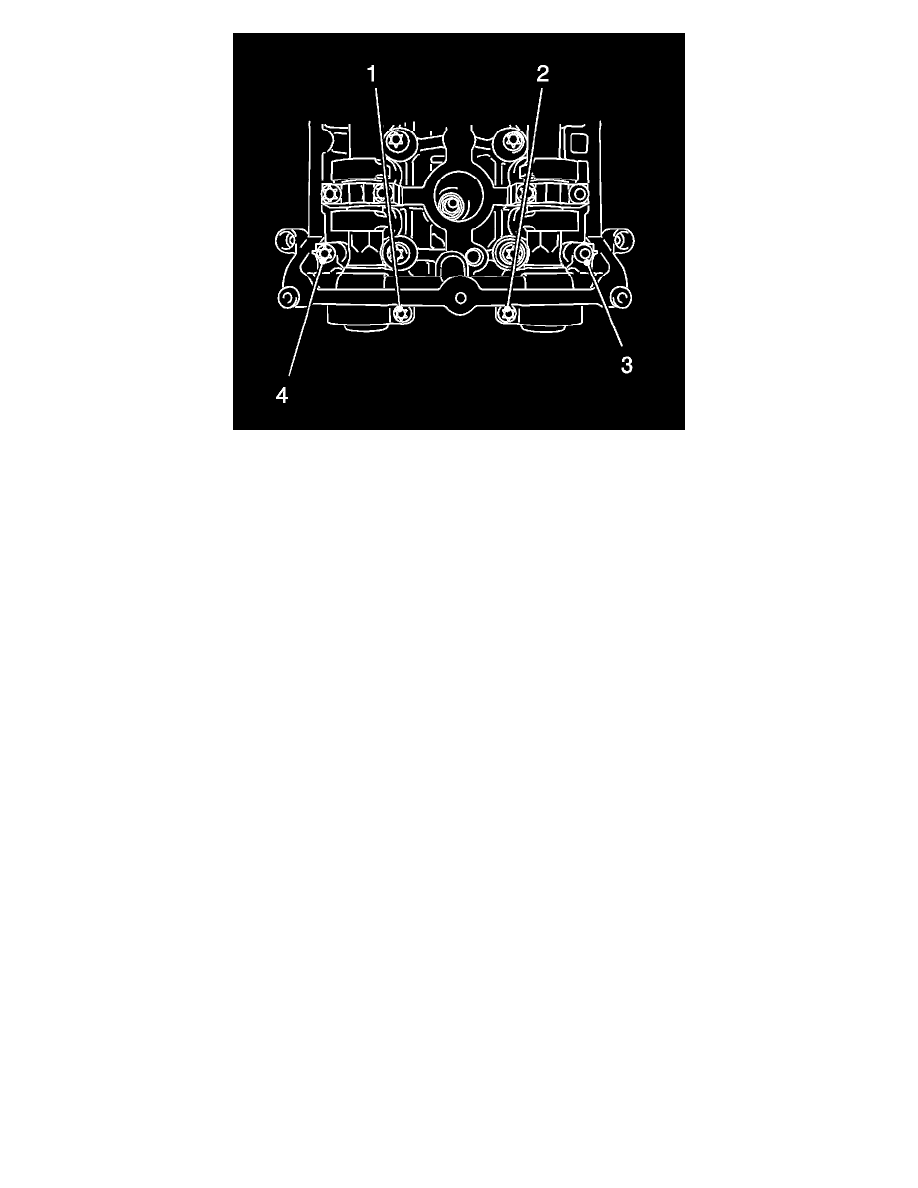
8. Attach 1st camshaft bearing support.
*
Place the bearing support in position.
Tighten the 4 bolts to 8 Nm (70 lb in).
*
Note installation sequence 1-4.
9. Install the intake camshaft seal ring with KM-422 .
*
Push the seal ring into the camshaft bearing cover with KM-422 (1).
*
Use the bolt (2) and the washer (3) of the camshaft adjuster.
10. Clean the 4 threads, rear toothed belt cover.
11. Install the rear toothed belt cover.
*
Tighten the 4 new bolts.
Tighten the 4 new bolts to 6 Nm (53 lb in).
*
Coat the 4 bolts with locking compound (red).
*
Clip in the wiring trough cover.
12. Attach the exhaust camshaft adjuster.
*
Insert the new sealing sleeve in the adjuster.
*
Install the new bolt.
13. Attach the intake camshaft adjuster.
*
Insert the new sealing sleeve in adjuster.
*
Install the new bolt.
Note: Note markings on the camshaft sprockets.
14. Insert MK-6340 .
15. Fasten the exhaust camshaft adjuster.
Tighten the bolt to 65 Nm (48 lb ft) plus 125 degrees plus 15 degrees.