
Astra L4-1.8L (2009)
24. Install the headlamps. Refer to Headlamp Replacement - Left Side (See: Lighting and Horns/Headlamp/Service and Repair) and Headlamp
Replacement - Right Side (See: Lighting and Horns/Headlamp/Service and Repair) or Headlamp Replacement (with Dipped Beam) (See:
Lighting and Horns/Headlamp/Service and Repair).
25. Remove the wire brackets for securing radiator.
26. Position the wheels in straight-ahead position.
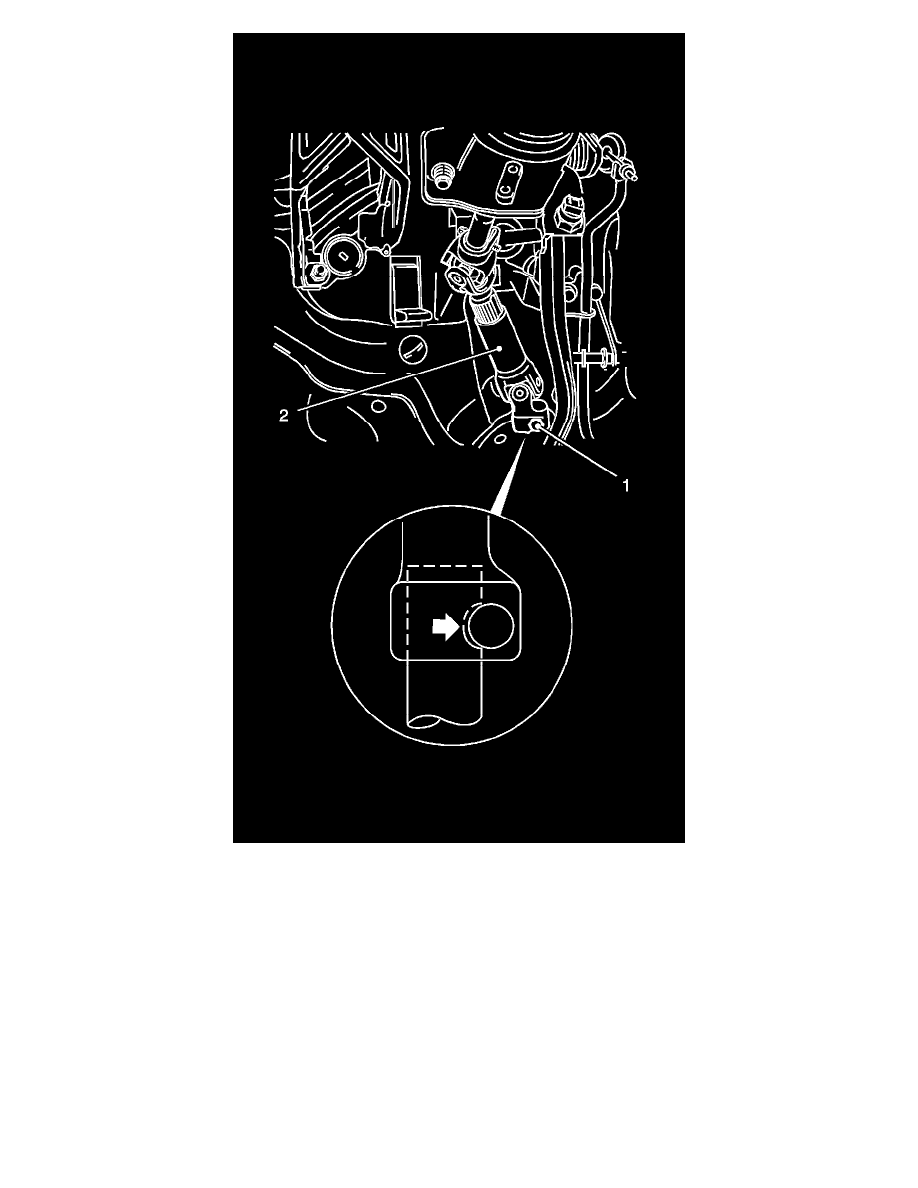
Note:
*
Before inserting the clamp bolt (1) make certain that the steering shaft groove (arrow) is flush with the intermediate shaft bore.
*
Clean thread and screw in bolt with locking compound.
27. Slide the intermediate spindle (2) onto steering gear spindle and tighten clamping bolt (1) on intermediate shaft to 24 Nm (18 lb ft).
28. For vehicles with shift guide, adjust the shift. Refer to Selector Lever Link Adjustment (See: Transmission and Drivetrain/Manual
Transmission/Transaxle/Shift Linkage/Adjustments).
29. Install the battery carrier and tighten the 3 bolts to 15 Nm (11 lb ft).
30. Connect the 2 cable ties.
31. Install the battery.
32. Install the battery shield.