
Aura L4-2.4L (2008)
Fluid Pressure Sensor/Switch: Service and Repair
Transmission Fluid Pressure Manual Valve Position Switch Replacement
Removal Procedure
1. Remove the transaxle case side cover. Refer to Control Valve Body Cover Replacement (See: Valve Body/Service and Repair/4T45-E -
Automatic Transaxle/Control Valve Body Cover Replacement).
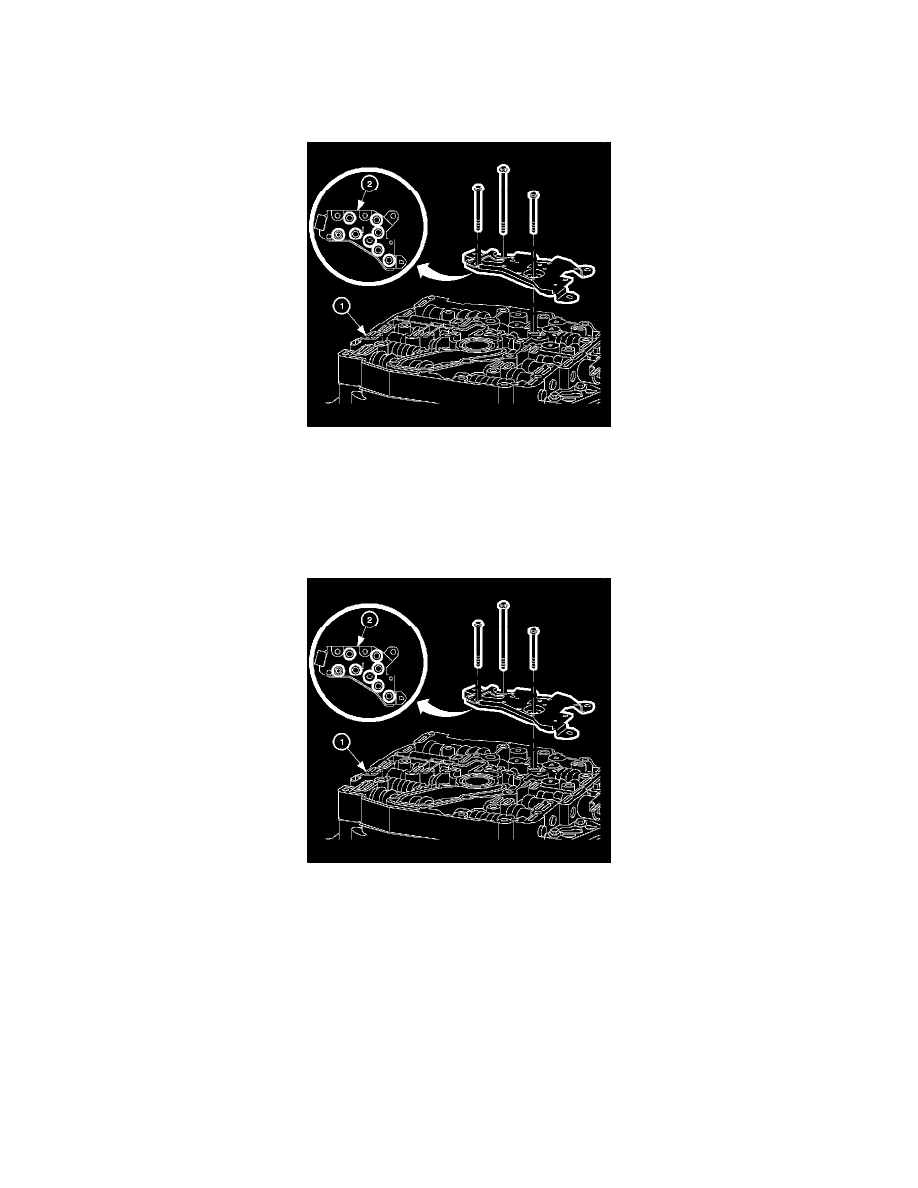
2. Remove the TFP switch assembly bolts.
3. Remove the TFP switch assembly from the control valve body assembly. The TFP switch O-rings are reusable if not damaged and should remain
with the switch assembly.
Installation Procedure
1. Inspect the TFP switch assembly in order to verify the condition and correct location of the pressure switch O-rings. If necessary, replace the
O-rings.
Notice: Refer to Fastener Notice (See: Service Precautions/Vehicle Damage Warnings/Fastener Notice).
2. Install the TFP switch assembly onto the control valve body assembly and install the bolts.
Tighten the control valve body bolts to 12 N.m (9 lb ft).
3. Install the transaxle case side cover. Refer to Control Valve Body Cover Replacement (See: Valve Body/Service and Repair/4T45-E - Automatic
Transaxle/Control Valve Body Cover Replacement).
4. Start the engine, warm up the transaxle, and check for leaks.
5. Inspect for proper fluid level. Refer to Transmission Fluid Check (See: Testing and Inspection/Component Tests and General Diagnostics/4T45-E
- Automatic Transaxle/Transmission Fluid Check).
Important: It is recommended that transmission adaptive pressure (TAP) information be reset.