
Aura V6-3.5L (2007)
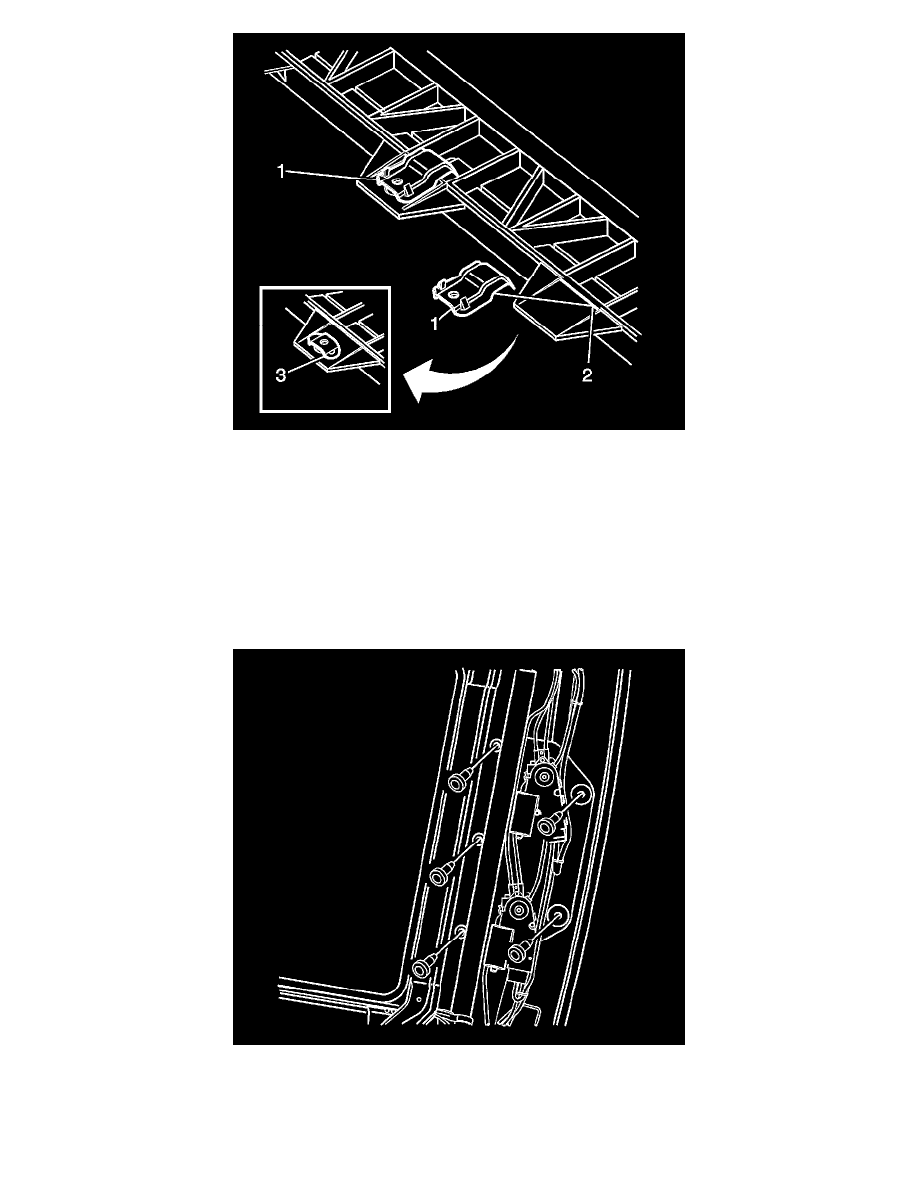
Important: If the sunroof is equipped with the old style clip (3) the new style (1) will be needed.
15. If vehicle is not equipped with center brackets (1) the new brackets will need to be installed.
16. Remove the material (2), using a pair of tin snips to allow the new brackets (1) to sit flush to the sunroof module.
17. Install the new brackets (1).
18. Install the fasteners. Do the following steps:
* Loosen the four fasteners/tolerance compensators along the front. "Back off" the tolerance compensators by turning them down with your
finger tips the necessary amount. Sunroof Module Adjustment.
* Push up on the front rail of the module while tightening the front fasteners.
* Pushing up will close the gap and the tolerance compensators will not extend as far thus compressing the seal more.
19. If the sunroof window seal is low in the rear, adjust the three screws in the rear.
20. Close the sunshade to gain access to the screws.
These fasteners do not have tolerance compensators but may need to be tightened more.
Important: If the sunroof module needed adjustment and could not be achieved in the front or the rear, the module may be misaligned to