
Coupe L4-1.9L DOHC VIN 7 (1994)
Electronic Variable Orifice: Service and Repair
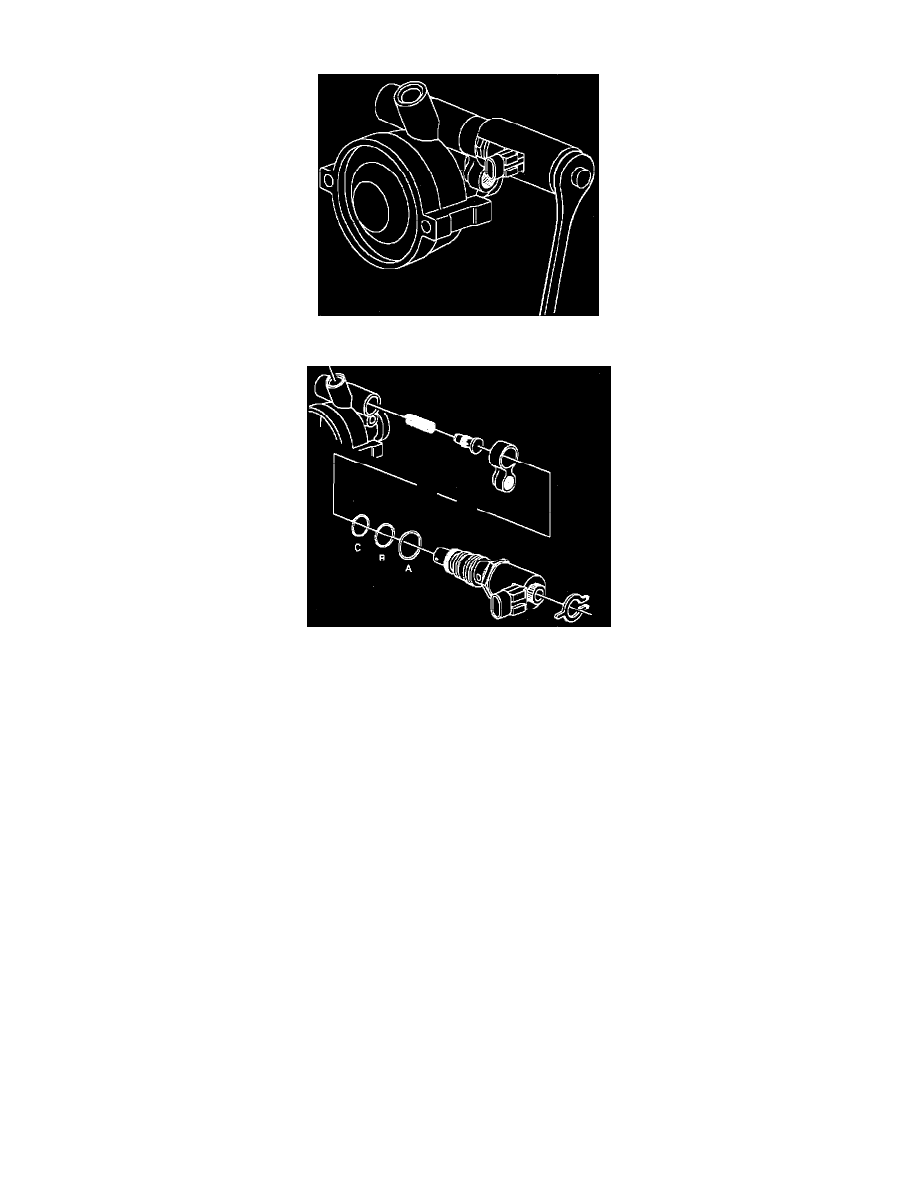
Removal Of EVO Solenoid.
EVO Solenoid Replacement.
REMOVAL
1.
Disconnect negative battery cable.
2.
Remove power steering pump from vehicle.
3.
Remove EVO electrical connector locating clip.
4.
Remove EVO actuator assembly with SA9116C (or equivalent).
CAUTION: Do not cock socket when removing EVO actuator, since this can result in actuator damage and loss of EVO operation.
5.
Remove discharge fitting from EVO actuator.
6.
Remove three O-rings from EVO actuator.
NOTE: Note the size and location of each of the O-ring seals.
INSTALLATION
1.
Install three O-rings onto EVO actuator.
NOTE: Install the three O-rings in their correct locations.
^ Largest (19.00/18.54 mm) first
^ Mid-size (17.4/16.44 mm) second
^ Smallest (14.6/15.3 mm) third
2.
Install discharge fiting to EVO actuator until fully seated.
3.
Correctly position EVO actuator and discharge fitting to pump assembly.
4.
Using SA9116C (or equivalent), tighten EVO actuator.
^ Torque: 5 Nm (44 in lbs).