
ION L4-2.2L VIN F (2004)
lead to brake pulsation,
1. Using the J 42450-A, thoroughly clean any rust or corrosion from the mating surface of the hub/axle flange.
2. Using the J 41013, thoroughly clean any rust or corrosion from the mating surface and mounting surface of the brake rotor.
3. Inspect the mating surfaces of the hub/axle flange and the rotor to ensure that there are no foreign particles or debris remaining.
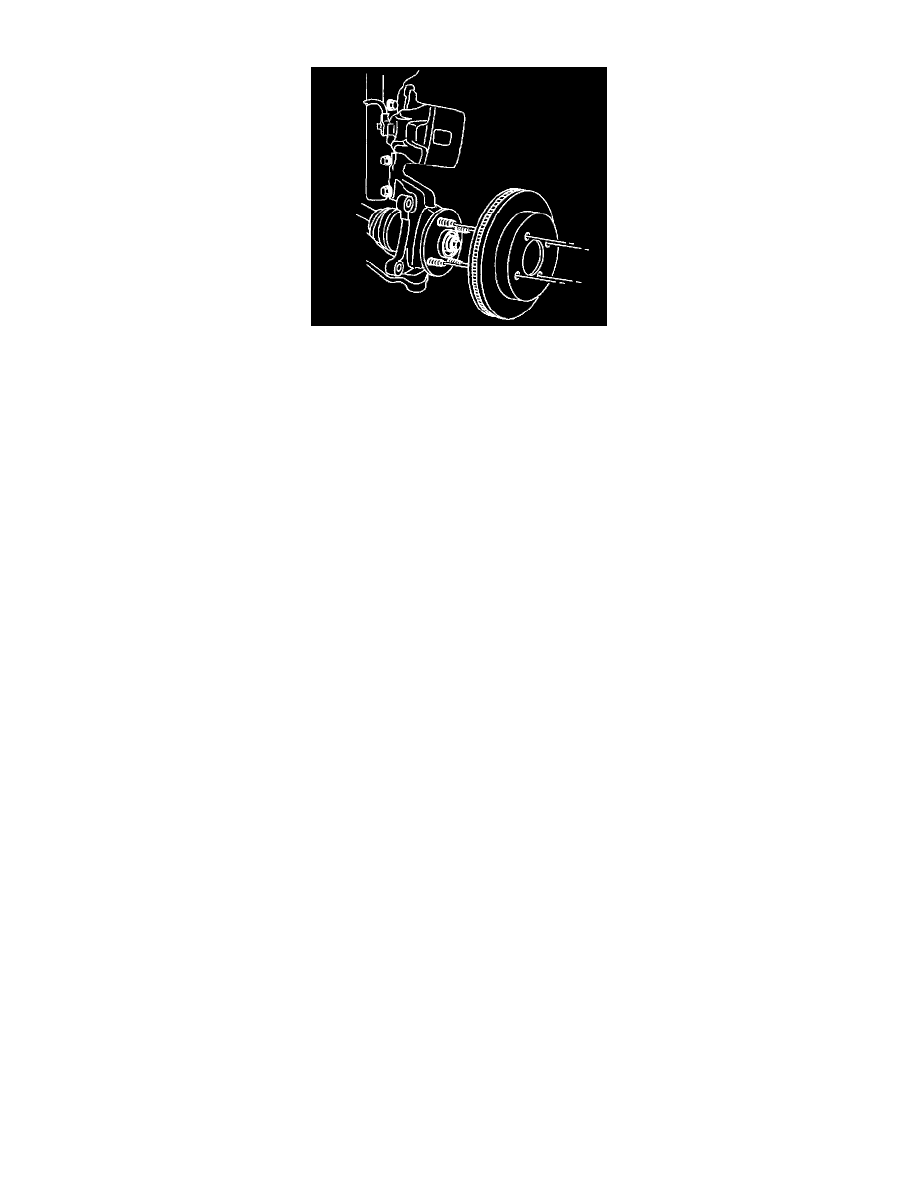
4. Install the brake rotor to the hub/axle flange. Use the matchmark made prior to removal for proper orientation to the flange.
5. If the brake rotor was removed and installed as part of a brake system repair, measure the assembled Lateral Runout (LRO) of the brake rotor to
ensure optimum performance of the disc brakes.
6. If the brake rotor assembled LRO measurement exceeds the specification, bring the LRO to within specifications.
7. Remove the support, and install the brake caliper and the brake caliper bracket as an assembly to the steering knuckle.
8. Install the tire and wheel assembly.
9. Lower the vehicle.
10. If the brake rotor was refinished or replaced, or if new brake pads were installed, burnish the pads and rotors.
Burnishing Pads and Rotors
Burnishing Pads and Rotors
Caution: Road test a vehicle under safe conditions and while obeying all traffic laws. Do not attempt any maneuvers that could jeopardize
vehicle control. Failure to adhere to these precautions could lead to serious personal injury and vehicle damage.
Caution: Refer to Brake Dust Caution in Service Precautions.
Burnishing the brake pads and brake rotors is necessary in order to ensure that the braking surfaces are properly prepared after service has been
performed on the disc brake system.
This procedure should be performed whenever the disc brake rotors have been refinished or replaced, and/or whenever the disc brake pads have been
replaced.
1. Select a smooth road with little or no traffic.
2. Accelerate the vehicle to 48 km/h (30 mph).
Important: Use care to avoid overheating the brakes while performing this step.
3. Using moderate to firm pressure, apply the brakes to bring the vehicle to a stop. Do not allow the brakes to lock.
4. Repeat steps 2 and 3 until approximately 20 stops have been completed. Allow sufficient cooling periods between stops in order to properly
burnish the brake pads and rotors.
Brake Rotor Assembled Lateral Runout (LRO) Correction
Brake Rotor Assembled Lateral Runout (LRO) Correction
Important:
-
Brake rotor thickness variation MUST be checked BEFORE checking for assembled Lateral Runout (LRO). Thickness variation exceeding the
maximum acceptable level can cause brake pulsation.
-
Brake rotor assembled Lateral Runout (LRO) exceeding the maximum allowable specification can cause thickness variation to develop in the
brake rotor over time, usually between 4,800 - 11,300 km (3,000 - 7,000 mi).
-
Review the following acceptable methods for bringing the brake rotor assembled LRO to within specifications. Determine which method to use for
the specific vehicle being repaired.
-
The indexing method of correcting assembled LRO is most effective when the LRO specification is only exceeded by a relatively small amount:
0.025 - 0.127 mm (0.001 - 0.005 inch). Indexing is used to achieve the best possible match of high spots to low spots between related
components.