
ION L4-2.2L VIN F (2004)
Fluid - A/T: Service and Repair
Transmission Fluid Replacement
1. Raise and support the vehicle. Refer to Vehicle Lifting.
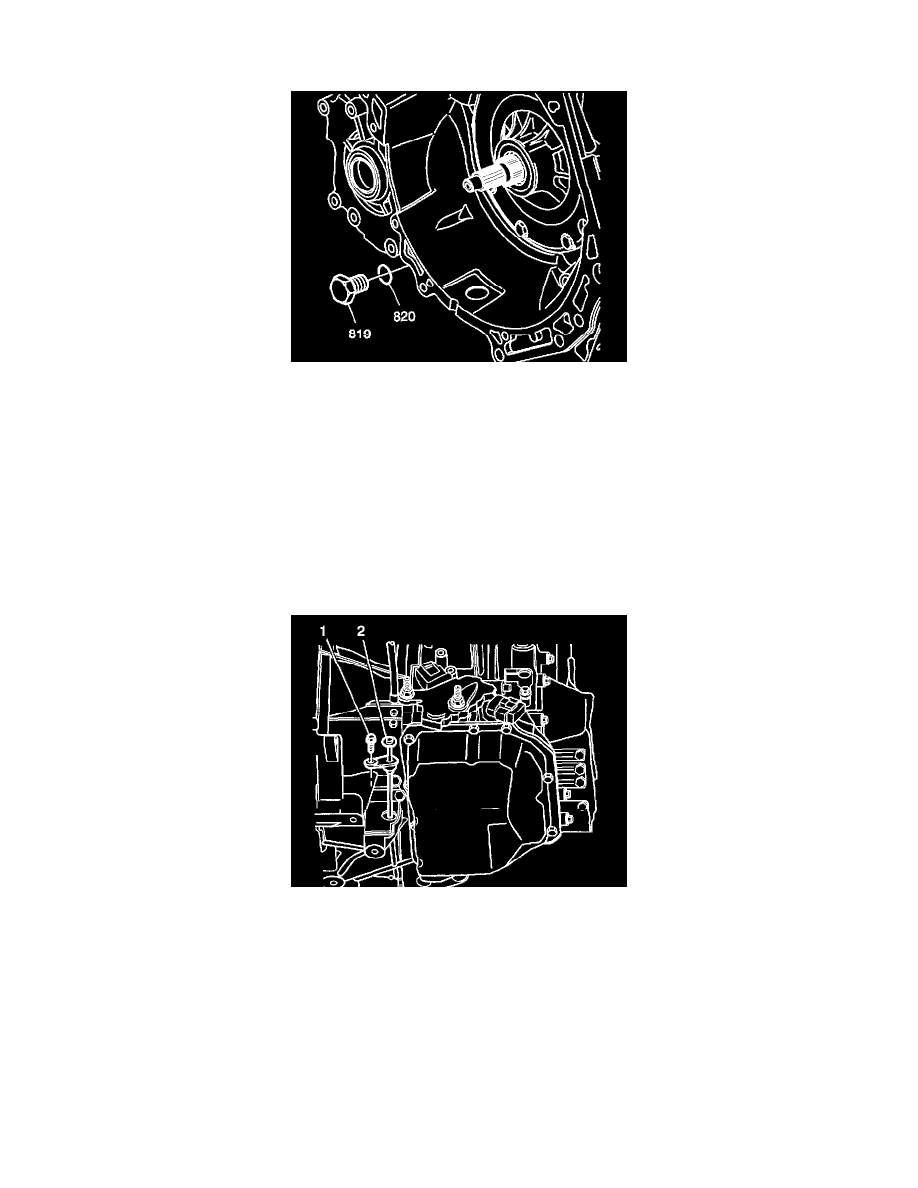
2. Remove the drain plug (819) from the transmission. Allow the fluid to completely drain.
3. Remove the gasket (820) from the drain plug (819) and discard.
4. Install the new gasket (820) on the drain plug (819).
5. Install the drain plug into the transmission.
Notice: Refer to Fastener Notice in Service Precautions.
6. Tighten the drain plug to 40 Nm (30 ft. lbs.).
7. Lower the vehicle.
Important: Do not attempt to remove the 3rd gear anchor band bolt, located on top of the transmission. Removing the bolt will dislocate the
internal components, resulting in removal and disassembly of the transmission.
8. Remove the transmission level gage bolt (1) and gage (2).
Important: Do not use ATF (P/N 21005966 or P/N 21019223). These fluids are not compatible with this transmission.
9. Add approximately 3.1 Liters (3.3 Qt) of Saturn T-IV fluid (P/N 22689186) through the transmission level gage tube.
10. With the vehicle on a flat level surface, start the engine and operate until the transmission fluid temperature reaches 60-70°C (140-158°F).
11. Apply the parking brake.
12. Depress the brake pedal and move the shift lever slowly through all gear ranges, pausing approximately 3 seconds in each range.
13. Return the shift lever to the park position.
Important: Make sure the fill level tube is clean and free of debris.
14. Push the transmission level gage into the level gage tube until fully seated.
15. Pull the transmission level gage from the transmission in order to check the proper fluid level on the gage.