
ION L4-2.4L (2007)
4. Connect the quick-connect fitting on the reservoir clutch hose to the clutch master cylinder. Ensure that the hose is fully seated to the master
cylinder.
5. Remove the cap from the nipple on the brake primary reservoir.
6. Remove the plug from the reservoir brake hose end.
7. Connect the quick-connect fitting on the reservoir brake hose to the brake primary reservoir. Ensure that the hose is fully seated to the reservoir.
Notice: Refer to Fastener Notice.
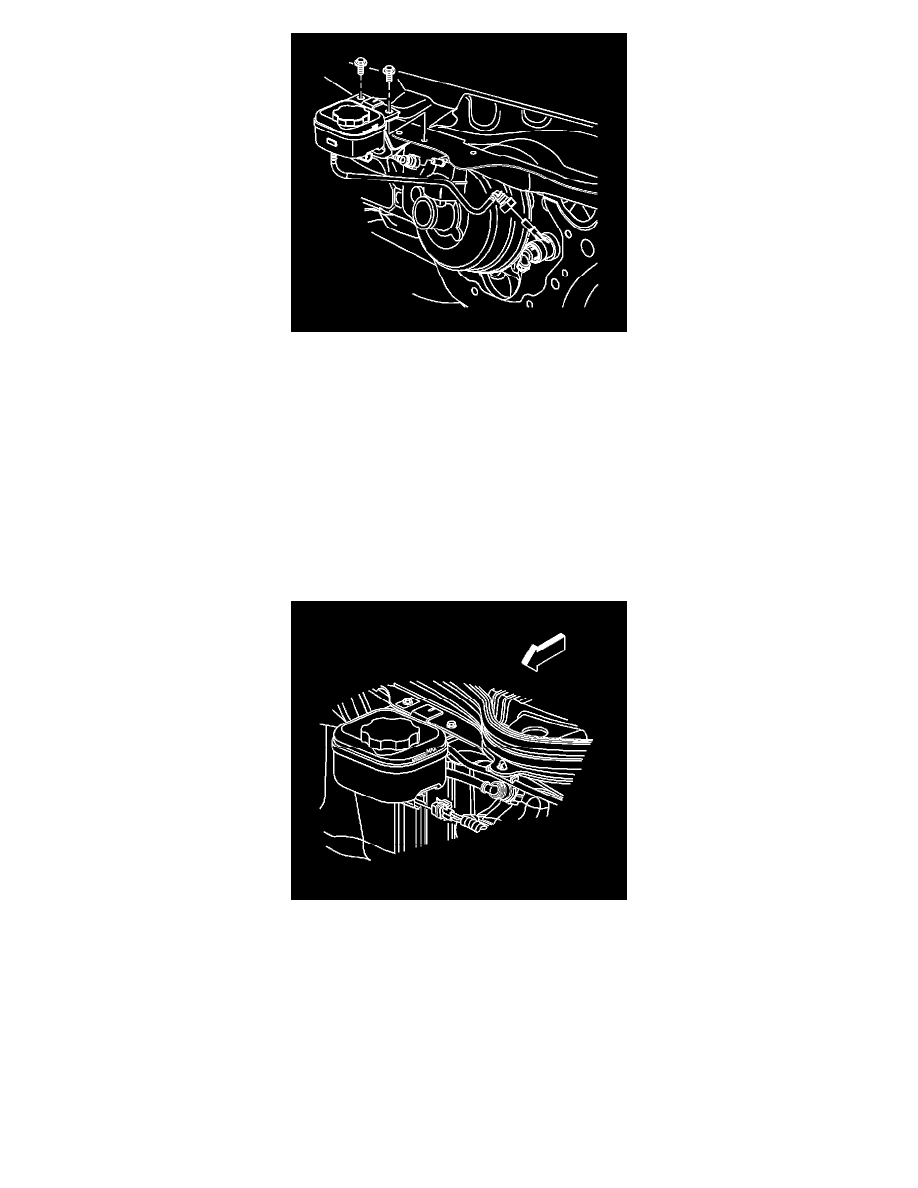
8. Install the brake master cylinder auxiliary reservoir mounting bolts.
Tighten the bolts to 10 N.m (89 lb in).
9. Fill the brake master cylinder auxiliary reservoir.
10. Remove the shop towels and discard into an approved container.
11. Connect the electrical connector to the brake fluid level sensor, then press forward on the CPA tab of the connector to secure.
12. Install the cover to the underhood electrical center.
Master Cylinder Reservoir Replacement
Master Cylinder Reservoir Replacement
Caution: Refer to Brake Fluid Irritant Caution.
Notice: When adding fluid to the brake master cylinder reservoir, use only GM approved or equivalent DOT-3 brake fluid from a clean, sealed brake
fluid container. The use of any type of fluid other than the recommended type of brake fluid may cause contamination which could result in damage to
the internal rubber seals and/or rubber linings of hydraulic brake system components.