
L200 L4-2.2L VIN F (2002)
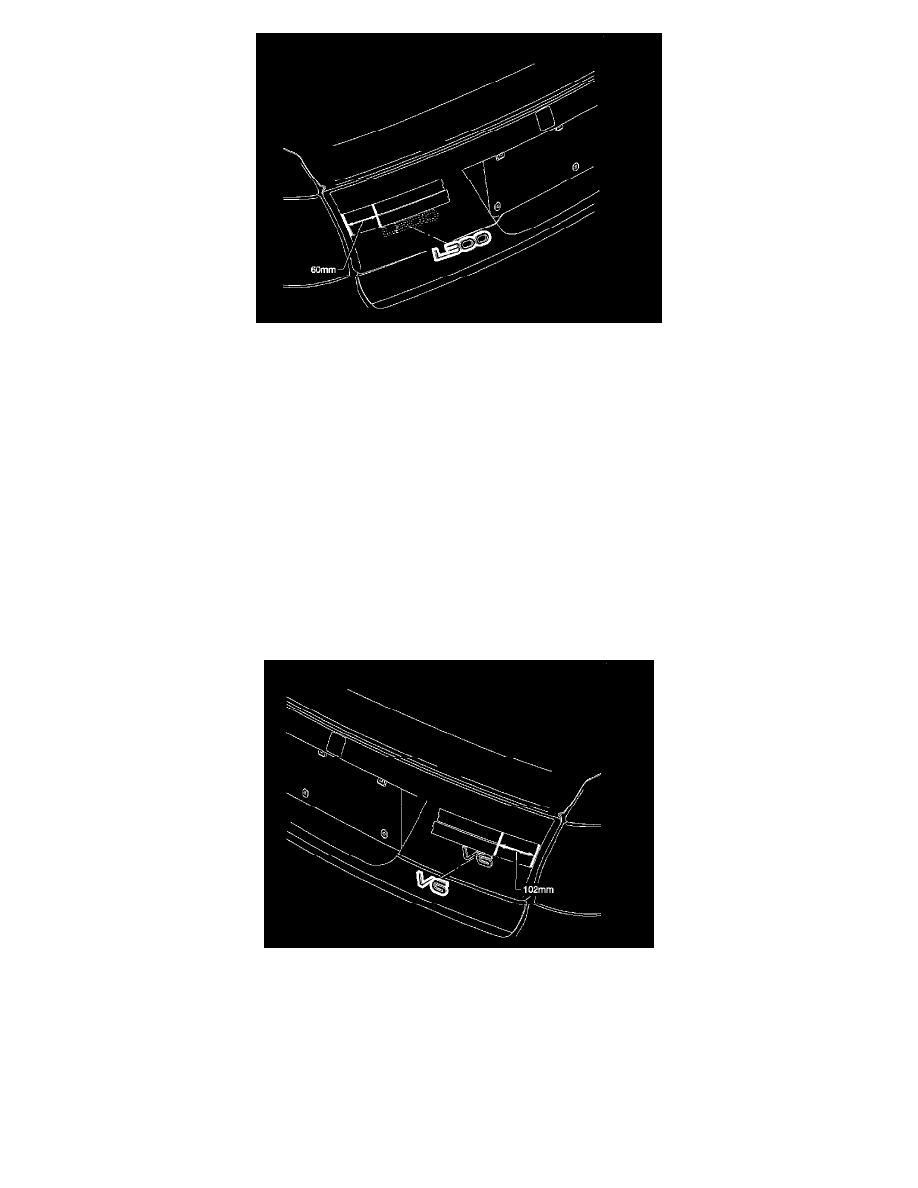
3. Using a tape measure, measure from the edge of the deck lid along the bottom edge of the tape and make a vertical reference mark at 60 mm (2 1/4
in.).
4. Remove the white protective tape from the back of the emblem, being careful not to loosen the clear adhesive tape on the front of the emblem.
Important
Do not remove the clear protective tape from the front of the emblem. This tape is used to maintain the alignment of the individual characters
during the installation process.
5. Carefully align the emblem so the left edge of the "L" is aligned with the vertical reference mark and the top edge of the emblem is aligned with
the bottom edge of the masking tape.
6. Using your hand, apply medium hand pressure to each individual character for a minimum of three seconds. This will ensure the emblem bonds
properly to the applique.
7. Remove the clear protective tape from the front of the emblem.
V6 Emblem Placement on Sedan Models 2003 Model Year
1. Install a 254 mm (10 in.) piece of (3/4 in.) masking tape. Align the upper edge of the masking tape with the lower edge of the deck lid applique
chrome strip.
2. Install a second 254 mm (10 in.) piece of (3/4 in.) masking tape. Align the upper edge with the lower edge of the previously installed piece.
3. Using a tape measure, measure from the edge of the deck lid along the bottom edge of the tape and make vertical reference at 102 mm (4 in.).
4. Remove the white protective tape from the back of the emblem, being careful not to loosen the clear adhesive tape on the front of the emblem.
Important
Do not remove the clear protective tape from the front of the emblem. This tape is used to maintain the alignment of the individual characters
during the installation process.
5. Carefully align the emblem so the right edge of the "6" is aligned with the vertical reference mark and the top edge of the emblem is aligned with
the bottom edge of the masking tape.
6. Using your hand, apply medium hand pressure to each individual character for a minimum of three seconds. This will ensure the emblem bonds