
L200 L4-2.2L VIN F (2002)
16. Position fuel line away from rail assembly without disconnecting de-gas hose.
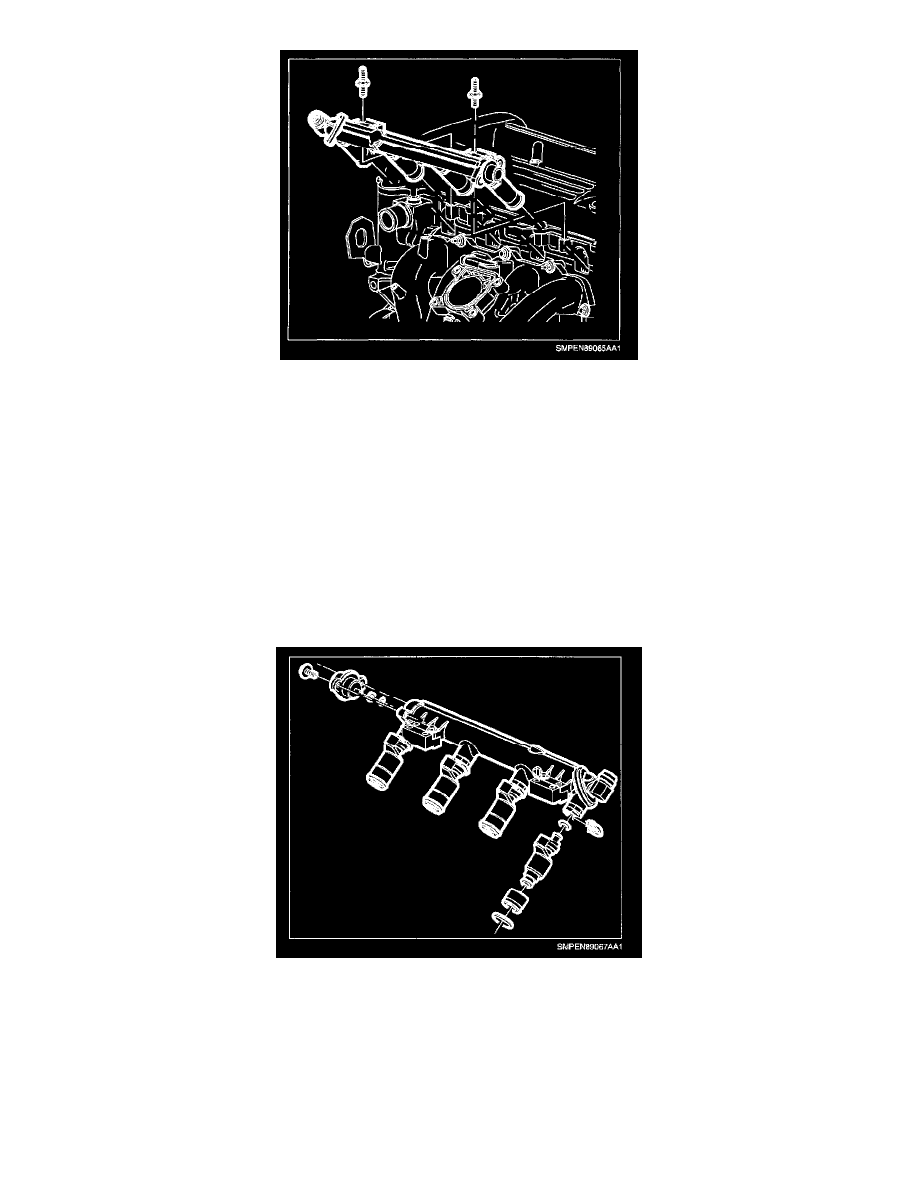
17. Disconnect electrical connectors at fuel injectors.
18. Remove fuel rail assembly attachment bolts.
NOTE: Use care in removing fuel rail assembly to prevent damage to electrical terminals and spray tips. The fuel injector is serviced as a complete
assembly only. Since it is an electrical component, it should not be immersed in any cleaner.
19. Remove fuel rail assembly by carefully pulling the rail backward and upward to remove injectors from cylinder head.
20. Move fuel rail assembly rearward while slightly rotating to remove fuel rail assembly.
NOTE:
^
When cleaning or servicing the fuel rail, care should be taken to ensure that the plastic fuel rail surfaces that mate to the fuel injector O-rings are
not scratched.
^
Whenever the fuel rail is removed for service, upper and lower O-ring seals must be replaced. The injectors can be serviced individually if
required.
21. Remove fuel injector(s) retaining clips.
22. Remove fuel injector(s) from fuel rail.
23. Remove and discard all injector O-ring seals by using a small pick.
INSTALLATION
1. Transfer components to new fuel rail if rail is being replaced.
2. Install new upper and lower O-ring seals to injectors.
3. Install injectors to fuel rail assembly.
4. Install isolators with new seals to injectors.
5. Install injector retaining clip.