
L200 L4-2.2L VIN F (2002)
12.
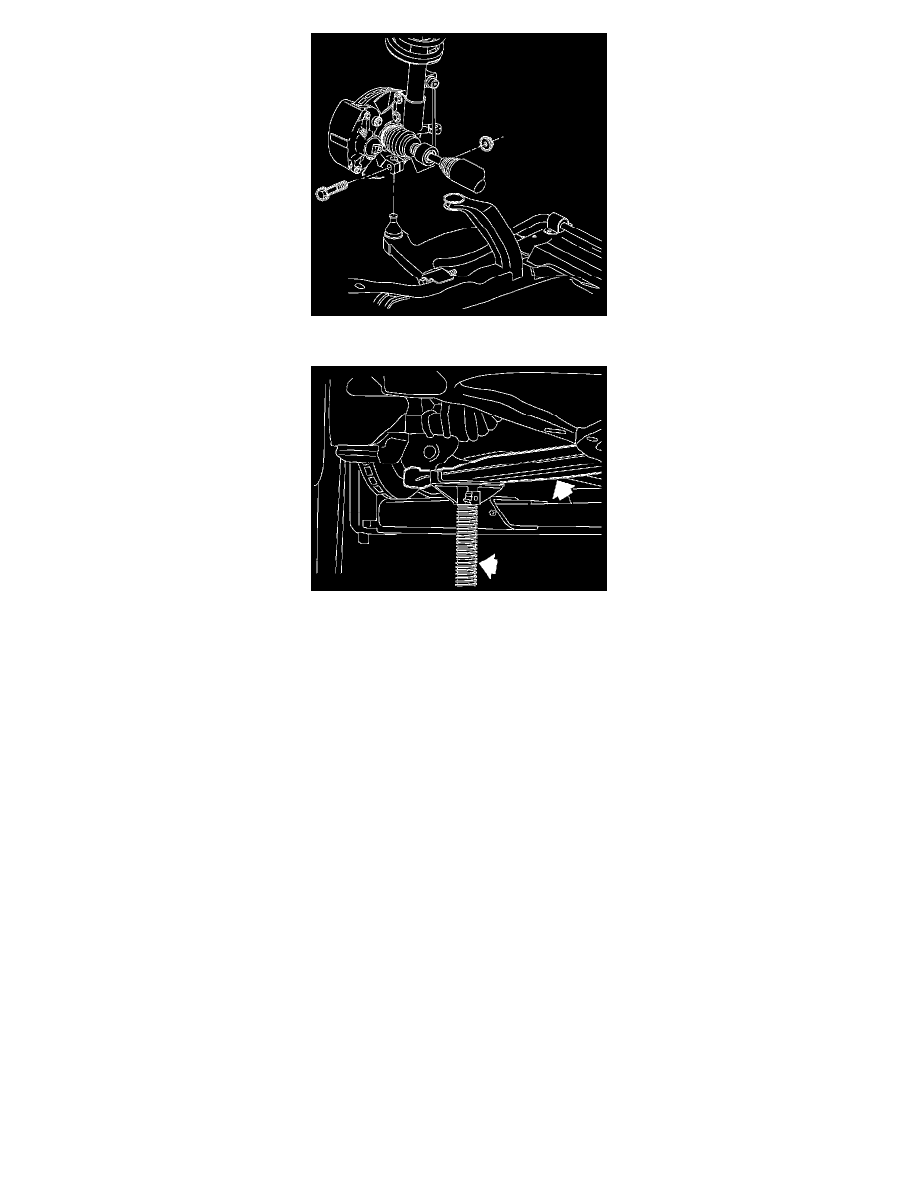
Install ball stud to steering knuckle.
13.
Install new bolt, P/N 90496191, and nut, P/N 90538057.
Tighten
Tighten Ball Stud Nut to 100 N.m (75 ft-lbs).
Note:
The front lower control arm-to frame bolts must be tightened only with the control arms loaded to normal ride height. Failure to load control
arms prior to tightening bolts may affect ride quality and/or bushing durability.
14.
Place an under hoist support stand under the ball joint area and carefully load control arm until a gap can be seen between hoist contact pad and
vehicle frame.
15.
Torque front lower control arm bolts.
Tighten
Tighten Front Lower Control Arm Bolts to 90 N.m (65 ft-lbs) + 75°.
16.
Remove under hoist support stand. (Vehicle front end wheel alignment is NOT necessary.)
17.
Install lower splash shield to frame on right side of vehicle.
18.
Return to and continue with step 9 of the "Balance, Rotate, and/or Replace Tires" procedure in this bulletin.
STEERING GEAR PRELOAD SPRING REPLACEMENT
Caution:
MAKE SURE VEHICLE IS PROPERLY SUPPORTED AND SQUARELY POSITIONED ON THE HOIST. TO HELP AVOID
PERSONAL INJURY WHEN A VEHICLE IS ON HOIST, PROVIDE ADDITIONAL SUPPORT FOR THE VEHICLE ON THE
OPPOSITE END FROM WHICH COMPONENTS ARE BEING REMOVED.