
L300 V6-3.0L VIN R (2001)
Front Door Panel: Service and Repair
Panel Replacement
Front Side Door Trim Panel Replacement
Front Side Door Trim Panel Replacement
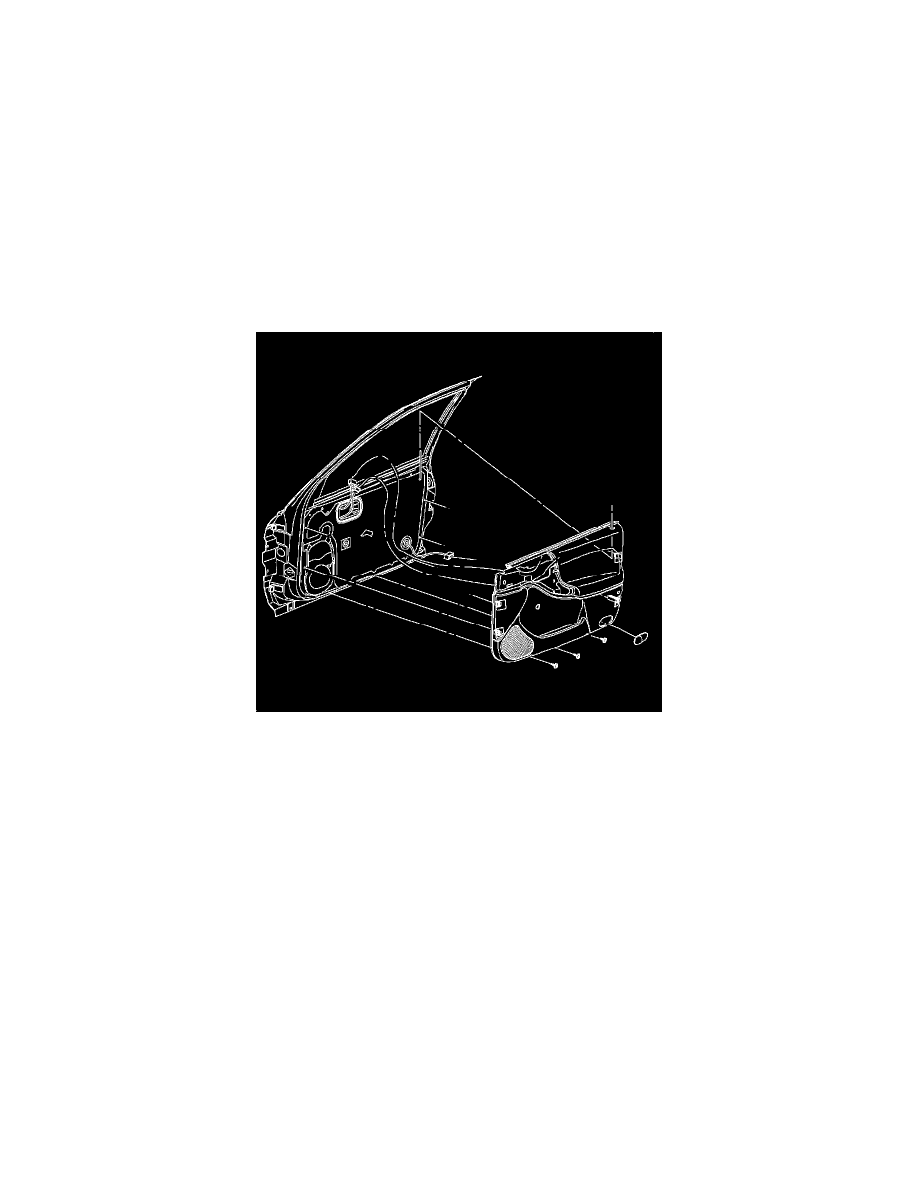
Removal Procedure
1. Remove the upper trim panel. Refer to Upper Extension Trim Panel Replacement (Front) (See: Upper Extension Trim Panel Replacement (Front)
)Upper Extension Trim Panel Replacement (Rear) (See: Rear Door/Rear Door Panel/Service and Repair/Upper Extension Trim Panel
Replacement (Rear)).
2. Remove the pull door handle. Refer to Front Side Door Pull Handle Replacement (See: Front Side Door Pull Handle Replacement).
3. Remove the power door lock switch. Refer to Door Lock Switch Replacement (Front) (See: Locks/Power Locks/Power Door Lock
Switch/Service and Repair).
4. Remove the lower fasteners from the door trim panel.
5. On manual window vehicles, remove the window crank handle.
6. Using a door pad removal tool, disengage the door trim retainers.
7. Lift upward on the door trim panel to disengage the panel from the door.
8. On vehicles with an illuminated door trim pad, hold the door panel away from the door structure and disconnect the wiring harness.
9. Remove the door trim panel.
Installation Procedure
1. If the door trim panel is being replaced with a new panel, transfer the door panel lamp assembly to the new panel.
2. Place the door panel over the top inner door structure.
3. Connect the wiring harness for the panel illumination.
4. Pull down to engage the door trim panel to the door structure.
5. Apply pressure to the retainers to secure the panel to the door structure.